9 Chapter 9: Saving and Exporting Maps
Introduction
Many data formats created by ArcGIS® Pro are proprietary and cannot be used by other software applications. For example, an .mxd, .aprx, or .pprx format cannot be inserted into a Word document or spreadsheet. To integrate maps from ArcGIS® Pro into other applications, the map is exported to an appropriate file format. This chapter provides the process for saving and exporting a map project in a format that can be integrated into other media and applications.
Saving the Map Document
ArcGIS® Pro does not automatically save map projects, so if a map document is closed before saving, any work that has not been saved will be lost. When a map project is created, it is named and saved in a specific location (folder) on the computer.
After that, click the Save icon in the title bar of the ArcGIS® Pro window to save it (Figure 9.1). Save the map project frequently.
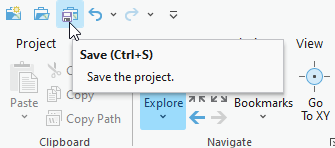
Figure 9.1. Saving the project
If the Save button is grayed out, ArcGIS Pro did not register any changes.
To save the map to a new project, click on the Project tab (Figure 9.2).
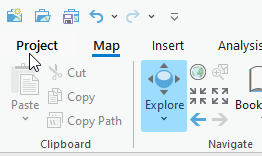
Figure 9.2. Saving the map to a new project
Then click Save As and navigate to locate the drive on the computer where the project should be saved, name the project, and click Save (Figure 9.3).
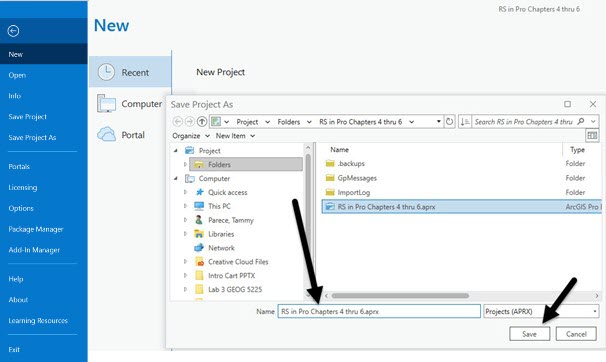
Figure 9.3. Saving the map to a new project
Note: the map project will be saved just as it appears in the map viewer. The symbology, the location of the files listed in the Contents, and the map’s extent are all saved. (Note: this chapter and book only apply to the map project and do not cover editing shapefiles, attribute tables, and raster data sets.)
Exporting the Map to use as a Figure in Another Document
ArcGIS® Pro is the only software program that can read .mxd, .aprx, and .pprx files. If the map is needed in a different software program (a Word document, a presentation, or a poster, for example), the map must be saved in another format, such as JPEG or PDF.
Click on the Share tab in the ribbon, select the down arrow for Export Map, and choose the file format needed from the menu. (Figure 9.4).
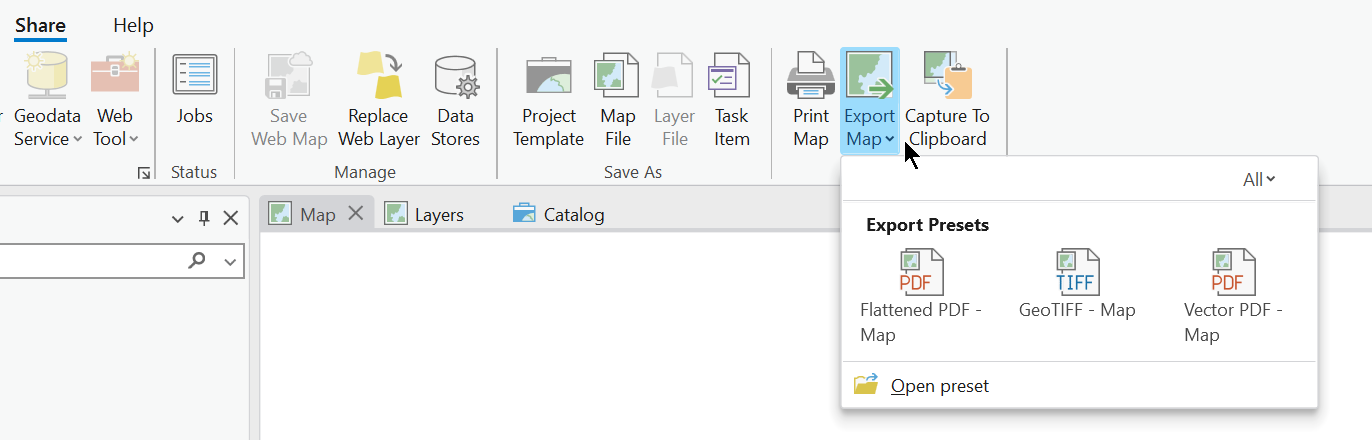
Figure 9.4. Exporting the map
But this step only exports what is currently visible in the map viewer (Figure 9.5). It may not be an appropriate image in another document because important map elements, including a legend, scale bar, north arrow, and title, should be included.
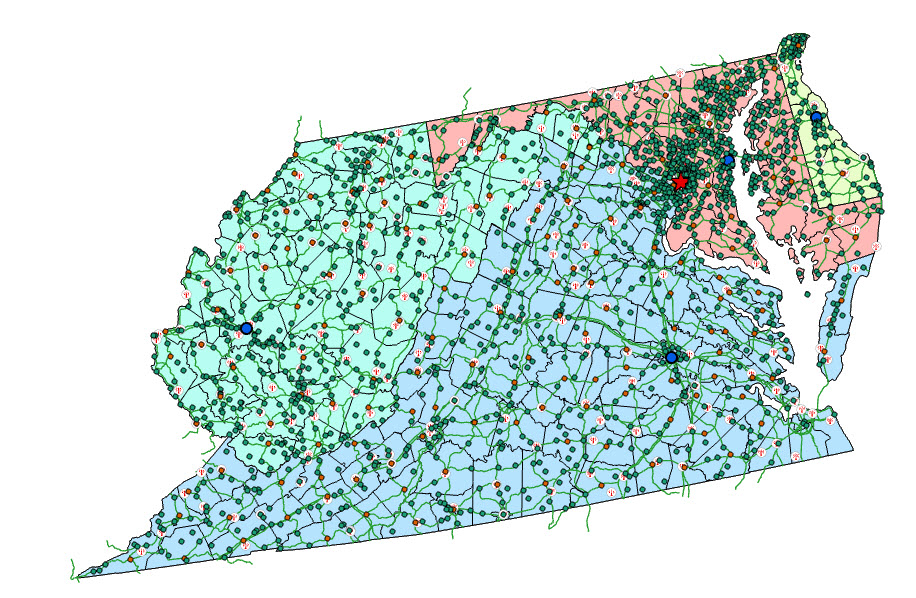
Figure 9.5. Exporting the map image
A map layout must first be generated to export a map, including those other elements. To create a map layout, select the Insert tab, then select the down arrow for New Layout and choose the appropriate layout for the map. In Figure 9.6, we chose ANSI Landscape Letter – second row, the first option. There are many options, including poster sizes.
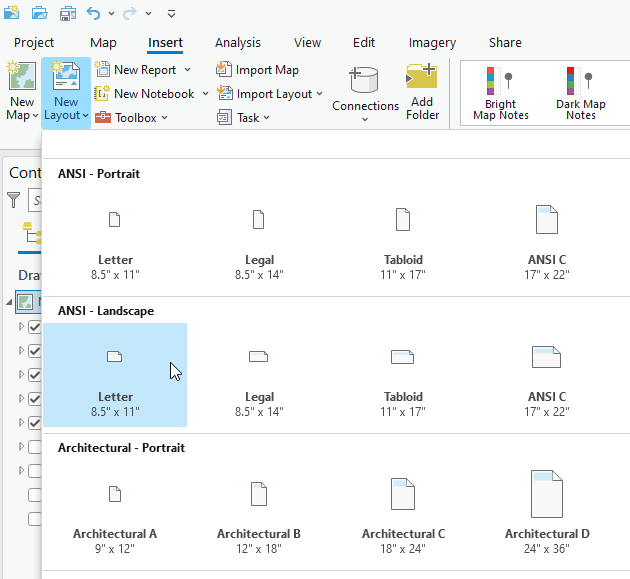
Figure 9.6. Creating a layout
A Layout tab appears in the map viewer for creating the layout, as shown in Figure 9.7.
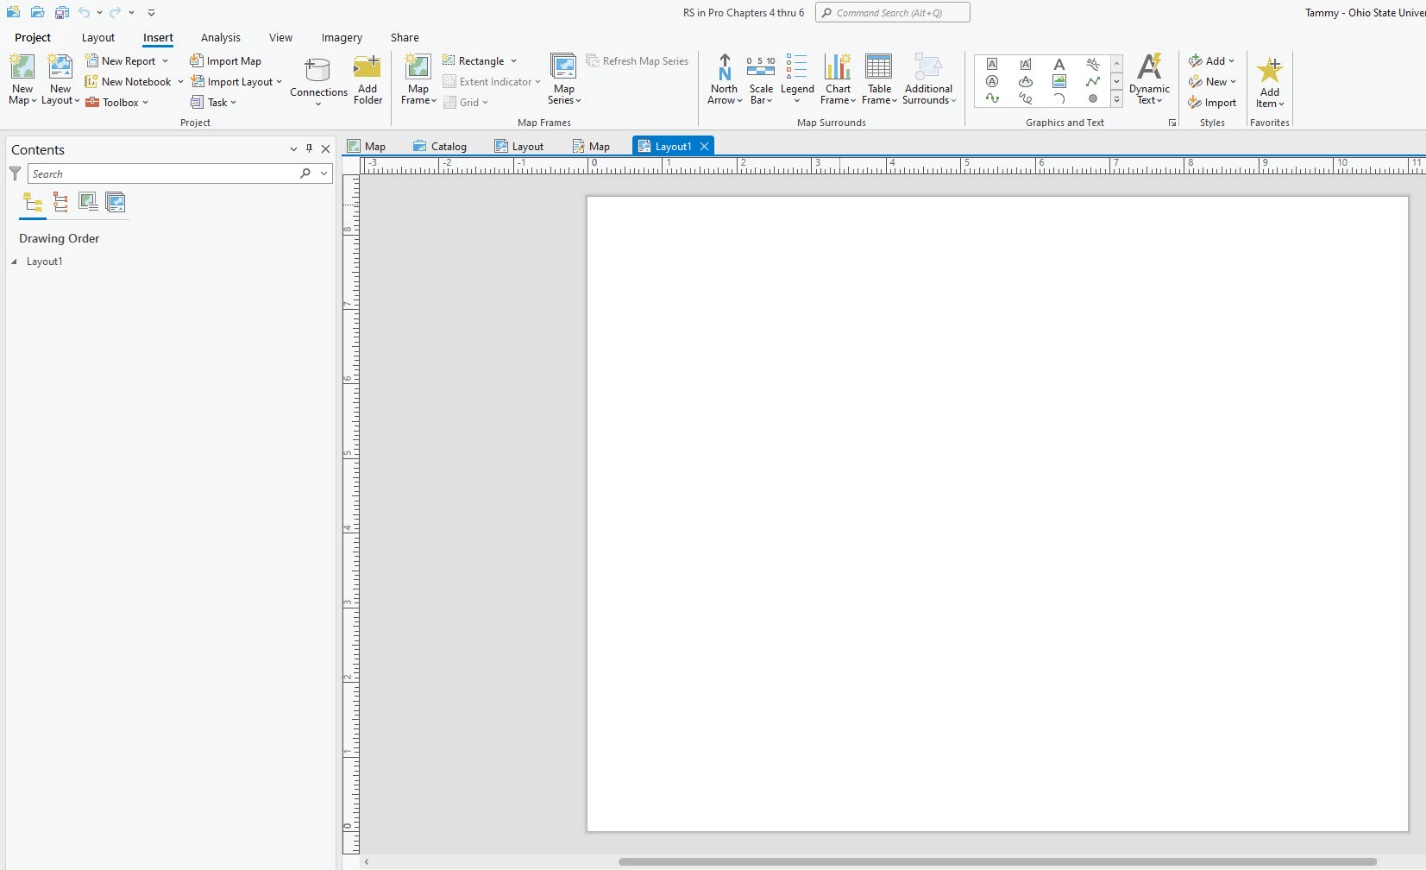
Figure 9.7. The layout tab
The next step is to choose a Map Frame. You can have multiple maps with associated map frames in an ArcGIS® Pro project. On the Insert tab, click the down arrow next to Map Frame and choose one (Figure 9.8). We choose the second map in the first row.
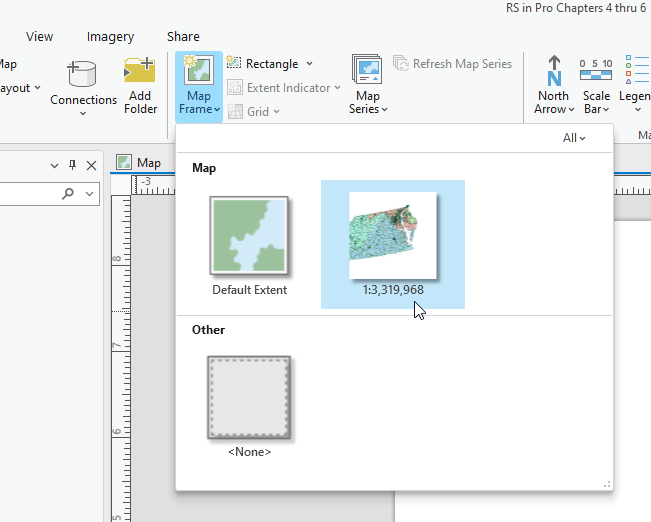
Figure 9.8. Selecting a map frame
Your cursor will change to a crosshair, indicating you can draw an object. Click and drag a square from the upper left side of the layout view (Figure 9.9) to the lower right side of the layout view (Figure 9.10).
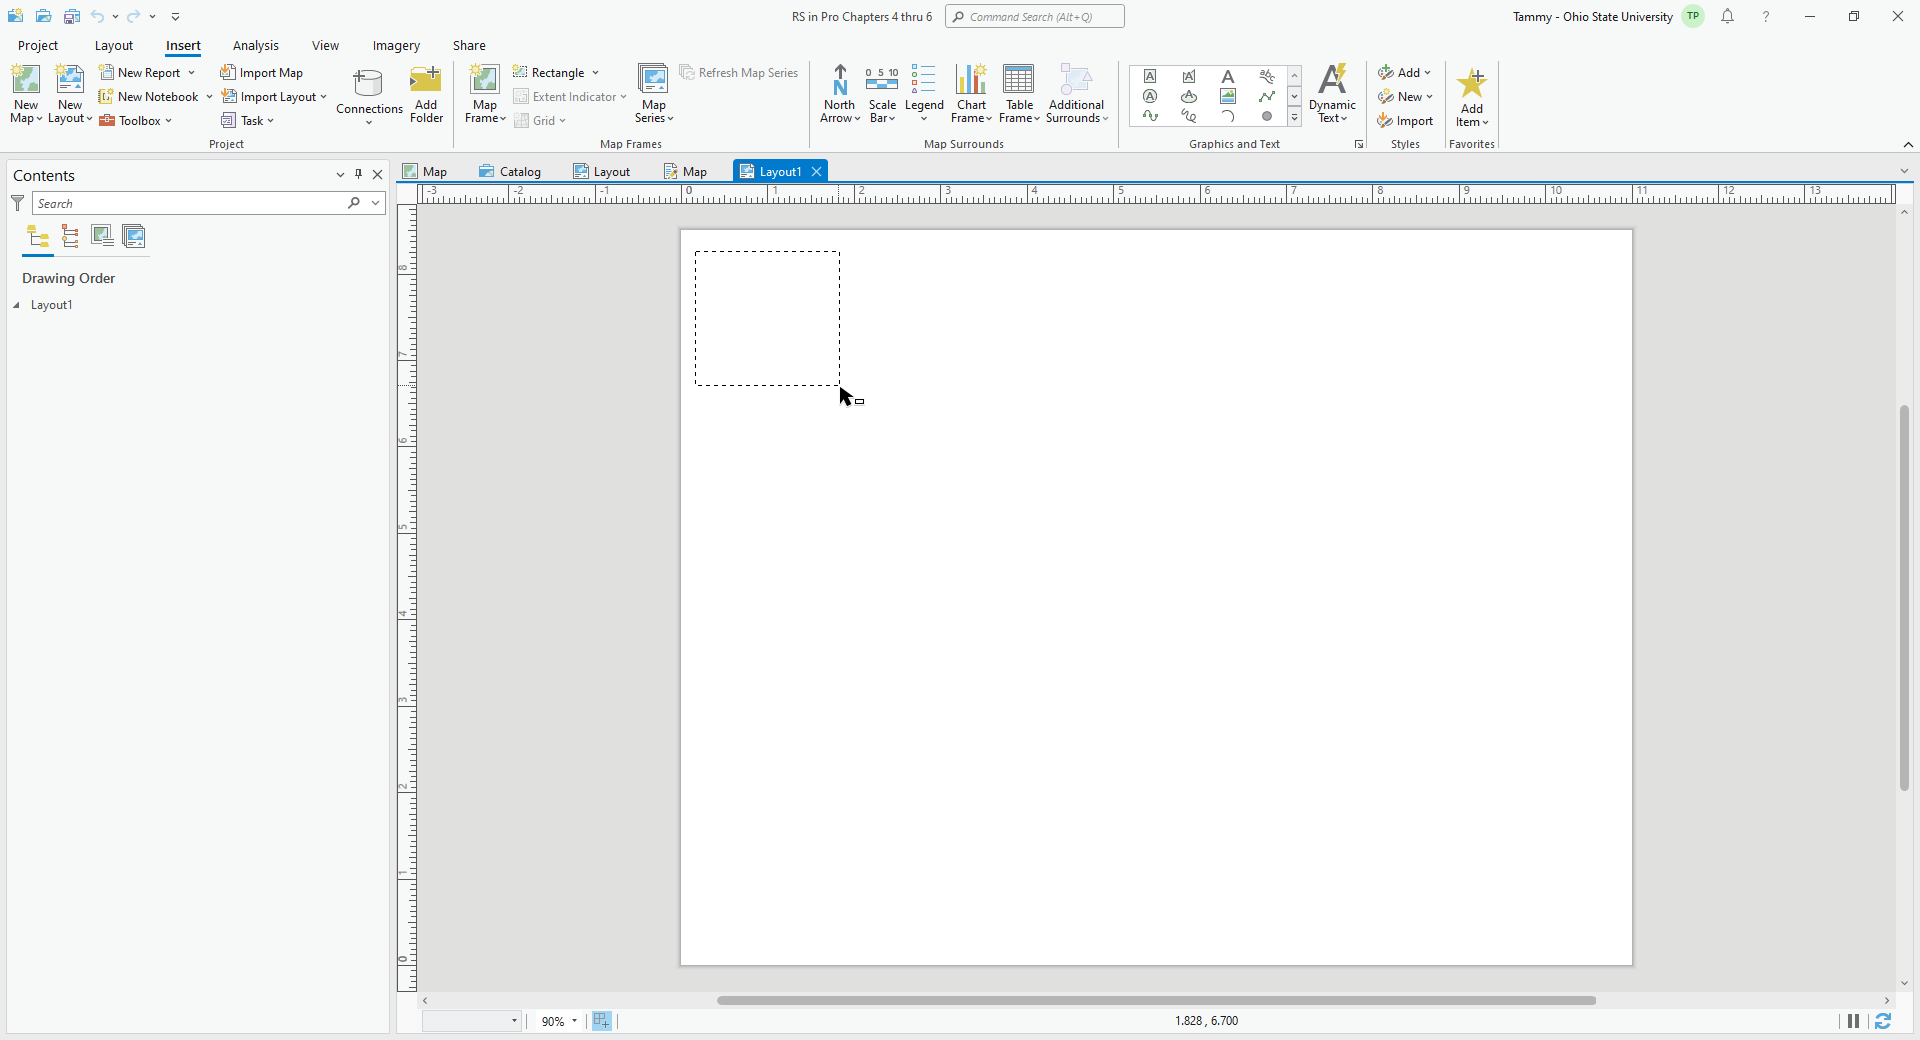
Figure 9.9. Defining a box
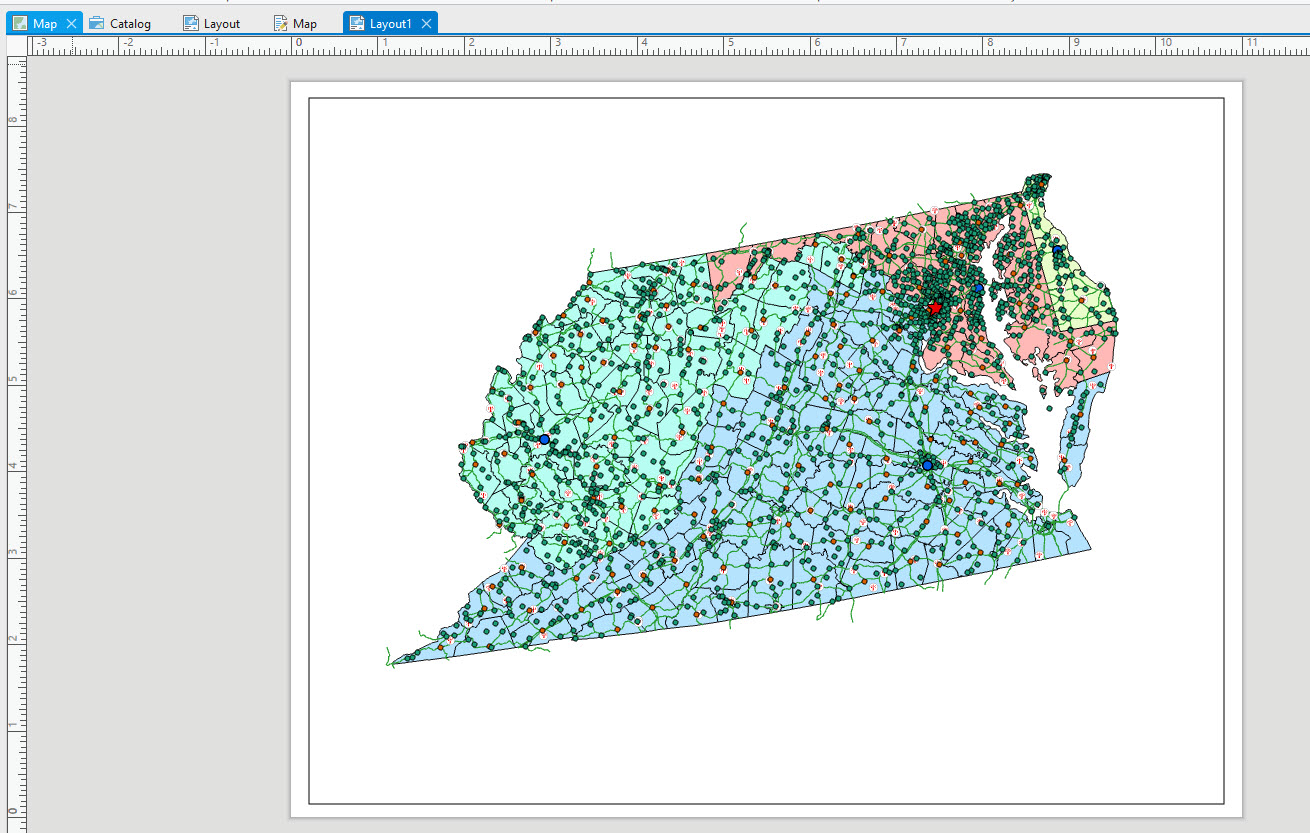
Figure 9.10. Map display in the layout
A new Map Frame tab appears in the ribbon. Clicking the Insert tab on the ribbon shows all the elements required to create a map layout (Figure 9.11).

Figure 9.11. Inserting a map frame
Use these tools to add a north arrow, scale bar, legend, and other elements, as seen in Figure 9.12. Please note that this is only a demonstration of some basic map elements. The map in Figure 9.12 is incomplete, but while you are in the Layout, the Insert tab on the ribbon provides all the links to create a complete and appropriate final map.
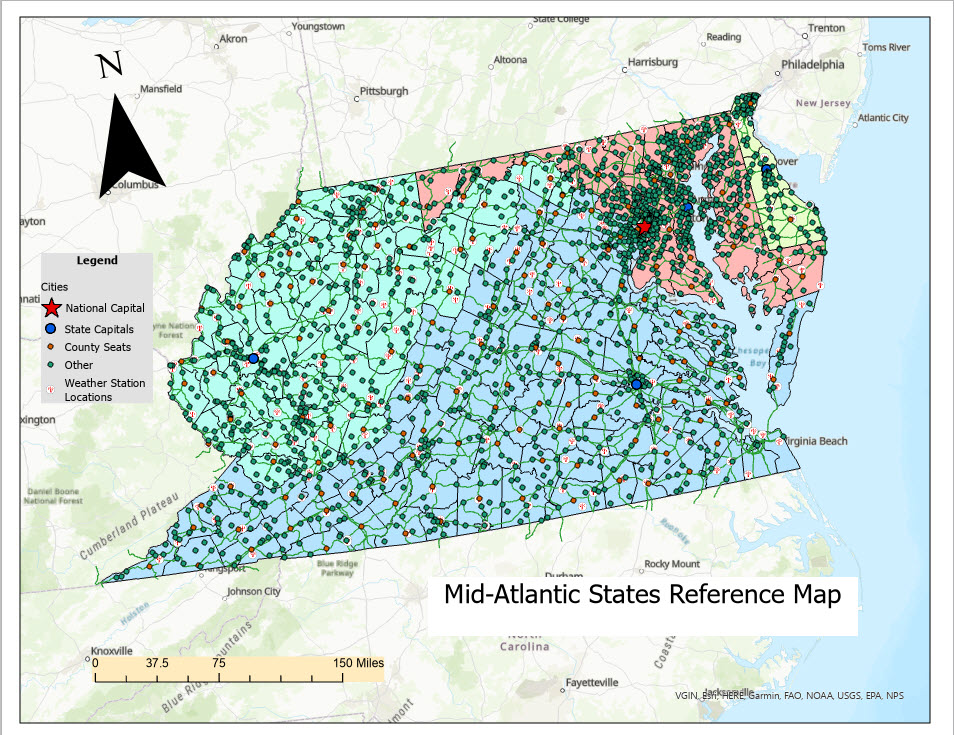
Figure 9.12. Inserting a scale bar, north arrow, and title
Once all elements required by your instructor are added, export the map layout by selecting the Share tab on the ribbon, dropping down the Export Layout button, and choosing the appropriate format for the file from the Presets (Figure 9.13).
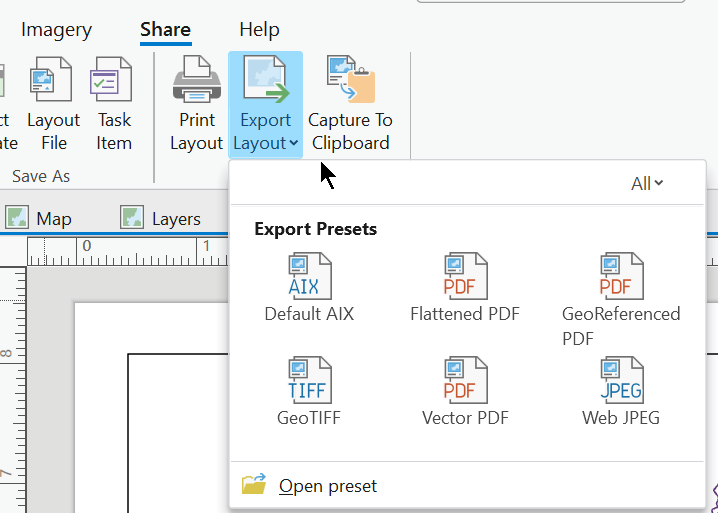
Figure 9.13. Exporting a layout
You also have several options for the file type for your final map. Clicking Export Layout will open the Export Layout pane (Figure 9.14). If you are exporting a map to use in a written document, choose an image type file such as JPEG. If you want a standalone document, choose PDF.

Figure 9.14. Selecting an export format
In Figure 9.14, we chose JPEG and 24-bit True Color. Ensure your export is in the file folder you want on your computer. There are many other options we will not review here.1 After completing your settings options, choose Export to begin the process. When finished, you will receive the message in Figure 9.15
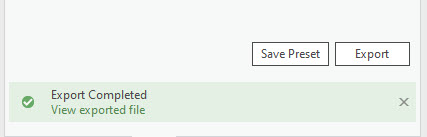
Figure 9.15. Status bar
The exported file can be found in your designated folder (Figure 9.16).
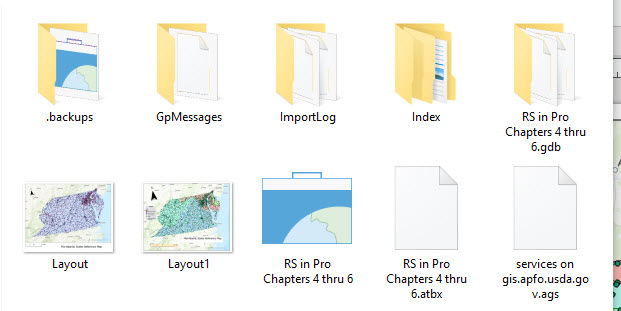
Figure 9.16. Locating an exported file
There are many other file formats and export options available. There are also many techniques associated with designing a professional-looking map layout; we did not cover those techniques in this chapter.
This chapter concludes the introduction to ArcGIS® Pro basics. Chapters 10-25 will cover remotely sensed imagery and using Landsat 8 scenes within ArcGIS® Pro for display and analysis.