11 Chapter 11: Downloading Landsat Imagery using Earth Explorer
Introduction
Landsat imagery will be used in subsequent chapters of this book. This chapter provides step-by-step instructions to select and download Landsat imagery via the USGS’s Earth Explorer website. These instructions can be applied to other imagery products available from the USGS’s Earth Explorer, including NAIP, MODIS, and more.
You must have access to a computer with a high-speed internet connection for this chapter.
Once any imagery is downloaded, you will need to determine if the downloaded imagery requires further processing beyond that already provided by the USGS. This chapter includes a discussion of some of those USGS processing steps, and it also briefly discusses metadata, referring the reader to metadata for additional information. In other chapters of this book, we cover metadata in more detail and basic image processing capabilities—band combinations, spatial, spectral, and radiometric enhancement, and image classification specific to the Landsat image downloaded in this chapter. Although we do not cover any other image products in detail in this book, many of the processing and image enhancement procedures discussed are also relevant to those other image products. We will direct readers to resources for additional information in the interest of conciseness and focus.
Note that your image search results will likely differ from the examples illustrated in this chapter.
Downloading Landsat Imagery
Earth Explorer is a repository of imagery products available for ordering and downloading. To access Earth Explorer, go to https://earthexplorer.usgs.gov/ (Figure 11.1).
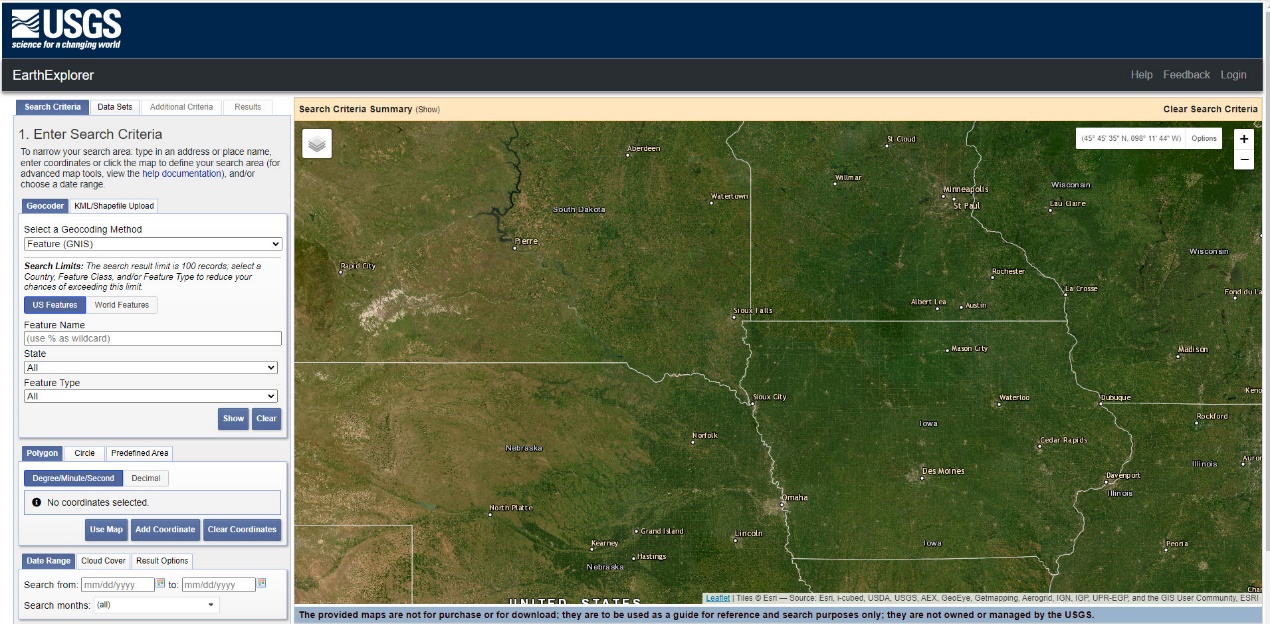
Figure 11.1. The USGS Earth Explorer landing page
Select Login to log in to the site (Figure 11.2) before you begin searching for images, so they can be downloaded immediately once located. You are unable to download images without logging into your account.

Figure 11.2. Account login
If you have an account, enter your username and password and click Sign In (Figure 11.3). If you do not have an account, select Create New Account and follow the steps in the EROS Registration system. Once complete, you will receive a confirmation email. Click the link in that email; it will return you to the Login screen to enter your login credentials.

Figure 11.3 Account login.
Searching for a Scene
Under the Search Criteria tab in the left pane of Earth Explorer (Figure 11.4), a search can be accomplished in multiple ways – Geocoder, KML/Shapefile Upload, and limited to US or World Features.
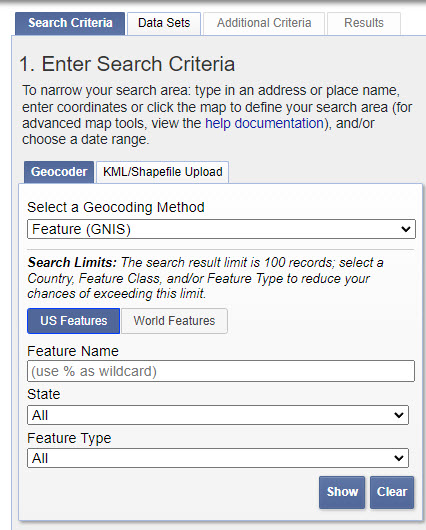
Figure 11.4. The search criteria tab
There are three options for Select a Geocoding Method (Figure 11.5)—Feature (GNIS), Address/Place, or by Path/Row of the specific image (we discuss Path/Row later).
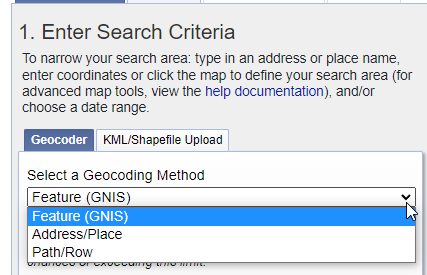
Figure 11.5. Search criteria methods
In Figure 11.6, we used Address/Place and entered Roanoke, Virginia.
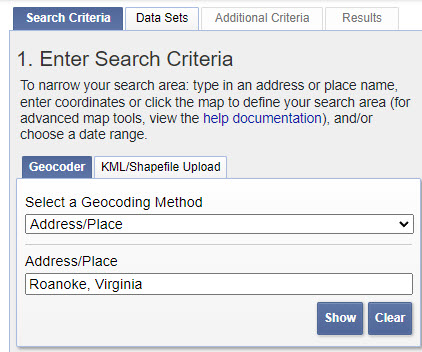
Figure 11.6. Search by address/place
Click the Show button to reveal the latitude and longitude of the Address/Place. Selecting the place’s name in the detail line shows the location on the map (Figure 11.7).
An additional search method is to navigate to your area of interest using the Earth Explorer map viewer. Once you have navigated to your area of interest, select the Add Coordinates button. The coordinates of the bounding box of the displayed viewer will appear, and Earth Explorer will search for images that overlap this bounding box. If you reoriented the viewer, select the Clear Coordinates button to clear the previous selection, and then select the Add Coordinate button again.
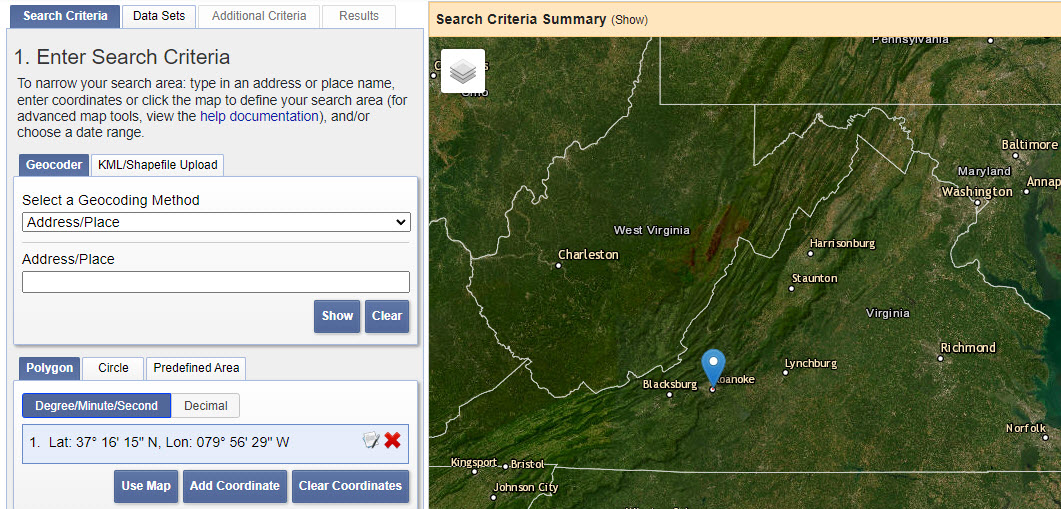
Figure 11.7. Using the map interface to search by location
We could now go to the Data Sets tab to identify image data sets available through Earth Explorer for this area of interest. However, limiting the Date Range is essential. Scroll down the Enter Search Criteria pane to locate the Date Range tab (Figure 11.8).

Figure 11.8. Refining a search by date
Let’s see what happens when searching a wide range of dates. Recall from the previous chapter that Landsat 8 launched in early 2013, so we are using May 2013 as the start date—the end date shown in Figure 11.8 is one we chose at random. You can also select a specific month by clicking the down arrow under Search months, which is necessary to limit the results to a particular month or season. For our purposes, enter the dates as shown and leave the selection to (all) months. Obviously, including a larger date range will increase the image download options.
Cloud Cover
Next, we will address the Cloud Cover tab (Figure 11.9)
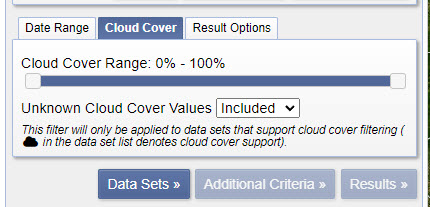
Figure 11.9. Refining a search by percentage cloud cover
Choosing an image with limited to no cloud cover is extremely important for many land analyses. Figure 11.10 exemplifies an almost entirely cloud-covered Landsat scene over Charleston, South Carolina.
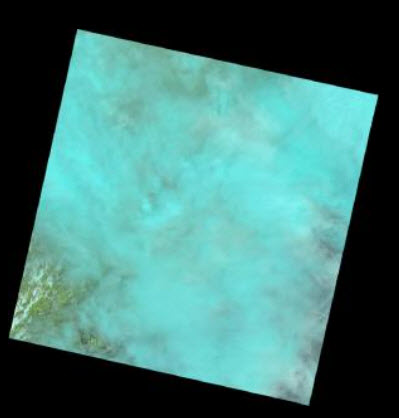
Figure 11.10. A Landsat scene with extensive cloud cover
Cloud cover patterns vary over space. In some scenes, part of the image may include a large body of water, so cloud cover over the open water may not matter if you are mapping terrestrial components. The scene in Figure 11.11 includes Charleston, South Carolina. But the scene also extends over the Atlantic Ocean. Clouds over the ocean may not matter if the application is focused on terrestrial characteristics.
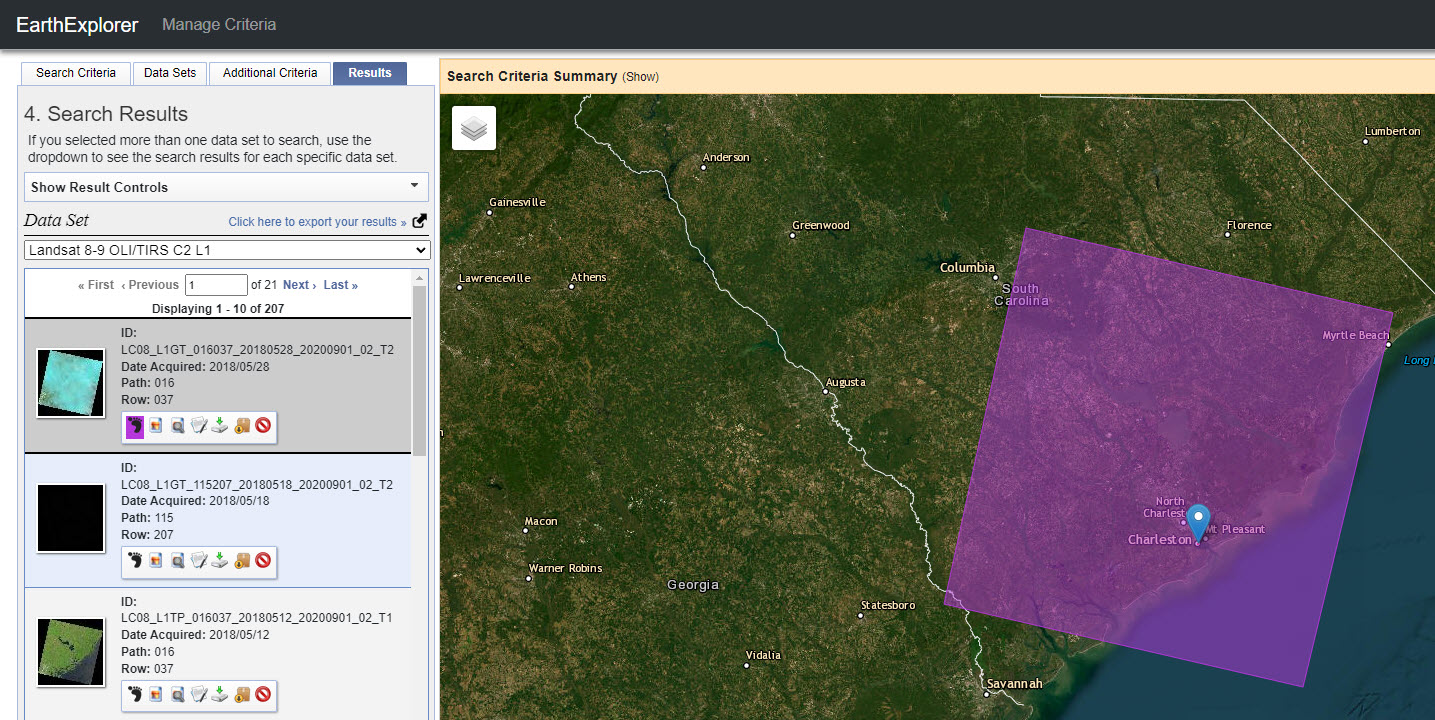
Figure 11.11. Exploring the Earth Explorer image archive
We will be using an image from the Roanoke, Virginia region. Roanoke is far from large bodies of water such as the Great Lakes or the Atlantic Ocean.
Reset the Date Range for 7/23/2018 to 7/12/2023 (or you could include today’s date for the final date). By including a date range after October 31, 2021, you will be able to include Landsat 9 imagery in your search results.
For terrestrial analyses, the search criteria should be limited to scenes with less than 10% cloud cover. Adjust the Cloud Cover Range slider to 0% – 10% (Figure 11.12).
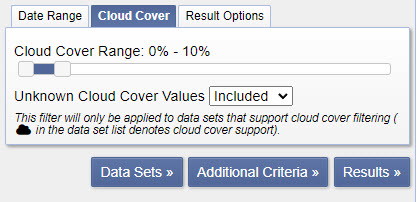
Figure 11.12. Setting the cloud cover range threshold to 10 percent
Next, go to the Data Sets tab (Figure 11.13).
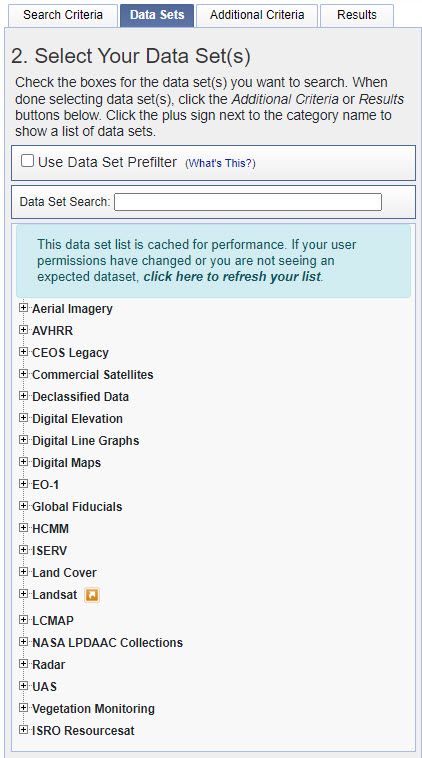
Figure 11.13. Selecting data sets in Earth Explorer
Under the Data Sets tab, expand the + sign next to Landsat, which provides a list of available Landsat collections, each with different levels of processing (Figure 11.14).
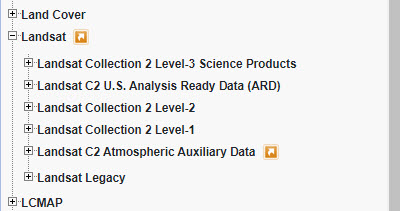
Figure 11.14. Narrowing the search to Landsat data collections
For these tutorials, we are using Landsat Collection 2 Level-1. For analyses beyond the scope of this book, access the Landsat websites, and consult academic literature to determine which product is needed for your project. For complete details on the other options, go to https://www.usgs.gov/landsat-missions/landsat-science-products
Landsat Collection 2 Level-1
As you can see from Figure 11.11, all the different Landsat satellites’ imagery is available under this option.
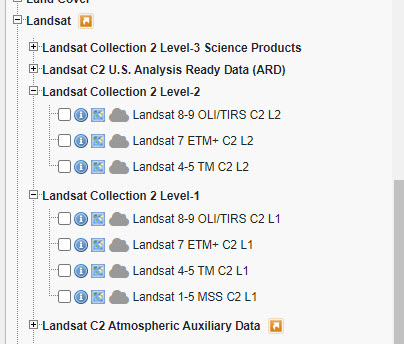
Figure 11.15. Expanding Landsat collection options
This imagery is downloadable and has undergone some processing by the USGS. Again, for more information, go to the Landsat website referenced above.
Landsat Legacy
Expand the Landsat Legacy collection to view the available images and processing types (Figure 11.16).
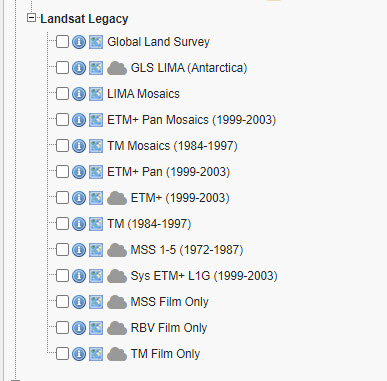
Figure 11.16. Landsat legacy options
Landsat Legacy consists of a collection of Landsat data that meet specific data quality levels, allowing users to find data suitable for a particular analysis quickly. The sensor, acquisition dates, and processing caliber define the data.
The Legacy framework ensures that Landsat products form a consistent archive of known data quality that can support time-series analyses while supporting continuous improvement of the archive and permitting users to access all data as they are acquired.
Legacy data are not relevant to our current lesson but make a mental note about the existence of Landsat Legacy products, as these may be useful to you in future endeavors.
The USGS has also processed some images for normalized difference vegetation index (NDVI) and bulk ordering for Landsat, MODIS, and others. They are available through on-demand ordering at https://espa.cr.usgs.gov/.
After reviewing the different processing levels, we choose to download an image directly from Landsat Collection 2 Level-1, so check the Landsat 8-9 OLI/TIRS C2 L1 checkbox associated with this image product (Figure 11.17).
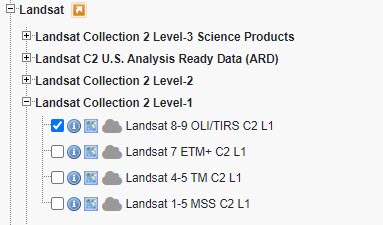
Figure 11.17. The Landsat 8-9 OLI/TIRS C2 L1 collection
Additional Criteria
Now select the Additional Criteria tab at the top, which provides additional options for filtering the requests of the image data archive—these choices will help focus the number of images that are returned.
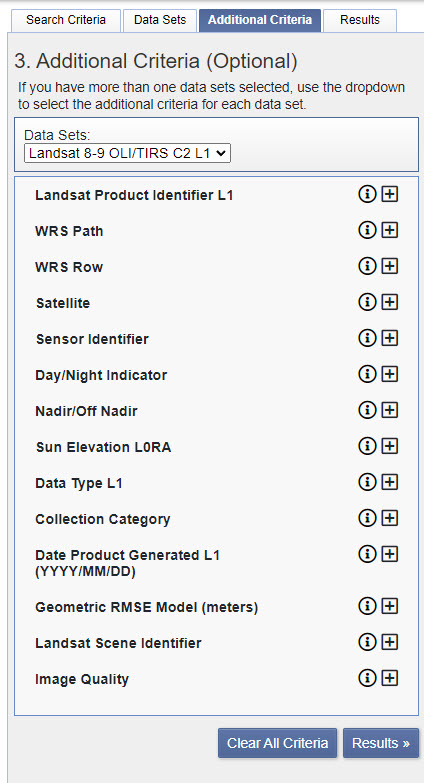
Figure 11.18. Additional search criteria
The Landsat Product Identifier (LPI) is a unique number assigned to each image. For this chapter, we don’t know any LPIs. The LPI is covered in detail in Chapter 12: Information about Downloaded Landsat Imagery.
WRS Path and WRS Row are unique for each location covered by a Landsat Scene. Again, we don’t know this information offhand for this chapter, but it will also be covered in the next chapter. If you are curious and would like to figure that out now, see https://landsat.gsfc.nasa.gov/the-worldwide-reference-system/.
We are only interested in images captured during the day, so we will choose Day from the Day/Night Indicator drop-down shown in Figure 11.19. Many older Landsat scenes are only daytime images, and nighttime images over Roanoke are also available, but the use of nighttime scenes is beyond the scope of this book.
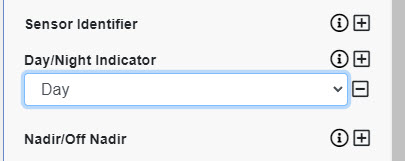
Figure 11.19. The Day/Night indicator
We will leave all the other parameters as is.
Now select Results! Sixty-nine images are returned, displayed in reverse chronological order, the most recent scenes are listed first (Figures 11.20 and 11.21).
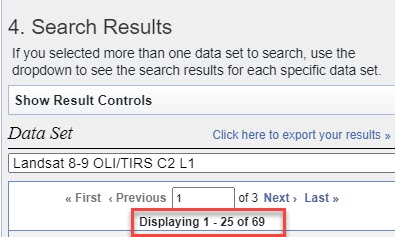
Figure 11.20. Returned search results in Earth Explorer
Interpreting the Search Results
Let’s first look at one of the results to understand what we have at hand. Each of the images has specific information related to that image. The first image in this example (if you used different search criteria, then your results will vary) was acquired on 2023/06/03 (Figure 11.21). Note that some of image ID’s begin with LC08, and others with LC09. This code denotes Landsat 8 or Landsat 9. A thumbnail snapshot of the Landsat 9 image is provided and appears to be cloud-free. Compare it to the image below it for 2023/04/24, which shows some cloud cover in the northwest and southwest corners of the image. The USGS uses a naming convention for Landsat products. Reference the naming convention outlined below to better understand images in the Landsat collection data archive.
LXSS_LLLL_PPPRRR_YYYYMMDD_yyyymmdd_CC_TX
L = Landsat
X = Sensor (“C”=OLI/TIRS combined, “O”=OLI-only, “T”=TIRS-only, “E”=ETM+, “T”=“TM, “M”=MSS)
SS = Satellite (”07”=Landsat 7, “08”=Landsat 8, “09”=Landsat 9)
LLL = Processing correction level (L1TP/L1GT/L1GS)
PPP = WRS path
RRR = WRS row
YYYYMMDD = Acquisition year, month, day
yyyymmdd – Processing year, month, day
CC = Collection number (01, 02, …)
TX = Collection category (“RT”=Real-Time, “T1”=Tier 1, “T2”=Tier 2)
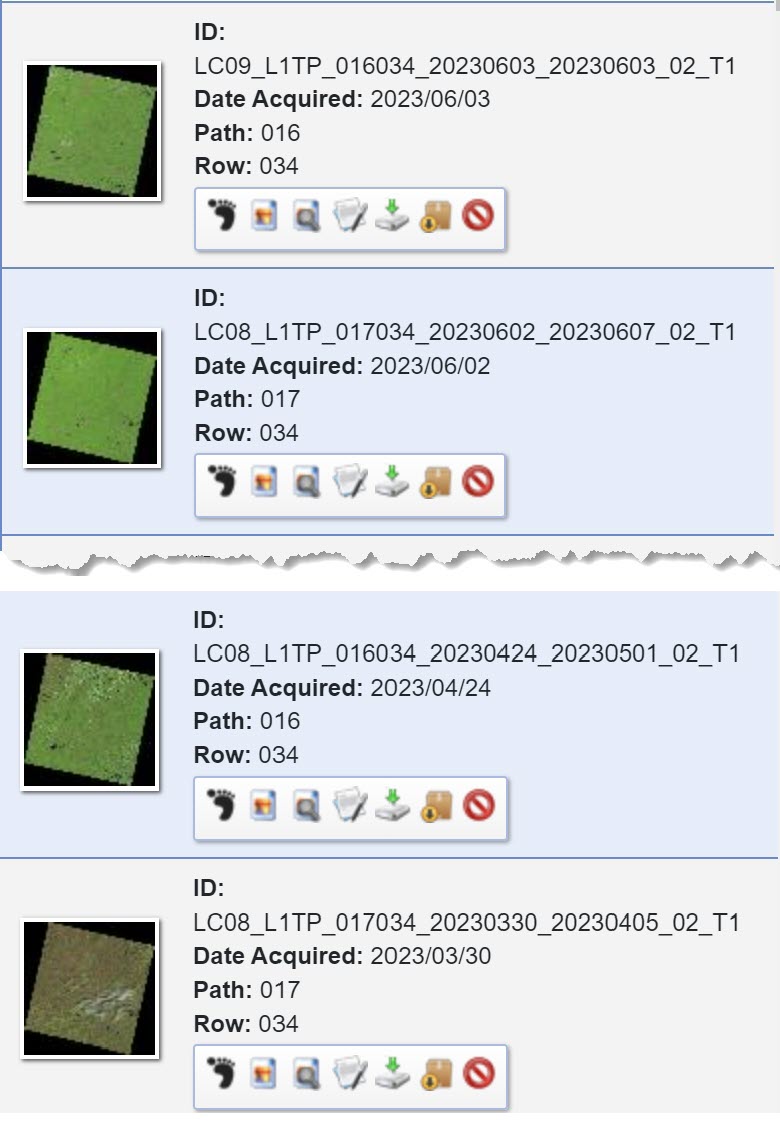
Figure 11.21. Landsat: Interpreting the search results
Remember Path and Row? Images over this region are associated with Path 017/Row 034 and Path 017/Row 034. Landsat images overlap, so Roanoke is in both images, although only fully in Path 017/Row 034 footprint.
How do we know this? Click on the footprint icon (the left-most icon in the list at the bottom of the scene ID) for the Path 017/Row 034 image. The footprint of the scene appears in the map window showing the region covered by the scene. Figure 11.22 shows both scenes. The distinct colors of the footprint relate to the scene in the Search Results pane.
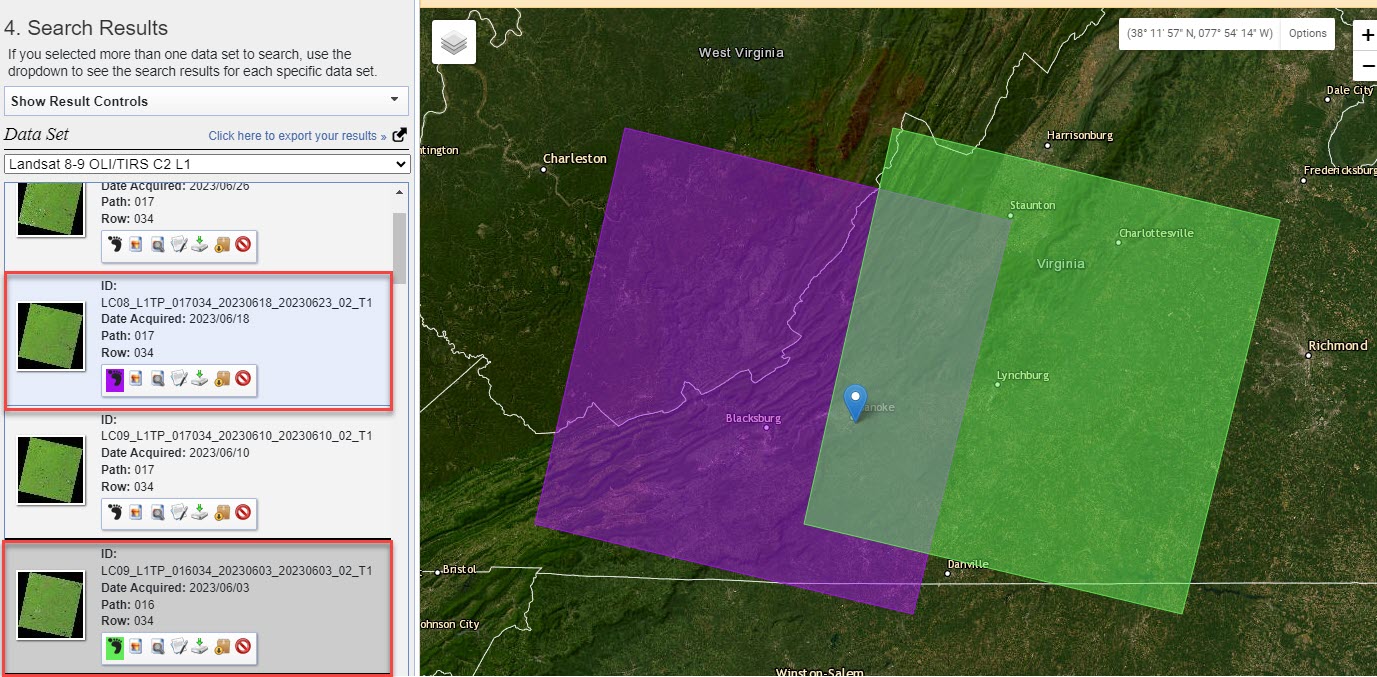
Figure 11.22. Landsat image footprint results
Deselect the footprints and select the Show Browse Overlay icon (the next icon to the right of the footprint) next to an image of interest. Figure 11.23 shows the Browse Overlay as a jpeg of the Landsat natural color scene. For more about natural color, see Chapter 16: Band Combinations for Landsat 9 Imagery. Notice that this scene is not entirely cloud-free, some small clouds are seen just southeast of Roanoke, but those clouds are not over our study area and will not affect an analysis.
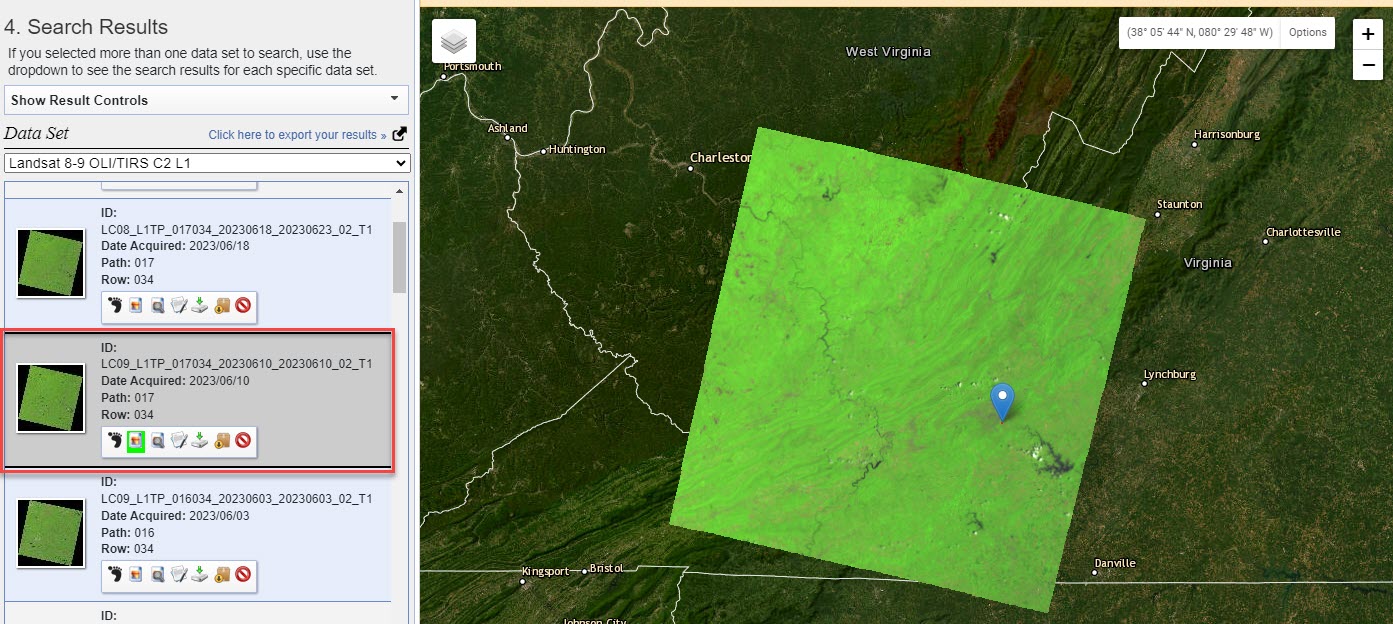
Figure 11.23. Browse overlay in Earth Explorer
Skip the next icon and click on the one that looks like pen and paper—Show Metadata and Browse (Figure 11.24).
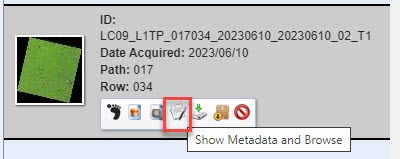
Figure 11.24. Accessing metadata in Earth Explorer
A full scene display opens in its own window in natural color (Figure 11.25).
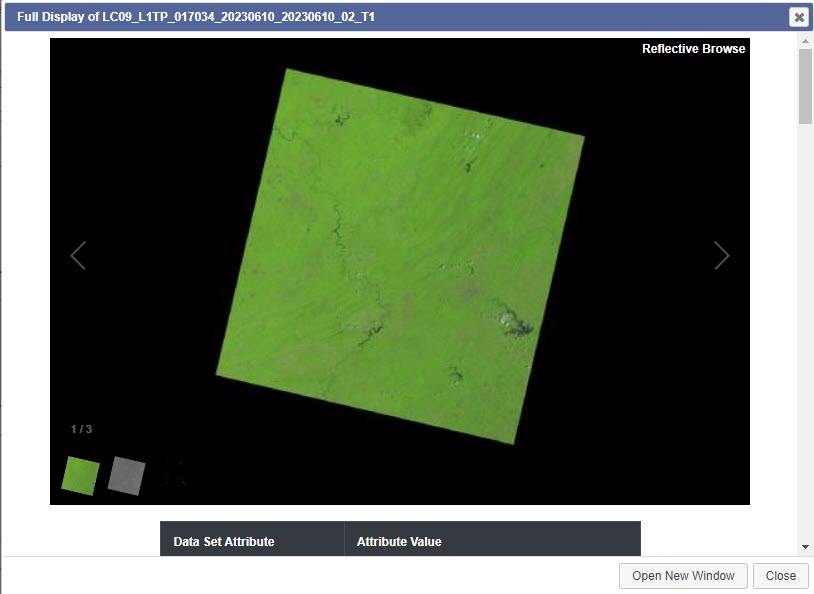
Figure 11.25. An example of a Landsat image provided with Earth Explorer’s metadata
Scrolling down, metadata appears for the scene, provided as a summary tabulation of crucial information associated with this scene. Close the Full Display window.
We will discuss Landsat metadata in detail in the next chapter, Chapter 12: Information about the Downloaded Landsat 9 Image.
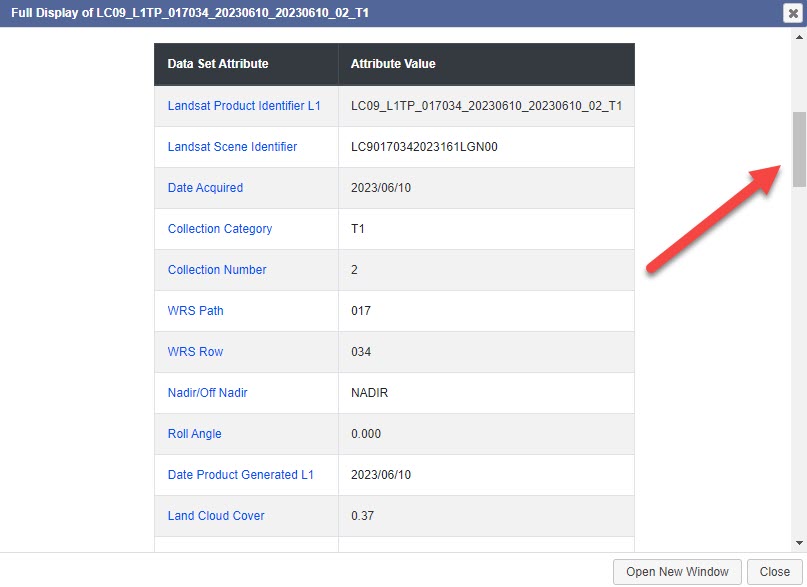
Figure 11.26. Accessing additional metadata elements with the slider bar
This scene’s metadata can be downloaded by selecting Click here to export your results as indicated by the red arrow in Figure 11.27, which then allows you to name your metadata file and select the file format of the Metadata Export.
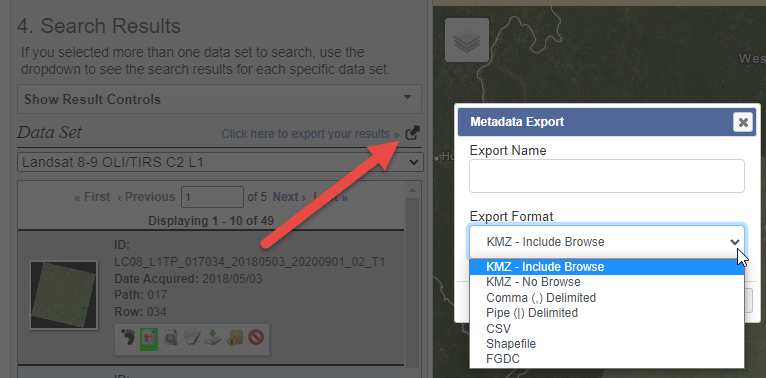
Figure 11.27. Exporting metadata
Why would you need metadata? You may have lost the metadata from a previously downloaded scene or are just reviewing metadata for prospective scenes you might use. Be sure to review all the options before choosing Landsat scenes.
Next is the Download Options icon (Figure 11.28). Do not download this image. At this point, we are simply reviewing the imagery options icons, and we will choose another image to download later.
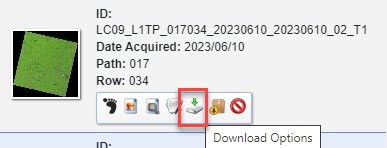
Figure 11.28. The download option
If the download icon is not enabled, the scene is unavailable for direct download; the image is ordered using the Add to Bulk Download icon. A downloadable scene can be ordered instead.
Why would you want to order instead of directly downloading? It is one scene at a time when downloading, which can take considerable time. If multiple scenes are needed, order them using the bulk download option and download them all at once.
Ordering a Landsat Scene
Earth Explorer is a very user-friendly site, so if you want to order images via bulk download, the site will walk you through the process. Ordering multiple scenes is accomplished using the Add to Bulk Download icon for each scene, as shown in Figure 11.29.
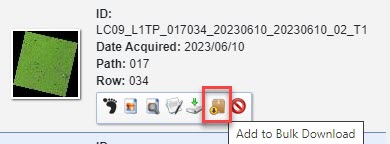
Figure 11.29. Adding an image to a bulk download
What is the advantage of a bulk download? Multiple scenes can be downloaded simultaneously through a single transaction.
Some scenes can be eliminated from the established search results by choosing Exclude Scene from Results (Figure 11.30).
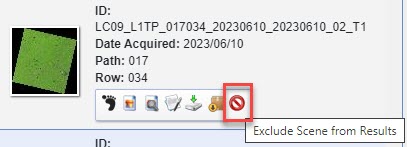
Figure 11.30. Excluding an image from the search results
When performing a bulk download, the images are placed in the item basket (Figure 11.31).

Figure 11.31. The download basket
Select the Item Basket to view the procedures for bulk ordering (Figure 11.32). We will not review the process here; the directions on Earth Explorer are detailed. Select Start Order if you wish to proceed.
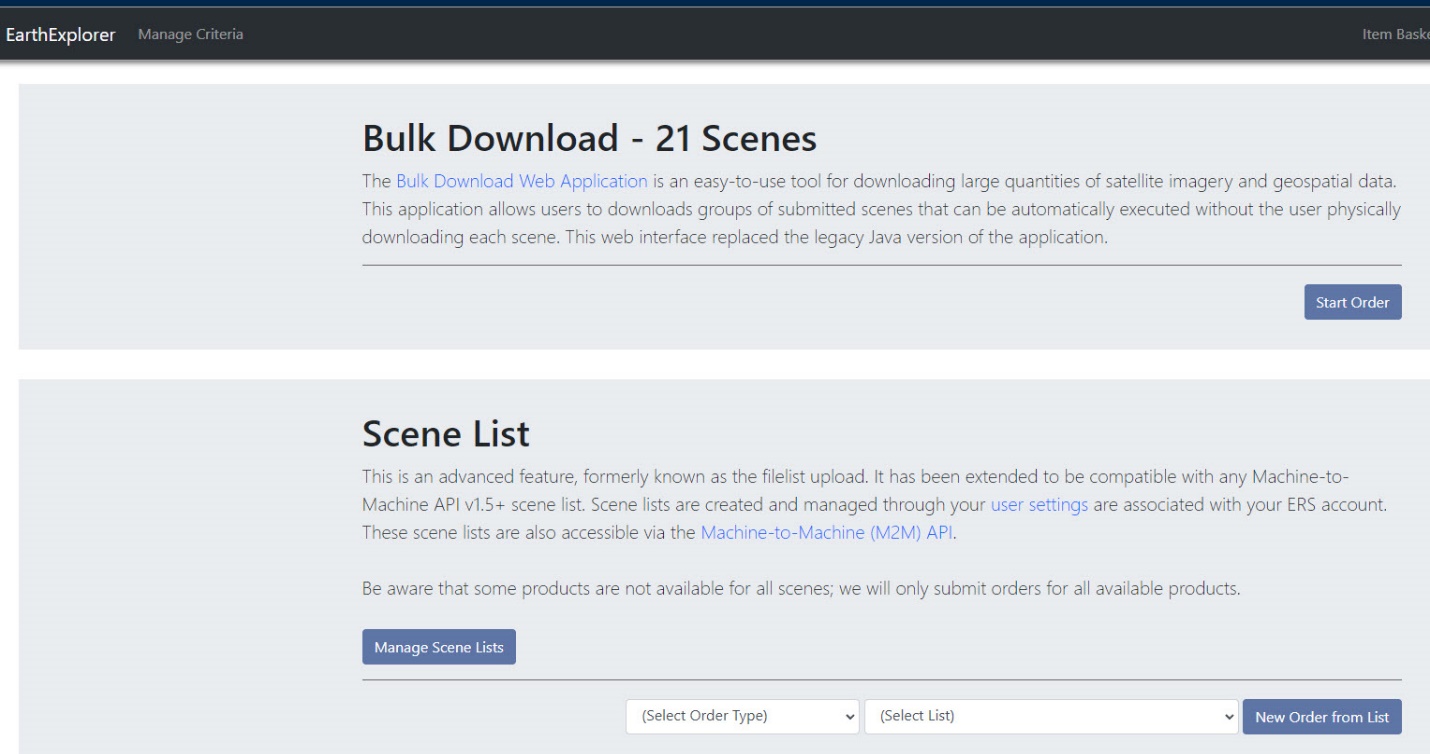
Figure 11.32. Completing a bulk download
Directly Downloading a Landsat Scene
In the Search Results pane, clear any selections that you have made.
Search for a Roanoke, Virginia image with the source ID: LC09_L1TP_017034_20230610_20230610_02_T1. This image is dated June 10, 2023 (Figure 11.33). We will use this scene in other chapters of this book.
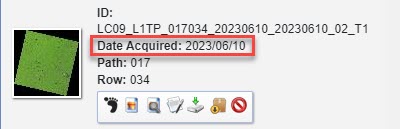
Figure 11.33. The Landsat 9 Roanoke Scene
Click the Download Options icon and select the Product Options button in the dialog box (Figure 11.34).
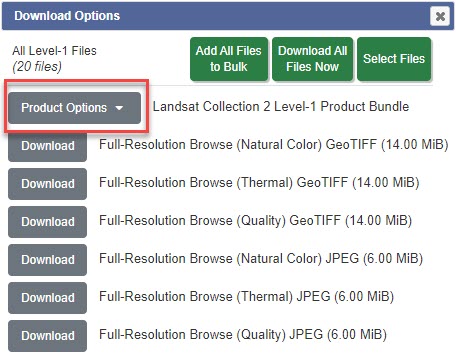
Figure 11.34. The product options
The Product Download Options window opens (Figure 11.35). We will select the Landsat Collection 2 Level-1 Product Bundle (red rectangle in Figure 11.35). This option includes all the items listed in the window in the download. Select the gray download button to the left of the product name. (Note: for other projects, you may only wish to select some of the bands.)
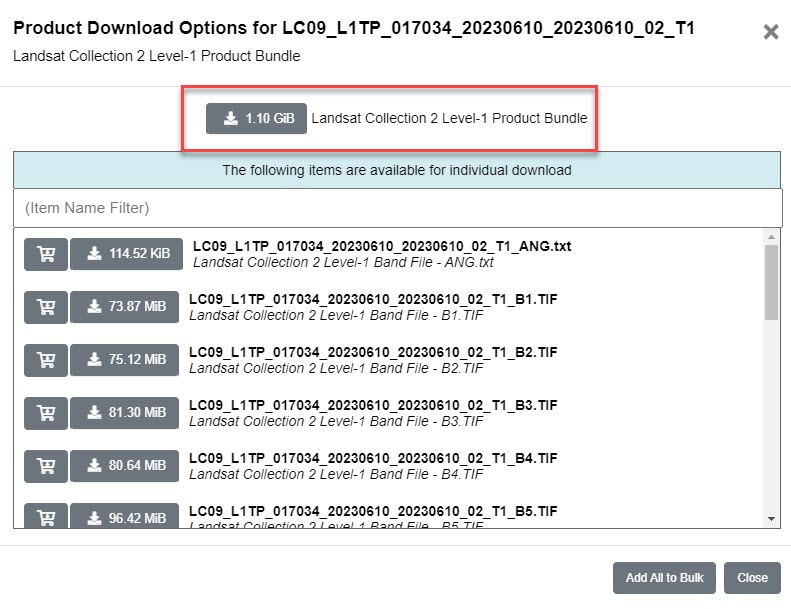
Figure 11.35. Downloading a product bundle
The download immediately starts. You should see a prompt to save the file to your computer, depending on which browser you are using. This huge file (1.11 GB) will take a few minutes or more, depending on the Wi-Fi speed (Figure 11.36).
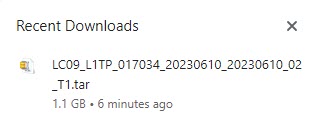
Figure 11.36. A Landsat bundle is a large file
Once the file has finished downloading, navigate to the folder where your download is stored to find the downloaded Landsat file. The file is compressed in a .tar format and must be extracted to access the Landsat data (Figure 11.37).

Figure 11.37. Downloaded files are compressed
To extract the file, right-click the file name, point to 7-Zip1 (Figure 11.38).
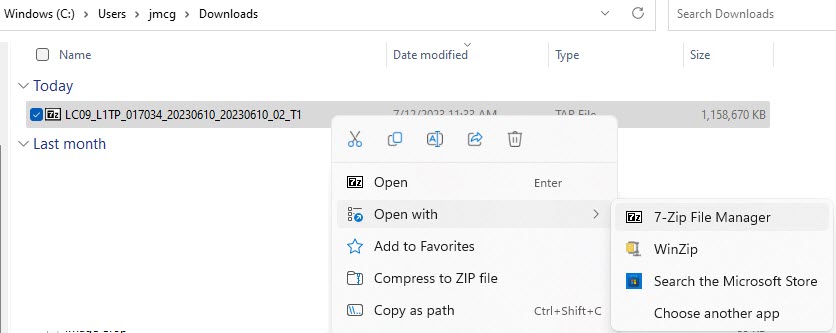
Figure 11.38. Extracting a downloaded compressed file using 7-Zip
Select Extract (Figure 11.39).
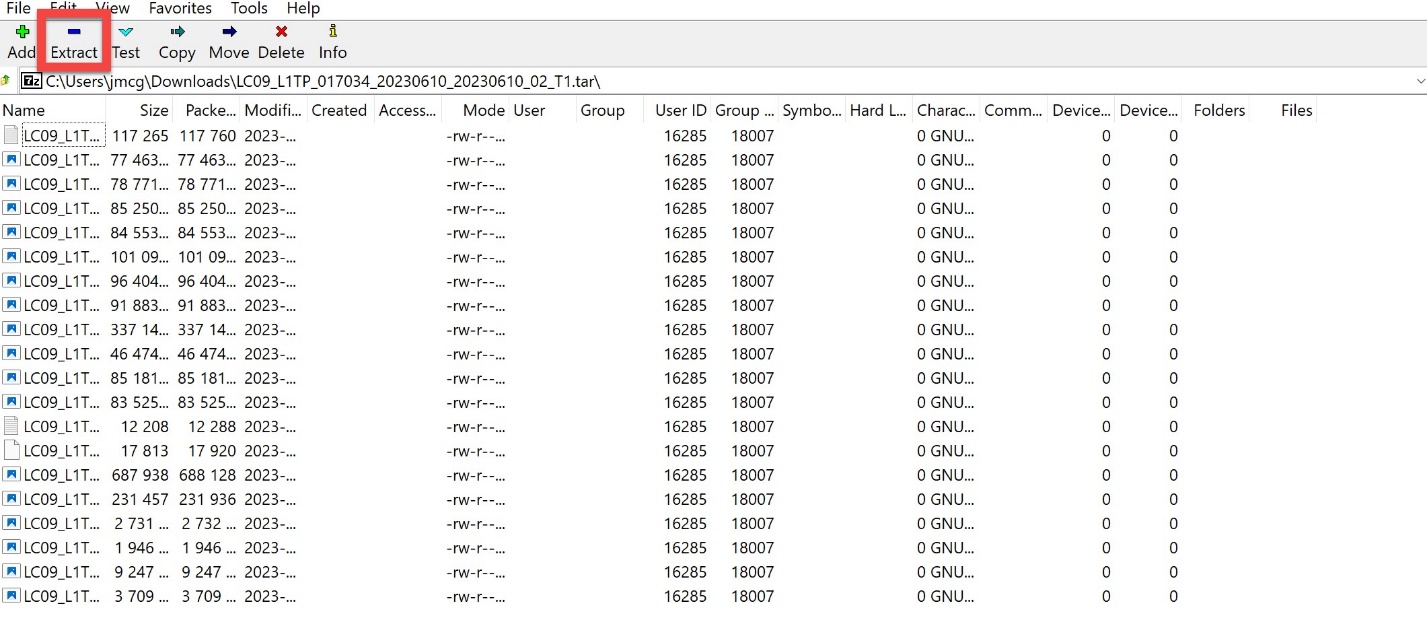
Figure 11.39. Extracting a downloaded compressed file using 7-Zip
In the Extract: dialog box, under Extract to: make sure the path listed is to the drive on your computer where you are saving your image files (Figure 11.40). If you are in a computer lab, check with your instructor if you need help finding where to save them. If you need to select another location, click on the … at the end of the line and navigate to the folder to store the images—we recommend the project folder.
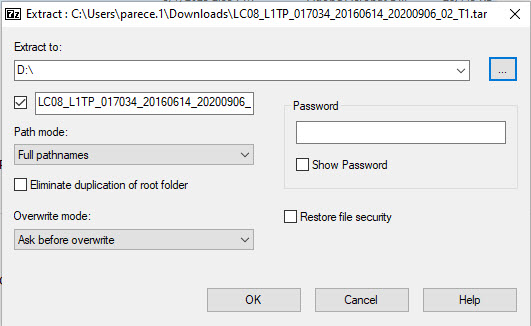
Figure 11.40. Extracting a downloaded compressed file using 7-Zip
Click OK. You can watch the extraction process (Figure 11.41).
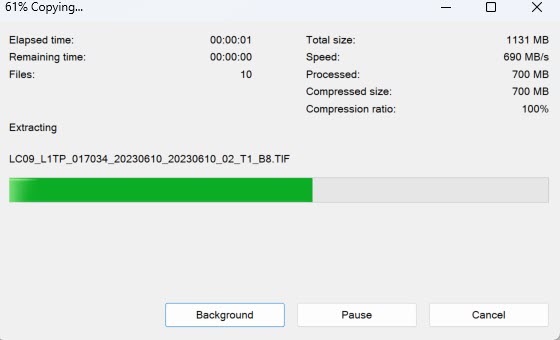
Figure 11.41. The file extraction process
Navigate to the folder where you saved the extracted .tar file. The following files should be present in the folder:

Figure 11.42. The extracted Landsat files
Success! You have downloaded the Landsat 9 scene, including Roanoke, Virginia, dated June 10, 2023.
You may need to determine if the downloaded imagery needs further processing beyond that completed by the USGS. For more information about the level and type of USGS processing of Landsat scenes, go to http://landsat.usgs.gov/Landsat_Processing_Details.php. See also Masek, J.G., et al., A Landsat surface reflectance data set for North America, 1990-2000. Geoscience and Remote Sensing Letters, 2006. 3: p. 68-72.
In the next chapter, Chapter 12: Information about the Downloaded Landsat 9 Image, we will discuss these files in more detail. In subsequent chapters, we introduce techniques to analyze this imagery and extract information to support research.