8 Chapter 8: Metadata
Introduction
What is metadata? Metadata is information about data. Your morning bowl of cereal has metadata—information about the product—located on the side of the cereal box. Figure 8.1 is an example from the FDA. This is known as a nutritional label. For datasets, metadata elements appear in a metadata file.
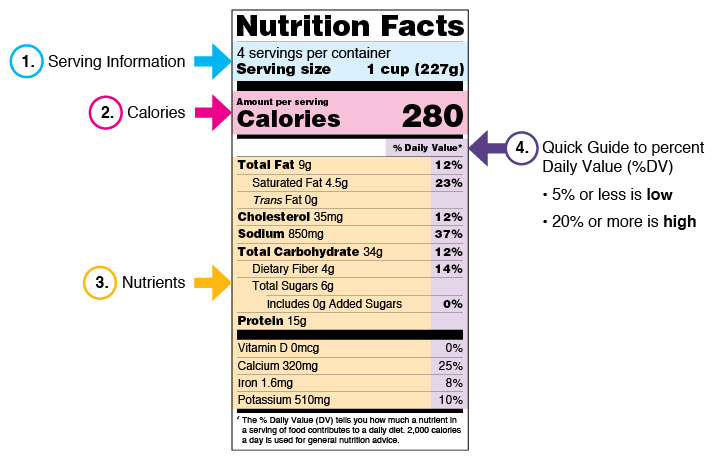
Figure 8.1. Example of a nutritional label. Source: U.S. Food and Drug Administration (FDA). https://www.fda.gov/food/new-nutrition-facts-label/how-understand-and-use-nutrition-facts-label
In this chapter, we discuss various locations in ArcGIS® Pro to find information about existing vector and raster data and how to create metadata for the map project. Please note that new metadata should also be created when new data is created, whether vector or raster.
To begin, Open an ArcGIS® Pro project as directed by your instructor—either the project saved from the previous chapter, or you may be directed to start a new project. We begin with the project from the last chapter.
Finding Metadata in Existing Files
The first place to find metadata is in the title of the project or the data. Examine the titles in the Contents pane in Figure 8.2. Many of the data layers listed in the figure are self-explanatory by their titles. The Mid_Atlantic Cities layer, for example, probably includes cities in the Mid-Atlantic region of the United States.
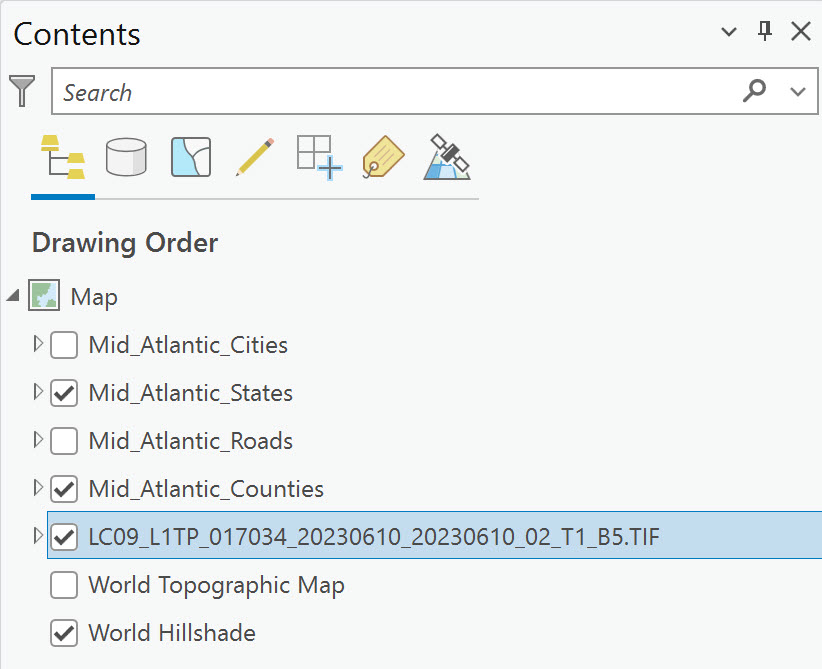
Figure 8.2. Various layers in Contents
But the name is not so revealing if we look at the Landsat 9 raster image layer. The name begins with LC09 in Contents in Figure 8.2. Raster file names are comprised of information pertinent to the file, and it just takes knowledge of the file name structure and a bit of experience to interpret these filenames, which provide some metadata about the imagery. We explain what information is contained in Landsat file names in Chapter 12: Information about the Downloaded Landsat 9 Image. If you are unfamiliar with raster file names, metadata can also be found in other areas, which will be discussed later.
Let’s look at the second option for locating metadata. From Contents, we know the title of the data, but we don’t know what the data contains.
The next place to look is in the attribute table. Do you remember how to view an attribute table? Right-click the layer name in Contents, then select Attribute Table from the drop-down list. In Figure 8.3, we are examining the attribute table for the Mid_Atlantic_Counties layer.

Figure 8.3. An attribute table
Here we discover additional information about the file, as shown in Figure 8.3. The state location of each feature is indicated by STFIPS (the U.S. Federal Information Processing Standards), which lists the unique federal identification number for each US State and Territory. The county’s name (NAME00), the federal identification number for each county (CTYFIPS), the combined FIPS number for state and county (STCTY), and the area of the county in Hectares (Hectares). The GIS also assigned two bits of data—OBJECTID, a unique identifier for a single feature, and Shape, indicating that it contains a Polygon vector data.
Right-click on any raster layer and notice that the attribute table is grayed out (Figure 8.4). Many raster data sets do not have an attribute table.
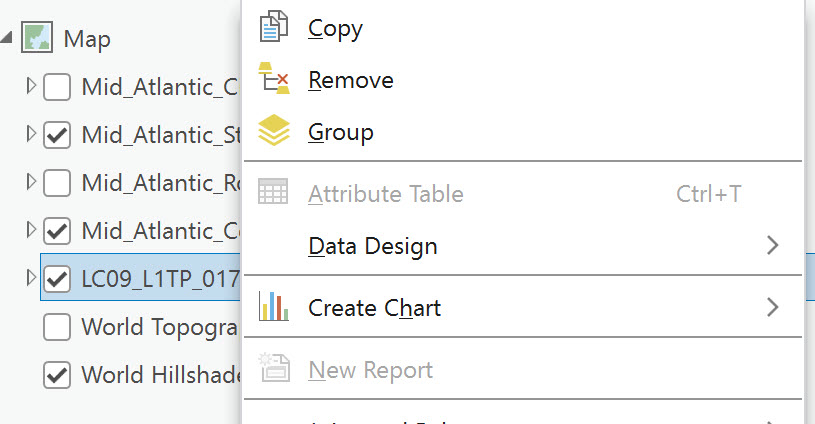
Figure 8.4. Some raster data sets do not have a raster layer
Let’s explore other locations of metadata. Right-click on any vector layer and select Properties (Figure 8.5). Notice there is a Metadata entry in the menu of the Layer Properties dialog box, but don’t click it yet!

Figure 8.5. The Layer Properties dialog box
First, select the Source tab (Figure 8.6). In this case, the source was a shapefile. The information will differ if you choose a File Geodatabase Feature Class layer.
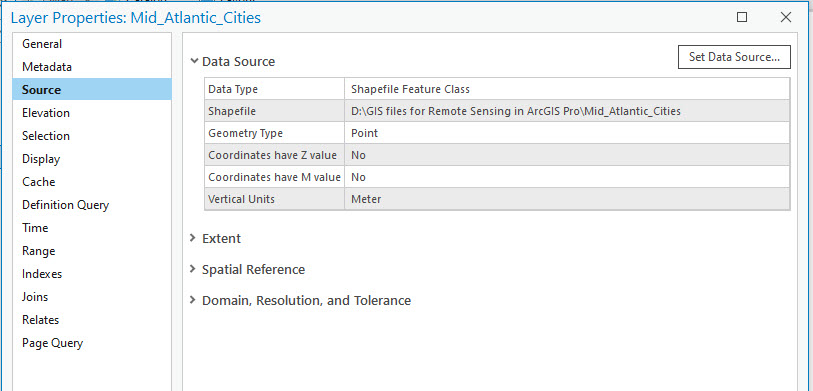
Figure 8.6. Layer Properties
There is some metadata in Source, and additional information can be revealed by expanding topics in the pane on the right side of the dialog box. First, expand Extent as shown in Figure 8.7.
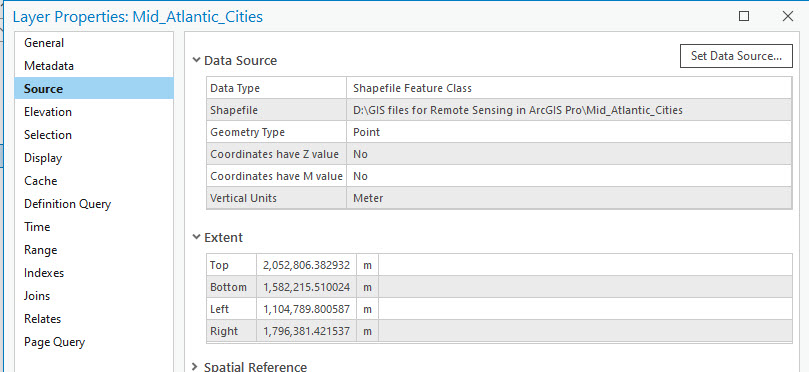
Figure 8.7. Layer Properties: Source
Then expand Spatial Reference, scrolling down if necessary. (Figure 8.8).
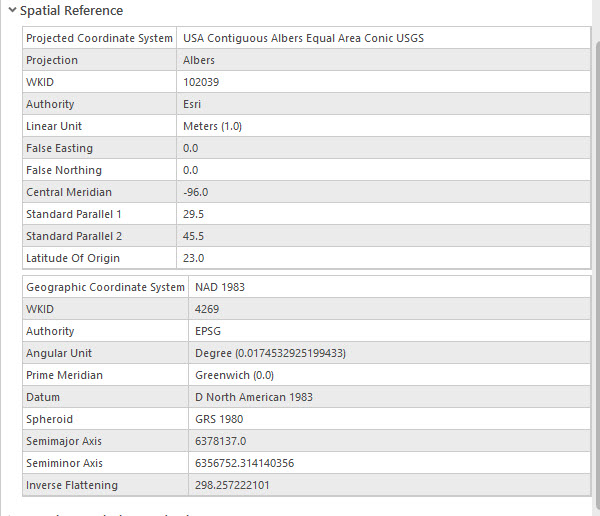
Figure 8.8. Layer Properties: Spatial reference
Expand Domain, Resolution, and Tolerance (Figure 8.9).
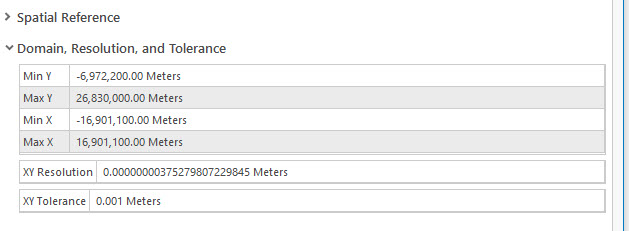
Figure 8.9. Layer Properties: Domain, Resolution, and Tolerance
Examine all the information (metadata) about the vector layer you chose.
Please note that each one of the menu items in the left pane of the Layer Properties dialog box can contain metadata—specifics of the metadata depend on the individual data.
Now let’s look at the Metadata tab (Figure 8.10). This tab has additional information that the data’s creator completed.

Figure 8.10. Layer Properties: Metadata
If any metadata elements are blank, then the data creator likely did not complete the information associated with that metadata element. For example, Figure 8.11 shows the metadata for the Landsat 9 imagery with empty metadata elements. You will find similar metadata for the NAIP imagery we added in an earlier chapter. Metadata for raster data is more extensive and can be found on the websites for the imagery or for Landsat; see Chapter 12: Information about the Downloaded Landsat 9 Image.
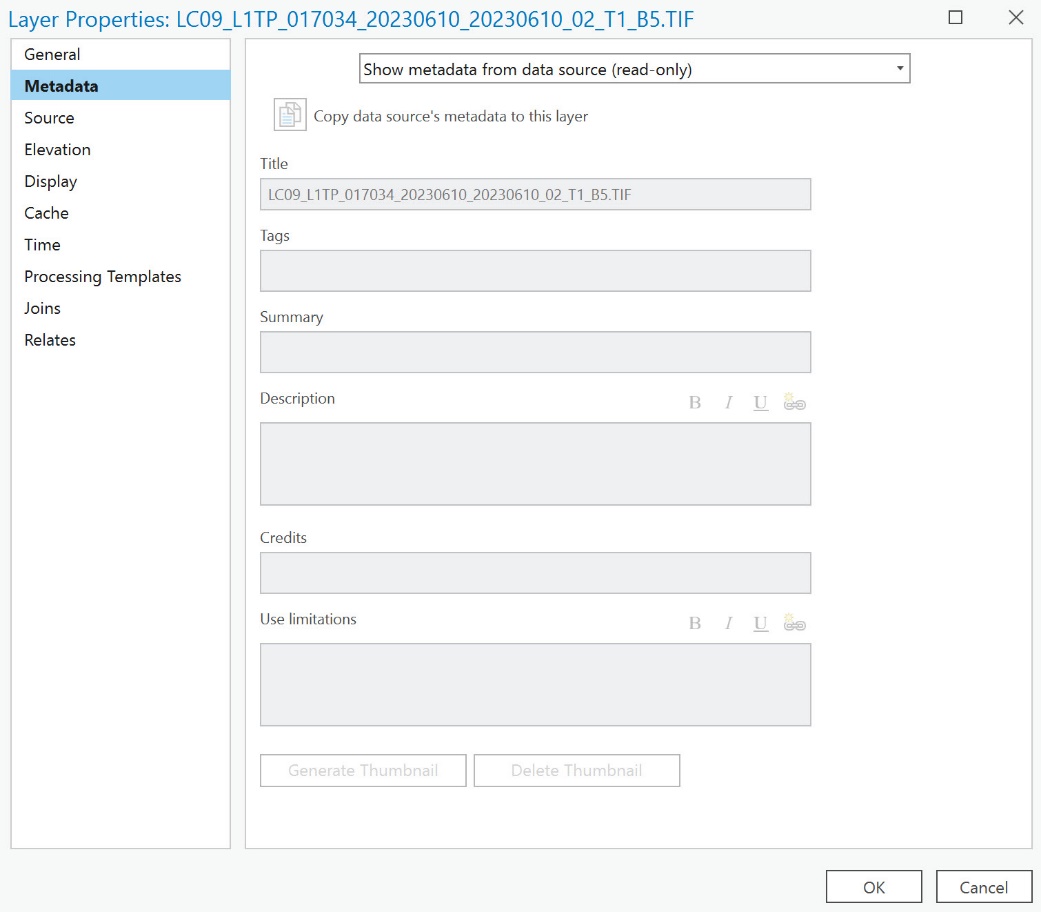
Figure 8.11. Layer Properties: Metadata
In the Mid_Atlantic_Counties layer, we could explain the fields of the attribute table. But what if the field names are not common or cannot be deciphered —for example, CDD and HDD in the Mid_Atlantic_Weather_Data attribute table shown in Figure 8.12?

Figure 8.12. An attribute table
Are the definitions for these field names located on the National Weather Service Website? Are the abbreviations related to weather? Right-click on the layer’s name and select View Metadata from the drop-down list (Figure 8.13).

Figure 8.13. The view metadata option
Catalog opens with much more extensive metadata (Figure 8.14).

Figure 8.14. Viewing metadata
If the displayed metadata file is based on the Item Description metadata style (see the bottom of Figure 8.15), it can be changed to a different style.

Figure 8.15. Viewing metadata
Click on the Project tab in the upper left corner to change styles (Figure 8.16).

Figure 8.16. Changing metadata styles
Select Options and choose the Metadata tab in the Options dialog box (Figure 8.17). Under Metadata style, choose FGDC CSDGM Metadata1 and click OK.

Figure 8.17. Changing metadata styles
FGDC CSDGM is the abbreviation for Federal Geographic Data Committee Content Standard for Digital Geospatial Metadata2.
Return to the Project (select the left-pointing arrow in the upper left corner, as shown in Figure 8.18).

Figure 8.18. Returning to the project window
To update the metadata style, you may need to click the Refresh button in the Catalog window (Figure 8.19).

Figure 8.19. Updating the metadata style
Use the scroll bar on the right to see how much additional data is present (Figure 8.20 shows some of the data).

Figure 8.20. Updated metadata style
With a raster, metadata may or may not be displayed this way. Again, consult the any ancillary documentation provided.
If you get a message, such as in Figure 8.21 — this is an older data file format, the update can be processed using ArcGIS® Desktop (not ArcGIS® Pro). ESRI online Help provides details on this process. (http://desktop.arcgis.com/en/arcmap/10.3/tools/conversion-toolbox/synchronize-metadata.htm)

Figure 8.21. Warning dialog
For the Landsat raster (Figure 8.22), a message in each field states that there is no information for that field. We discuss raster metadata and where to find it in more detail for Landsat imagery in Chapter 12: Information about the Downloaded Landsat 9 Image.

Figure 8.22. Landsat metadata file
Creating Metadata in the Map Project
Metadata can be created for the map project. We have seen some metadata in Chapter 7: Displaying Data, where we explored coordinate system information for the map project).
Return to the Map tab, right-click Map in Contents, and choose View Metadata (Figure 8.23).

Figure 8.23. Viewing metadata
Here you can create metadata for this particular Map in your Project (Figure 8.24).
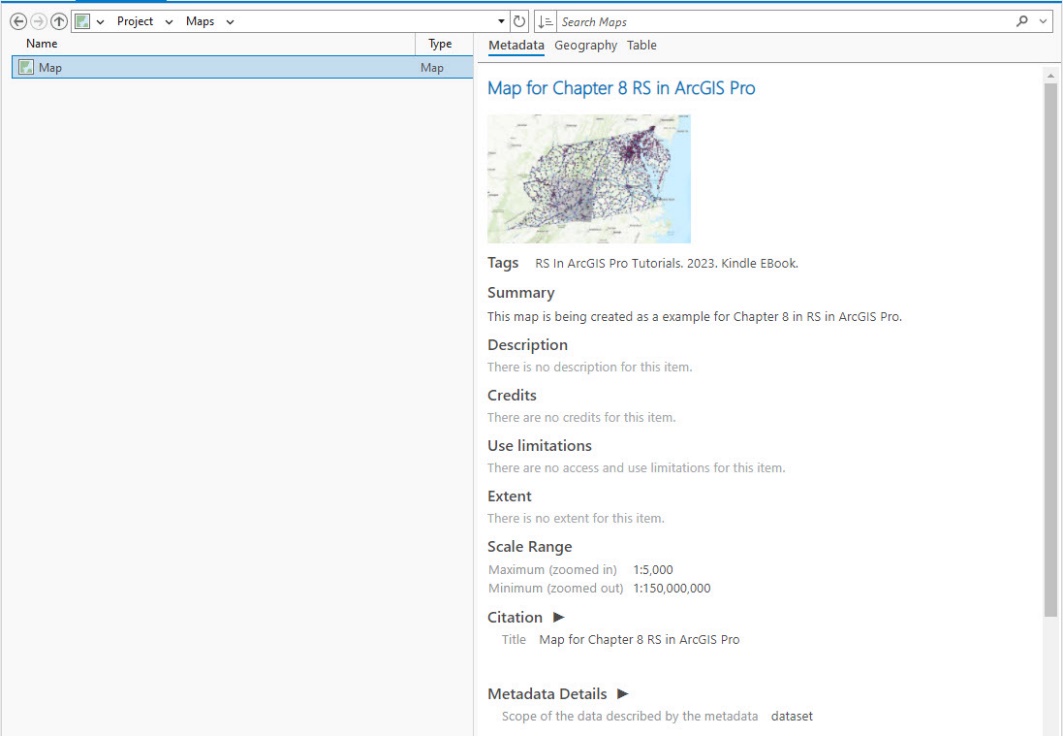
Figure 8.24. Creating metadata
The only populated information is a screenshot of the map. To create new or edit the existing metadata, select Edit (the blue pencil in the Metadata group of the Manage tab, as shown in Figure 8.25).

Figure 8.25. Editing metadata
When editing metadata, each field has an active box to enter information (Figure 8.26). Notice two messages at the top of the edit pane—abstract and bounding coordinates are required.
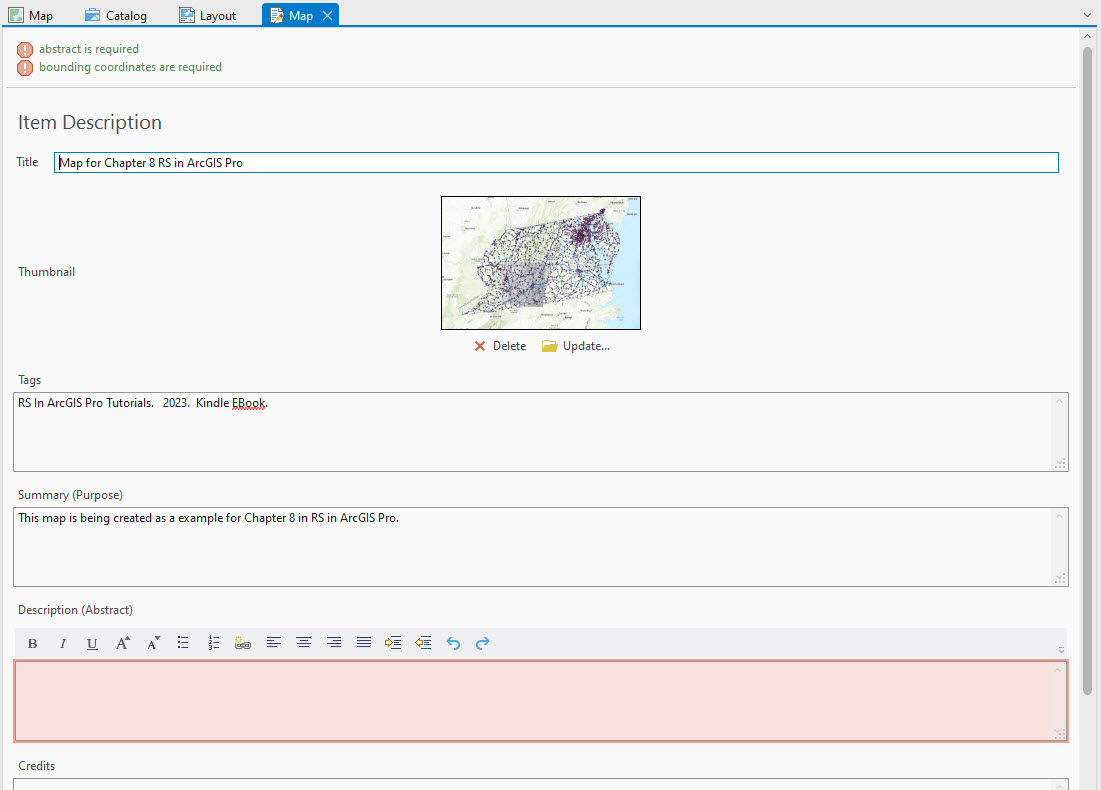
Figure 8.26. Editing metadata
ArcGIS® Pro provides notes for required information and red highlighted fields for what is missing, according to the FGDC CSDGM. As of the writing of this book, including all this information is not mandatory to work with a map project. But these standards are quite comprehensive, and, in many instances, the government, your employer (or future employer) may require these standards.
Enter the missing information for any red highlighted field (Figure 8.27), filling in the missing data for all fields.

Figure 8.27. Editing metadata
Metadata should be completed for all projects. Through the creation of metadata, you are documenting your work. This documentation adds value to the datasets and maps that you develop. Complete metadata may limit future phone calls and liability by providing use limitations. In addition, you can receive credit for your work.
As you enter metadata, click Apply to save intermediate work. Once the metadata entered is complete, click Apply and Save your project. (Figures 8.28 and 8.29).
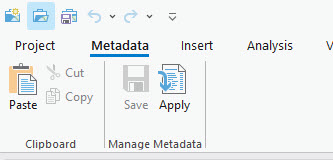
Figure 8.28. Applying changes

Figure 8.29. Saving
This concludes the chapter on metadata. We did not cover each of the fields and information required. Please see the FGDC CSDGM or FGDC ISO for more specifics and definitions of metadata elements.
Also, keep in mind that private employers, federal, state, and local governments often have established guidelines to support the development of geospatial metadata. If you have received funding from an outside source, consult your funding agency to ensure you comply with their associated metadata requirements.
The next chapter, Chapter 9: Saving and Exporting Maps, will conclude the introduction to ArcGIS® Pro.
