3 Chapter 3: Repairing a Broken Data Link
Introduction
In ArcGIS® Pro −the data (or layers) shown in the Contents window merely point to the actual data files. The data files are not physically saved within the map project. As such, if the project was moved to another folder, to a different drive on the computer, or opened from a renamed folder or drive, the path to the data source (address on the computer) may have changed. When this happens, the link between the data files and the project may be broken.
In this chapter, we demonstrate how to repair a broken data link.
After opening a project or after importing an .mxd file (from ArcGIS® Desktop), if red exclamation points are displayed beside the layer name in the Contents pane (Figure 3.1), the link to the data is broken.

Figure 3.1. Broken data links
Repairing a link on an individual layer in Properties
Right-click on the name of an individual layer listed in the Contents pane and select Properties. (Figure 3.2).

Figure 3.2. Selecting the Layer Properties dialog box.
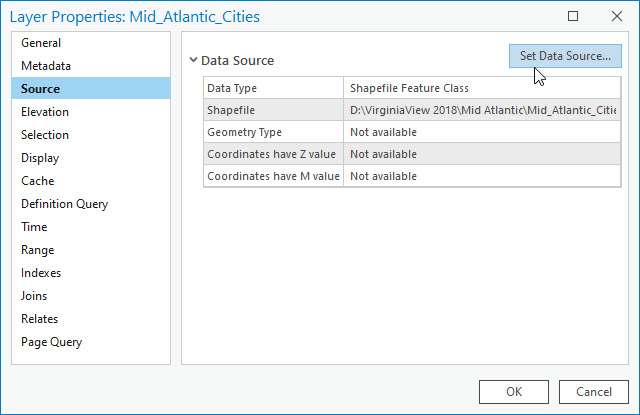
The Layer Properties dialog box will appear (Figure 3.3). Select Source (on the left) and then Set Data Source (upper right).

Figure 3.3. The Layer Properties dialog box.
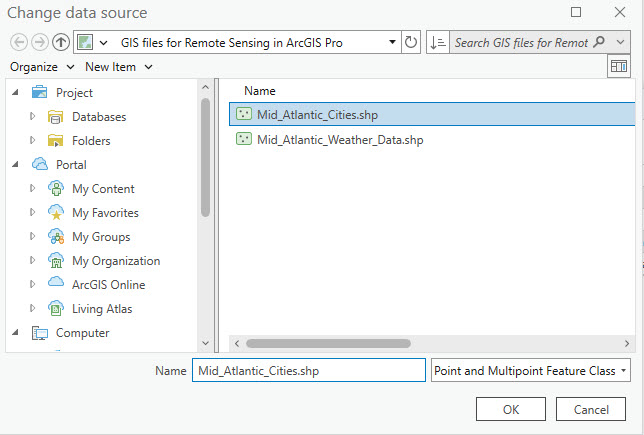
The Change data source dialog box will appear (Figure 3.4). Navigate to the folder where the shapefile is located. Since the data we chose to repair is a point shapefile (Mid_Atlantic_Cities), only point shapefiles are shown in the folder. Highlight the correct file—ensure you choose the same file that was chosen in Contents. The name of the file can be found in the Layer Properties box (Figure 3.3) on the right side by Shapefile. Click OK.

Figure 3.4. The Change data source dialog box.
The screen returns to Layer Properties (Figure 3.5), and the new location appears on the line titled Shapefile. Click OK again.

Figure 3.5. The Layer Properties dialog box.
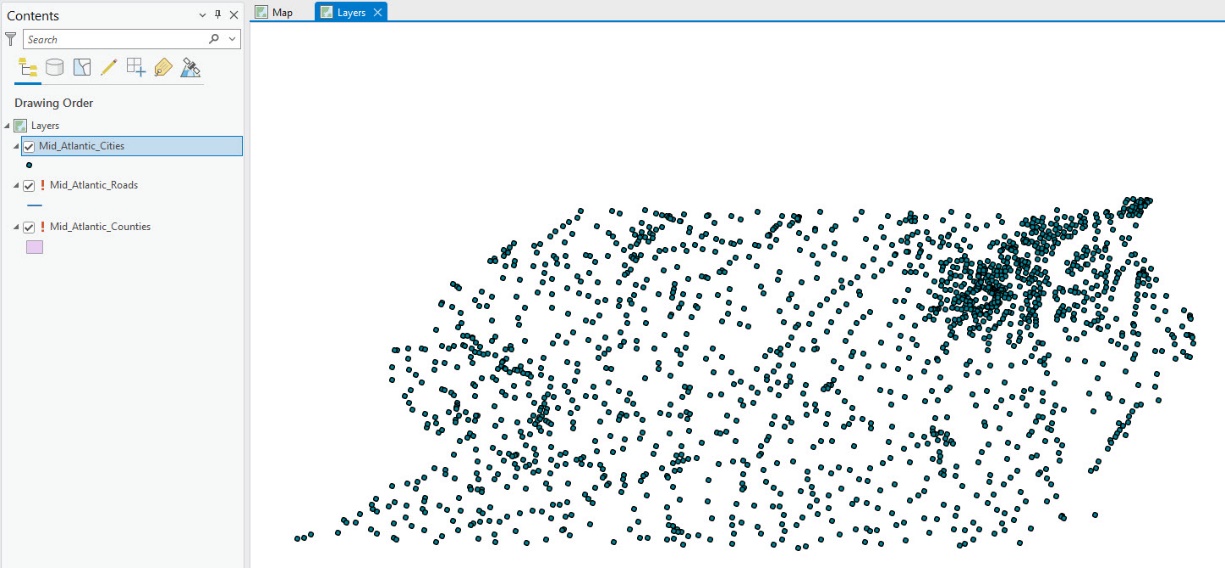
As demonstrated in Figure 3.6, the link to the Mid_Atlantic_Cities point shapefile is now repaired, so the data is displayed in the map window on the right and there is no longer a red exclamation point in the Contents pane.

Figure 3.6. The Contents pane.
Repairing a link on an individual layer using the Red Exclamation Point
There is another technique to repair broken data links. Instead of going into Properties, select one of the red exclamation points (not the layer name but the red exclamation point as seen in Figure 3.7).

Figure 3.7. Repairing a broken data link.
The Change data source dialog box automatically opens (Figure 3.8).

Figure 3.8. Repairing a broken data line.
Again, be sure to choose the correct file. Then click OK. If the shapefiles do not appear when the Change data source dialog box first opens, navigate to the file folder containing the shapefiles. Click on the correct shapefile for that layer, populating it in the Name field, then click OK. Because all layers were in the same folder, all broken data links were repaired (Figure 3.9).

Figure 3.9. Repaired broken data link.
If some of your links were not repaired, repeating the procedure for each layer repairs the broken link for each.
If the map project contains many layers, some of which have a broken data link and some which do not, the list of layers in the Contents window can be changed so that only those with a broken data link are visible.
This action can be done by selecting the Filter icon (Figure 3.10).

Figure 3.10. The Filter icon.
Then select Broken data link (Figure 3.11). This step changes the display so only those layers with broken data links are listed, thus allowing easier identification of the data layers with broken links.

Figure 3.11. Displaying only data layers with broken links.
Now we have demonstrated, in the first three chapters, setting up projects and repairing broken data links. In the next chapter, we discuss adding data.
