7 Individualized Teaching Techniques
Consider the following teaching episode.
The agriculture class had been studying the unit “Selecting and Using Hydraulic Machinery.” The specific question being answered focused on the case of a particular student in the class. His name was David, and the question was, “What plow should David buy for his moderate-size tractor?”
During the previous class the teacher had used group teaching techniques consisting of lecture and discussion with PowerPoint and handouts. On this day the teacher reviewed, through discussion, yesterday’s findings and placed on the chalkboard a summary of factors to consider in selecting the proper plow for the job. The teacher then had David list on the board his tractor size, number of acres his family plows, tire width, type of soil, and types of fields they plow.
The teacher then helped the students review the importance of these factors to David‘s specific choice, based on their previous study. He then suggested that “we” ought to refer to the agricultural engineering bulletin that “we” used earlier in this unit of instruction and specifically the charts on pages 19 and 20 in order to help David choose the best machinery for his situation.
At that point he divided the class of twenty-one students into study groups of three and had a student give everyone a copy of the agricultural engineering bulletin. The teacher then placed the following statement on the board and asked each student to study the tables in the bulletin and complete the statement: “David should buy a plow because .” Another student distributed blue half sheets of paper for students to use to record their recommendations.
Students were again reminded of David’s specific factors and allowed to begin the study on which their recommendation to David would be based. As the seven groups studied, the teacher assisted them. The teacher helped some figure out how to read the reference tables and charts. Others were reminded of factors they needed to consider. The teacher reviewed the conclusions previously developed by the class for others. At one point the teacher asked for everyone’s attention while David explained whether he planned to trade tractors or change the tires on his tractor. In one case the teacher praised a student for her performance in the basketball game the night before. Of course, the teacher also answered many questions raised by the students.
When the teacher sensed that most students were ready to offer their advice to David, the class was called back together. Then the teacher had the students hand in their sheets of paper containing their recommendations. As the teacher went through the recommendations a student kept a tally. The most popular recommendation was for David to buy a hydraulic lift, five-bottom, 16-inch plow.
The teacher then used group discussion to list on the board the reasons for this recommended decision and completed the blanks in the statement given to the students before they embarked on their study.
The teacher revealed that David had checked with an agricultural engineer and two local equipment dealers. In addition, David had already developed a tentative decision. David was then asked to present these results. All of the advice David had received agreed with the class’s majority recommendation.
In concluding the problem, the teacher then had each student use the agricultural engineering bulletin to make the same decision for his or her own situation. Students without tractors or land helped classmates with their individual problems. Once again the teacher supervised each student’s progress.
Notice that in this case the teacher builds on some of the group teaching techniques examined in Chapter 6. However, the teacher also adds new dimensions to the students’ learning experiences. In this instance, students pursue learning as individuals and in small groups.
It has been pointed out previously that a variety of learning experiences are important if optimum learning is to be fostered. Not only should teachers use a variety of group teaching techniques but they should also use individualized teaching techniques. This provides variety as well as diversified learning.
There are other important reasons for using individualized teaching techniques. In the case presented, each learner had a different situation and, as away of drawing the problem solution to a conclusion, each learner worked on his or her specific problem.
There are other differences among learners that can also be addressed by using techniques that are designed for use by each learner as an individual. Differences in interests, reading level, speed of learning, background experiences, interest span, learning styles, and learning goals can be better addressed when students pursue learning individually rather than when all the students in a class get the same lesson regardless of whether they need it.
OBJECTIVES
After studying this chapter, you will be able to
- Explain the reasons for selecting individualized teaching techniques.
- List and explain the use of the basic individualized teaching techniques.
- Successfully plan for instruction using individualized teaching techniques.
- Successfully use individualized teaching techniques.
- Explain the factors to consider in selecting an appropriate individualized teaching technique for a given situation
WHY USE INDIVIDUALIZED TEACHING TECHNIQUES?
Before selecting a teaching technique that is more individually centered than group centered, a teacher of agriculture should consider why individualized teaching techniques are best suited in some cases. Based on such a consideration, the teacher can match the needs of the students with techniques that best meet those needs.
Individualize the Learning
If there is one truism about learning, it is that each individual is different and should be taken from where he or she is to where he or she is capable of being. Unfortunately, teachers frequently have a difficult time of individualizing instruction such that it actually meets the specific needs of each learner. The ideal situation would be one in which specific goals are established for the course and each learner can achieve these goals in a manner consistent with his or her needs and abilities. For each goal, each learner could have the best materials, approaches, and levels of assistance available and an expert diagnostician would individually prescribe learning experiences. The student would then be individually and personally guided through the prescribed learning experiences. However, such a utopia does not exist. Nevertheless, most teachers of agriculture can use a number of basic individualized teaching techniques with at least some variety of learning resources and personal assistance to help students learn as individuals.
Foremost in the agriculture teacher’s mind should be the realization that learners are different. They have different learning styles and varying levels of aptitude, interest, energy, previous experience, opportunity to use given information, and long-term goals. Although teachers may not have precise measures of the extent to which these differences exist among students, they do have a general sense of the nature of these differences. Of course, there are some areas of difference for which there is specific information available, for example, reading level, general intelligence, verbal ability, and quantitative ability. Wise use of such information should be made.
Students also have different needs, calling for individual or at least varying treatment in the development of the learning process they are to follow. Students’ goals differ. Some may want to become purebred animal breeders, whereas others only want and need to know the basics of animal breeding. Some have extensive projects in an area and need to go beyond the basics the teacher typically teaches. Then there are students who have a unique interest for which the teacher will want to provide special opportunities for them to study, but the whole class need not study that specific area. For example, there may be one student in a horticulture class that is tremendously interested in orchids. This student may already be growing a few orchids at home and desires to study in depth the cultural practices that are currently recommended. Such a desire should be accommodated if possible. In a production agriculture class located in a community that has almost no poultry, there may be a student who has an insatiable interest in poultry and, in fact, is quite involved with poultry at home. Here again this student’s need for studying poultry is quite different from the rest of the class. This need can be addressed using individual teaching techniques. The prudent agriculture teacher recognizes these individual differences and meets as many as possible.
Help Students Learn to Inquire into Subject Matter
Another laudable goal of individualized teaching techniques is that they help students learn to inquire into subject matter. The principle of learning to which this refers is important because it increases learning. Teaching must help students learn more and better.
Whenever most individualized teaching techniques are used, students are individually involved with seeking information. They are not cast into roles of waiting for the teacher to tell them what they need to know. They are not limited by what someone else decides to tell them. Rather they control their own learning. They discover as much as their current level of capability allows.
Through teaching techniques aimed at the individual rather than the group, students gain valuable practice at inquiring into subject matter. They thereby begin to instruct themselves and become independent problem solvers.
Promote Independence
A primary aim of all teachers should be to help students become increasingly independent of the teacher. Otherwise students leave school with the mindset that teachers are the source of knowledge; teachers solve problems; teachers make decisions. Obviously teachers do not want to foster such a mentality.
The best way to avoid this dilemma is to ensure that students gradually learn how to learn in ways other than directly from the teacher. Using individual teaching techniques, this goal can be realized. As students begin to work individually and have precalculated successful experiences, they become increasingly less dependent on the teacher as a source of knowledge.
Learn to Make Use of More than One Opinion
When students pursue learning using teaching techniques designed to accommodate individual learners, they quickly discover that there are many sources of knowledge and many opinions to consider in solving their problems and arriving at individual decisions. This is crucial to the future success of students. If such strategies are used in solving problems in school, it is likely that students will follow similar models later in life. Thus, instead of functioning with one opinion or source of knowledge, students will learn to consult a variety of sources of information in arriving at important decisions and in solving the problems they encounter in life.
Learn How to Evaluate and Apply Information
Teachers of agriculture should teach students how to evaluate and apply information using individualized teaching techniques. No teacher wants students to leave a program routinely accepting whatever information is presented. Therefore, as a part of teaching students how to learn independently by using individualized teaching techniques, the teacher must teach students how to properly evaluate factual information.
Teachers should teach students to distinguish between objective information and subjective information. Textbooks, experiment station bulletins, extension documents, and curriculum material service references provide objective information. Such information has been developed based on objective data and analyses.
Subjective information is highly opinionated and has little basis in fact. Examples of subjective information include hearsay stories, personal claims of others, some Internet sites, and any other information that cannot be supported by specific documentation. Teachers also need to teach students to be wary of accepting information in advertisements and promotions without thoughtful evaluation.
Clearly, the Internet is a valuable source of information. However, caution must be exercised in selecting the information that we use from this source. Check the validity and reliability of all sites before judging the information to be objective and factual.
Teach Students How to Learn
A final role of individualized teaching techniques involves teaching students to learn independently; the teacher is not always available to personally assist them. There are many times in the classroom and laboratory when the teacher cannot immediately assist a given student. Granted, the very nature of providing for individual needs requires teachers to provide individual assistance to students. However, while the teacher is helping one student or a small group of students, the remaining students must be able to continue to learn and to behave in an acceptable fashion.
Students develop this ability when they practice using individualized teaching techniques and realize that they cannot simply wait for the teacher. Rather they must move on to other tasks until the teacher is available. Otherwise, the class would always be in chaos because while the teacher helps one student the remainder of the students cease to learn until the teacher can attend to them.
BASIC INDIVIDUALIZED TEACHING TECHNIQUES
In this chapter only the fundamental individualized teaching techniques that are frequently used are presented and explained. Readers are given insight into the purposes for which they are suited, explained how to plan for using them, and provided practices to follow in the use of each. The techniques presented include supervised study; experiments; independent study; the use of student notebooks; and using information sheets, assignment sheets, and skill sheets.
SUPERVISED STUDY
Case 7-1A: If you had to teach one of the following problem areas, how would you do it?
QUESTIONS TO BE ANSWERED
- How much fertilizer (and what analysis) should be applied to my corn?
- Which Christmas tree varieties should we start this year to maximize our market potential?
- What should be the timing setting on the tractor I am working on in lab?
Whatever your teaching specialty, or whichever question you selected, there are obviously any number of ways you could proceed to answer the question. However, in each case, there is an element that suggests that learning where to find the current information makes the most sense, either because each learner has a different situation or because the specific answers change from one year to another.
In order to analyze the charge that was given, question 3 from Case 7-1A will be used, and a daily plan that can be followed to teach its solution will be developed. The reader is encouraged to sketch out a personal daily plan before studying the authors’ proposed daily plan.
Case 7-1B: Proposed plan for Case 7-1
| Directions to self | Key content |
|---|---|
| List on the board the makes and models of the tractors currently in the lab | 1. John Deere 2. International 3. Ford |
| Distribute handout 3-1 | Makes and models of student-owned tractors (attached) |
| Ask students | "What is the correct timing for each of these tractors?" Possible student responses: "Don't know" "It differs" |
| Ask students | "Why do timing specifications differ?" Possible student responses: "Models and types of tractors" "What tractor is used for" |
| Ask students | "Can we use a rule of thumb?" Student response: "No." |
| Ask students | "Why not?" Possible student responses: "Won't work for every tractor" "Not specific enough" |
| Ask students | "Then how will we be able to have the answer to this question whenever it arises?" Possible student response: "Use operator's manual" |
| Show Transparency 3a | Content is written on transparency. |
| Distribute manuals | OK. Let's each look up the specifications for your tractor in lab or at home |
| Assist each student | (Note to the reader. Early in the year the teacher must teach students how to efficiently use all the types of references to be used in the course.) |
| List several timings on board | Pull from page 5 in owner's manual (see attached notes 3-N-1) |
| Brainstorm on board a list of places students can locate this information whenever they need it | Possible student responses: "Tractor dealership" "Extension office" "Owner's manual" (see attached notes 3-N-2) |
| Develop on board a list of problems created if they don't take time to look up the specifications | Possible student responses: "Tractor won't run" "It will damage other parts" (see attached notes 3-N-3) |
Analysis of Solution to Case 7-1B. Some group teaching techniques were used (see Chapter 6), and there was also time when each individual studied or learned on his or her own. The individual study used in the preceding solution is called supervised study. It allows each student to learn to use basic reference materials, to find answers for themselves rather than depend on the teacher as their source of knowledge, and to obtain the specific information they need without being burdened by the information needed by everyone else in the class. It also allows the teacher to have some time to work with each student individually.
But what does it take to make the use of supervised study a success? This question can best be answered by considering this sequence: planning the supervised study, conducting the supervised study, terminating the supervised study, and developing conclusions based on the supervised study.
Planning the Supervised Study
If a supervised study is to be effective, the teacher must plan it just as any other technique requires teacher planning. Teachers must identify what they wish to accomplish through such study, decide on the resources to be used, be sure of the subject matter outcomes that are desired, and plan how they will conduct the supervised study. The objectives selected must be achievable via supervised study. Most of the objectives to be achieved through supervised study will be cognitive or affective. However, in the case of the development of psychomotor skills, a demonstration (a group technique unless it is shown to one student at a time) followed by actual practice by the student (the individual practice could be considered as supervised study) could be used. In the case of the psychomotor skills there could be prior study of a supervised study type that would prepare students for a demonstration followed by actual practice by the students.
Teachers also need to plan ways to gain the interest of students and create, on the part of students, a “felt need to know” (see Chapter 4) so the students will be willing to invest time and energy in finding answers such that they remove the felt need and actually solve the problem. Following the procedures described in Chapter 5 regarding the interest approach may help. For example, a teacher wanting students to solve the problem, “Which timber stand improvement practices should we use for our school woodlot?” might generate interest as follows.
Interest Approach. (1) “The FFA has been given the authority to manage the school laboratory woodlot however we see fit. Any earnings from improvements will be shared equally between the school board and the FFA. Our class has the responsibility of deciding what practices to use and then following through during class and lab time.” (2) Lead students to realize they do not know what the best practices are. (3) Suggest gathering information and developing a plan of action.
The teacher should plan the lesson with structure and direction. This is usually accomplished by developing study questions to guide students as they seek information needed to solve the problem. Oftentimes, a problem is too broad to be the only thing students focus on as they gather factual information. By breaking the study down into a series of phases, through the use of study questions, students experience success and enjoy supervised study. In operationalizing supervised study, a teacher may decide to use group discussion to develop the questions for the supervised study. Nevertheless, teachers need to know in advance the study questions they wish to draw out through group discussion; therefore, they still need to have them recorded in their unit of instruction. In the example of timberstand improvement practices, study questions might include.
- What are the recommended timberstand improvement practices?
- What factors should be considered in deciding which practice or practices to use?
Another planning decision is what type of supervised study should be used. There are at least six basic types of supervised study that could be used:
- All students study the same problem using the same reference.
- All students study the same problem using different references.
- Small groups of students (often called study groups) study the same problem using the same references.
- Small groups study the same problem using different references.
- Small groups study different problems using the same references.
- Small groups study different problems using different references.
The decision to have students study individually or in groups will be based on several criteria. If references are limited, the teacher may have to use group work. Perhaps the teacher believes that there are many times when students need to practice working in small groups and arriving at small-group decisions because such activities are so much a part of the real world. Sometimes teachers have students work individually so they can foster independent inquiry. Times like these allow the teacher to give specific attention and to help students as individuals.
The choice of uniform or varying references may have to be made based on what is available. However, many times different references are purposely used to allow the teacher to better match the reading level of the material to the students’ reading needs, to challenge the more capable students, or to provide students with the opportunity to learn that there are a number of sources of information, or to learn that everyone does not agree on how some things should be done. In the case of the timberstand study questions, the teacher could go either way, depending on the secondary learning outcomes he or she wished to promote.
Teachers also need to be familiar with the resources available for supervised study in order to make good planning decisions. The major materials the teacher needs to effectively conduct supervised study serve as references for students to use in their study. Printed materials are usually associated with supervised study. However, one needs to realize that supervised study could be set up and conducted using a field trip, an experiment, a resource person, a film, a slide presentation, an Internet activity, a telephone interview to gather information, or any number of other ways. The key notions are
- The problem is clearly defined.
- Students understand what information they need to discover.
- The teacher directs their efforts toward the desired end.
The authors of this book do not subscribe to a narrow view of supervised study as consisting of only reading in class, but rather they argue that supervised study can involve essentially any resources from which students can learn. The resources listed in the accompanying display can be used effectively with supervised study.
Printed materials
- Books
- Curriculum materials known as student references
- Extension bulletins
- Commercial flyers
- Magazines and journals
- Activity guides
- Job sheets
- Internet printouts
Visual materials
- Videos
- Slides
- Pictures
- Transparencies
- Internet sites
- CD-ROMs
- DVDs
Audio materials
- Tape recordings
- Telephone inquiries
People
- Resource people
- Talking to experts in the field
Experiential resources
- Field trips
- Experiments
- Observations (such as field studies in natural resources)
Additionally, teachers need to develop and write into the unit of instruction the conclusions students must arrive at through supervised study. This means the teachers need the correct answers to the study questions as well as final conclusions for the problem. Otherwise the discussion that must follow a period of supervised study will be too vague and fragmented. In the timberstand example the conclusions to the problem might be listed in the unit of instruction as follows:
Case 7-2: Listing possible student responses
| Directions to self | Key content |
|---|---|
| Develop conclusions with class: | |
| Write on blackboard | Types of practices recommended for our area: (Possible student responses) 1. clear cut 2. selective cut 3. leave natural for wildlife habitat |
| Show Transparency 3 | Factors to consider: 1. topography of the land 2. traditions in the area 3. environmental considerations |
| Brainstorm options on board and choose one | Our decision is, "we should in the woodlot." (To be developed by students based on the facts relative to their woodlot.) (Possible student responses) 1. cut down the trees and sell them 2. leave the trees natural 3. Sell only the black walnut trees |
| Tell students | Write this in your notes with your rationale. |
Conducting the Supervised Study
Although thorough planning is essential to having a good supervised study, teachers must also use sound practices in the actual conduct of supervised study. The first important activity in conducting quality supervised study is to get students started in a smooth and purposeful fashion. This is an impossible task unless students have been taught how to use a supervised study session. The following suggestions can be used in teaching students how to use supervised study.
Suggestions to Follow in Teaching Students How to Use Supervised Study
- Teach students what resources are available, where they are located, how to find them, and when and how you expect them to be returned.
- Teach students how to use basic printed reference materials. This requires teaching students how to effectively use a table of contents and an index. In addition to a verbal explanation of how to use these two tools, try planning several exercises whereby students need to find a reference and locate certain material. To add a little excitement, let the class compete to see who can complete the exercise in the least amount of time. Following the first exercise or so, show the students how you would have located the desired information, thereby giving them a frame of reference against which to compare the procedure to follow.
- Teach students to access search engines on the Internet and to locate information on the World Wide Web.
- Teach students how to record notes. If students are not taught how to take notes during supervised study, they tend to write down everything verbatim. You must help students learn how to glance at headings, skim the passage, and identify the major concepts. Then the students need to learn to record only the most pertinent key points that apply to the question on which they are working. A good way to help students master the ability to select only the key ideas to record in writing is to provide a practice exercise. Have them look at the appropriate reading and, as a group, discuss what they believed was important. You can distribute notes to the class that indicate what information you would have recorded. Following the next few assignments you could again distribute model notes against which the students can compare their efforts. Early in the year the students’ notes should be collected and evaluated (not necessarily graded in these initial trials) so students develop good note taking techniques. Unless this degree of emphasis is given to note taking, supervised study will never reach its potential. Teachers also need to give students supervised practice at taking notes when viewing a video or taking a field trip.
- Furthermore, students need to learn what to record in their notebooks and how to record it. Once the class has developed conclusions for a problem, these class conclusions also go in the notebook and are labeled as such.
- Finally, teachers need to teach students how to report the findings of their supervised study in class. This is also the beginning of teaching students how to speak in public. It is rather routine when students simply report their answers to a study question either on the board or orally. However, teachers often have students complete a more detailed study and in varying subareas of the problem or problem area. In these cases students need to give minioral reports. They need to be coached on how to do this effectively.
Once students begin their supervised study, the teacher needs to focus on the task of supervising the study. Actually, the teacher is overseeing and directing the learning of each individual student.
Suggestions to Follow in Supervising the Study of Individual Students
- Stay in the room. This is not a time to check the mail, place phone calls, or visit with other teachers.
- Direct the study of students. Do not try to plan lessons, grade papers, or attend to correspondence. During supervised study, the teacher’s responsibility is to direct the learning of each student, and this is a full-time responsibility.
- Observe students as they work. Spot problems and offer help. For example, if a student has great difficulty locating pertinent information, offer assistance. If a student has trouble reading, provide help (you or another student can read with the student).
- Keep students productively involved. Nip misbehavior in the bud. Keep yourself positioned so you can see most of the class whenever assisting a given student.
- Question findings; challenge more capable students.
- Use this as a time to offer recognition to students who crave attention. Pass on an encouraging word to students who are feeling down.
- Spot situations in which students are on the wrong track and correct the problem.
- Ask why. Probe.
- Point out poor note taking and help the student do better.
If teachers attend to tasks such as these, supervising the students’ study will be effective and will take all the time available to the teacher. If these guidelines are ignored, supervised study will be chaotic and ineffective.
Providing for Individual Differences. During periods of supervised study, teachers have an excellent opportunity to provide for individual differences. If there are students with differing reading abilities, the teacher can assign a resource that is appropriate for each student’s ability. Students who are poor readers might use a simple leaflet, whereas more accomplished readers might use advanced reference works or journal articles.
Another way of providing for differences is in the scope and depth of the assignment. For students with limited previous experiences in the area being studied, basic questions may be assigned. In the case of students with considerable background, questions that require synthesis may be assigned.
In the case of both reading ability and extent of background, the teacher may elect to mix students who read well with those who need help reading, so as to let students help one another.
Supervised study is a good time to provide individual instruction for the student who learns at a slower rate than the others. It is also a time to counsel, to encourage, and to otherwise address personal and emotional differences of students.
Terminating the Supervised Study
Teachers who actively direct learning during a period of supervised study will have a very good sense of when to terminate the study period and move toward obtaining closure on the problem. Seldom can one wait until everyone finishes, and yet one dares not conclude the study period as soon as the first few students have completed their assignment. The middle ground must be worked. That is when most students have answered the study questions or otherwise completed the assignment, terminate the study. Also, consider having additional work ready for students who finish early. In this way, all students continue to be actively engaged during the entire period.
Developing Conclusions Based on the Supervised Study
Once the students have completed their supervised study, either individually or in small groups, it is important for the teacher to work with the class to develop final conclusions. This is particularly true in situations in which the whole class is working on a common problem or problem area. If this is not done, there is not enough opportunity to clear up misconceptions, elaborate on crucial concepts, or put the class’s findings together to determine the most accurate and complete conclusions.
This time of developing conclusions with the class allows for students to express themselves as well as to listen to the viewpoints of others. It also gives the teacher a good opportunity for quality instruction based on the students’ informed study. Of course, the development of these conclusions provides an excellent summary for the problem as well. However, good lead questions must have been developed by the teacher previously and written into the unit of instruction.
As the teacher works with the class to develop conclusions, it is important that time be taken to point out specific practices learned in the supervised study that students need to use in their experience programs. Such practices will later be summarized in the unit of instruction as a list of approved practices for the problem area.
But the teacher must help the students develop another important dimension to their conclusions: general principles. It is not enough to only conclude the specific facts learned or how certain problems are solved. It is also crucial to be sure the students understand why certain concepts are true, why certain practices are best, and why certain information learned in one problem area is applicable to other situations.
Recall the principles of teaching and learning related to transfer of learning (see Chapter 2). It is the responsibility of the teacher to guide students in understanding why certain answers or solutions are correct because understanding why means that underlying concepts and principles are made explicit and their meaning understood. When these procedures are followed in using supervised study to solve problems, students will learn and teachers will be successful in their teaching.
EXPERIMENTS
Consider the examples in Cases 7-3, 7-4, and 7-5.
Case 7-3: Baby chick experiment
A teacher in a small animal care program was beginning a unit of instruction on balancing rations. The students did not believe they needed to worry about learning how to balance rations. Their view was that it did not matter as long as you give the animals enough food.
Rather than arguing about it, the teacher said, “OK, let’s see.” Louis, one of the students, was then instructed to purchase two baby chicks at the local cooperative and was given a purchase order. The next day Louis came to school with two baby chicks, and the teacher had him put them in separate cages located side by side.
The teacher prescribed (and furnished) a balanced ration for chick A. The students were allowed to develop whatever feeding plan they chose for chick B. The students decided to feed chick B the food they enjoyed. So they gave it potato chips, cola, and milk chocolate candy.
Then the class developed a record sheet for each chick to be used each day in recording the date, the food the chick received, how much it consumed (grams and milliliters), and a description of each chick’s general appearance. Within a matter of days the students asked the teacher to call off the experiment.
Chick B was not looking healthy. Its wings were drooped, its legs were weak, and it could not open its eyes or hold up its head. The chick on the balanced ration had gained weight and in general looked healthy. The class concluded on its own that diet makes a big difference. The students readily agreed they needed to learn more. The use of a simple experiment had created a felt need to know more about animal nutrition.
Case 7-4: Feed testing analysis
Later in this problem area the same teacher had the students each take a measured quantity of gerbil food and separate out the various ingredients. Each component was identified with the help of the teacher and selected reference materials, then weighed. The students calculated the percentage of the food that each ingredient provided.
The teacher then led the class in deducing the formulation of the feed through testing with chemical kits. By using this quantitative experiment, students discovered specific factual information through their own inquiry.
Case 7-5: Poinsettia experiment
When a horticulture teacher was challenged by three students as to the necessity and value of shading poinsettias, the teacher did not argue. Rather, she had each of the three students select one poinsettia from the crop and separate it from the rest, which were shaded. When their plants were the only three not showing color for Christmas, it was clear to them that the practice of shading was necessary and the reasons for it as taught in class were valid. Thus, they were able to decide for themselves what practice was best. As a result they changed their behavior.
Now, consider these examples of using experiments to promote learning. What is the value of having students use experiments as a way of learning?
The Value of Using Experiments
When students conduct experiments, either individually or as a group, there is a high degree of real involvement and hence interest. Students who are actually involved in their learning learn more and better. In the case of conducting an experiment, students must use their minds. In addition, they are also physically involved in setting up the experiment, making observations and collecting data, and developing their conclusions. They are, in essence, creating their own information. When this is done well, it is a very success-oriented and student-centered form of learning.
Another value of experiments as a teaching technique is that it is a way of graphically illustrating important concepts, theories, or approved practices. When students try different ways of growing a plant, shrub, animal, or bird, and then are able to see the difference one way makes over others, a very lasting impression is formed. Students no longer have vague ideas about the problem being studied. They have a very specific understanding of the results of solving the problem in various ways.
The use of experiments in teaching agriculture also helps students learn to think systematically. In teaching students how to conduct an experiment, it is very important that the teacher emphasize the importance of being systematic, clear, and thorough. Students learn to think things through, to be specific, to keep careful records, and to be precise in carrying out their plans. They also learn to proceed in an orderly, step-by-step fashion. These are important traits for students to develop as a result of their schooling.
A final value of using experiments in teaching agricultural subject matter is that it causes students to have to study the facts they gather and then draw conclusions. They learn that conclusions cannot be properly developed without considering all the facts. They also learn that a conclusion is different from the facts. In other words, one must study the facts and then develop a conclusion that is based on the facts. For example, if a student in horticulture decided to see if using bottom heat when propagating chrysanthemum cuttings was superior to propagating without bottom heat, the student would have to collect data on which to formulate a conclusion. The data may reveal that the mums with bottom heat had a 90 percent rate of rooting, whereas those without bottom heat had a 65 percent rate of rooting. Based on this data the student could conclude that the use of bottom heat gives one a higher percentage of rooting than if bottom heat is not used. The facts were not reiterated; rather, a basic conclusion was advanced. Notice that the conclusion was specific and did not go beyond the evidence on which it was based. The student did not conclude that the use of bottom heat was best and rightly so because, for example, there were no data available on the added cost of using bottom heat. Such a conclusion would have gone beyond the scope of the data. When students develop sound conclusions based on the analysis of the pertinent information that is available, an important ability has been developed.
Planning for Using Experiments as a Teaching Technique
When teachers decide that they have an objective or a problem with which an experiment can best be used to meet the objective or solve the problem, then the nature of their planning for the students to meet the objective or solve the problem is quite a bit different from their planning to conduct a supervised study or give a demonstration. In the case of planning a supervised study or demonstration, for example, a teacher records key points to be developed and how to go about developing this information. In the case of planning a problem solution when an experiment is the teaching technique, the teacher needs to plan how to direct the process to be used by an individual student, if only one student will do an experiment, or a process to be used by all of the students, if the experiment is being done by the whole class or specific groups within the class.
Thus, the basic planning teachers need to do is to identify an appropriate experiment or experiments that will provide the information needed to solve the problem. They then need to outline the procedure to follow in conducting the experiment (see Case 7-6) and develop a list of supplies and materials needed. Teachers should also plan a system for gathering the data. It would also be wise to jot down the basic findings and conclusions the experiment is intended to reveal to the students. Perhaps the sample plan in Case 7-6 will provide a model to consider when planning the use of an experiment as the technique for teaching the problem solution.
Case 7-6: Sample of the type of plan needed to use an experiment
| Directions to self | Key content |
|---|---|
| Materials needed: three engines, timing lights, wrench set | Question to be answered: Why do we need to time an engine to a specific degree of accuracy? |
| Conduct trial discussion to see how much the class knows (Create divisions of opinions as to reasons why careful timing is needed.) |
"John, what do you think?" "Jodi, do you agree?" |
| Suggest that students try several ways and learn firsthand why accurate timing is important | Anticipated findings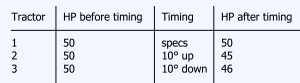 |
| Ask students | "What is the horsepower output of engines?" • Then time one engine specifically as outlined in the manual. • Then time one engine 10 degrees before manufacturer's specifications. • Then time one engine 10 degrees after manufacturer's specifications. |
| Ask students | "Now, what is the horsepower output of all three engines?" |
| Compare results (see anticipated conclusions) | "Let's look at what happened." |
| Draw conclusions (see anticipated conclusions) | Anticipated conclusions If you time an engine 10 degrees or more different from the manufacturer's specifications, you can expect to lose horsepower. |
Procedures to Follow in Having Students Conduct Experiments to Solve Problems
The first procedure for teachers to follow in using experiments to solve problems is to create interest. Suggestions on how to do this are discussed in Chapter 5.
The teacher then needs to help the individual student or the group, depending on the setting in which experimentation is used, plan how to conduct the experiment. The amount of assistance the students need will vary, as is the case with any technique. The teacher’s role is to help the students think through the procedures to be followed. Of course, there may be times when teachers choose to distribute a handout that lists the procedures. Whichever procedure is used, it is important that the students are clear as to what the goal is. They should also be encouraged to use reasoning to predict the outcomes of the experiment. This is important because students need to learn to use prior knowledge in anticipating answers to new problems. They need to be willing to predict and then check the accuracy of their predictions.
Once the students know how to proceed and what materials are needed, the teacher supervises the experimentation. This is true for experiments students conduct at home as well as at school. Teachers need to be sure procedures are correctly followed, questions are answered, and data are correctly recorded.
Once the data are collected, the teacher needs to help students analyze it and develop sound conclusions. This may be done on an individual basis or during group work. Whatever the procedure followed, if the problem is of interest to more than one or two individuals, the results need to be presented and discussed with the group.
Reporting the Results of the Experiment
Once the experiment has been completed, and if the information derived from the experiment is needed by the entire class, the student or students involved should make a report to the class. There are several reasons for this reporting. First, it is a way of sharing knowledge; all the students benefit from what was learned in the experiment. Second, the student(s) reporting will learn to sort out the important key points that need to be shared with others. Third, by reporting to the class, those giving the report have one more experience of speaking to and communicating with a group.
If this reporting to the class is to be successful, teachers need to teach students how to develop and give a report. Case 7-7 presents an outline students can use in organizing their report.
Case 7-7: Sample format to follow in reporting on experiments
FORMAT TO FOLLOW IN REPORTING ON EXPERIMENTS
Title: (What was the experiment about? Keep it simple and clear.) Example: “How does pH affect the growth of my ?”
Purpose: (What did you try to accomplish?) Example: “The purpose of this experiment was to see if too low a pH would reduce the yield of my .”
Procedures: (A step-by-step synopsis of how the experiment was conducted.)
Findings: (The important data presented in the form of tables, graphs, or charts.)
Conclusions: (Based on this experiment, what can we now conclude?) Example: “As pH drops below the recommended level, .”
Once reports are given, the teacher must be sure that what has been learned is clearly summarized. One needs to refer to the problem on which the students were working and make sure the key conclusions are written in each student’s notebook.
Using Data from the Research of Others in Teaching the Solution to the Problem
Agriculture teachers must rely on the findings of the research in agriculture if they are to teach current information. From the time research is conducted until it is reflected in basic texts, as many as five years may have passed. In an industry that is as technologically dependent as agriculture, teachers must keep their instruction up-to-date. Once a teacher has students using experiments as a way of learning, it is very natural to also bring in the results of experiment station research and other research as well.
It is best if the teacher relates the basic notion of the experiment in story fashion rather than being overly formal. In other words, put the research in nontechnical terms and at the level of the students.
Once the background, setting, and procedures have been explained, the good teacher will ask the students to guess what happened. This generating of possible answers (hypothesizing) is important because students must develop the ability to analyze a situation and deduce possible outcomes.
Findings should be presented in clear and simple terms. High school students need not be burdened with statistical jargon or research design lingo. Rather, the teacher can merely indicate, for example, that the researchers found that if people do things a certain way they make more money than if they do them other ways.
In presenting numerical findings in the form of charts, the teacher may want to leave some cells blank and have the student estimate the numbers that go therein. This forces students to spot trends and identify relationships. The same notion can be used with a graph. Draw it to a certain stage, then ask the students what they think the remainder of the graph will look like.
Some Suggested Experiments to Use in Teaching Agriculture
Following is a list of ideas for experiments to be conducted in agricultural instruction. It has been developed to help you begin to think of other good ideas for using experiments in your teaching. These experiments may be completed at school or in another part of the students’ supervised experience programs.
| Teaching specialty | Ideas for experiments |
|---|---|
| Production agriculture | The effect of amperage on strength of welds. How does the plant population per acre affect yield? What herbicide controls weeds best? Which ration is best for a given species of livestock? Which practice controls a given disease best? How does irrigation affect profit? Which fasteners are best for wood? How does date of planting affect yield? |
| Horticulture | What is the most effective way to propagate a given plant? The effect of rate of fertilization on plant quality. The effect of temperature on flower color. Which variety is best for a given situation? What is the best way to control a given insect or disease? The effect of sterilizing versus not sterilizing soil on plant growth. |
| Agricultural/industrial mechanics | The effect of temperature on oil viscosity. The effect of combine cylinder speed on corn harvest losses. The effect of tractor weighting on wheel slippage. How does the size of the gap of a spark plug affect engine starting performance? |
| Small animal care | What is the best temperature for the water in an aquarium? The effect of a nonbalanced diet on guinea pigs. The effect of a given chemical on internal parasite infestation. The effect of temperature on the spread of disease. |
| Natural resources | How to attract wildlife to a given area. Comparison of erosion control practices. What is the most effective way to control pond algae? The effect of given chemicals on soil life populations. |
INDEPENDENT STUDY
Independent study is any form of study that is conducted by an individual student. Supervised study where each student works on his or her own or an experiment that a student conducts alone are both considered independent study. The same is true to a certain extent for the supervised experience program of students outside of school laboratory time. However, there can be good independent study apart from these examples.
The Role of Independent Study
The primary role of independent study is to meet the needs of individual students. Students have different interests, abilities, and rates of learning, and independent study can speak to all of these differences. For the student who learns quickly, independent study offers the chance to go beyond minimums, to expand and enrich one’s basic ability. In the case of a student who from time to time cannot participate in a given learning experience because of a physical disability, independent study offers a potentially meaningful alternative. This independent study may take the form of students reading on their own. It could also involve the use of programmed materials, self-paced instructional units, computer-assisted instruction, or any of a number of other alternatives. For example, independent study could consist of job placement, interviewing selected agribusiness people, or doing a laboratory project on one’s own.
Just as in the case of supervised study, the use of independent study fosters independence on the part of the student. During the use of independent study the teacher takes a facilitating role. The student is, in essence, in charge of his or her own learning. Learning to learn on one’s own is a highly desirable outcome from using independent study as a teaching technique.
Another role of independent study as a teaching technique is that it offers variety. Students get tired of discussion, supervised study, and any other technique if it is overused. If independent study is made exciting and within the range of challenge for each student, it helps greatly in bringing a fresh perspective to the learning environment. However, one must help students learn how to study independently and to experience success from doing it.
How to Promote the Use of Independent Study
The first requisite to promoting independent study is that the teacher be sensitive to unique interests and abilities of individuals in a class. Teachers have to work at knowing individual differences. Individual interests can be determined in a number of ways. We can survey the students to get their list of special interests in agriculture. We also use home visits, FFA activities, and other times when we are with a student or small group of students to learn their particular areas of interest. Of course, every teacher needs to constantly be on the lookout for special interests of students. During the year, a student may encounter a problem in a supervised experience program that warrants time for independent study. This independent study may be carried out at school or at home, in class or lab, or outside of class or lab.
Teachers who decide to promote independent study will need to teach students how to study independently. Many of the study skills associated with supervised study, for example, how to use a table of contents and an index, and how to take notes, will be used in conducting independent study. In helping students engage in an independent study, teachers will need to provide the students with some degree of structure. This structure offers direction and meaning. A good way of providing this structure is to use a format for students to follow in organizing their study. The format in Case 7-8 is suggested.
Case 7-8: Sample format to use for independent study
What is the problem to be solved?
What are the questions that must be answered?
What references will I use?
What steps will I follow in conducting my independent study?
What will I learn from my study (a summary)?
The teacher needs to suggest independent study for students at times and in ways that make it clear that independent study is a reward and not a penalty. Independent study involves freedom, a chance to do something different from the other students, and an opportunity for students to study areas in which they are most interested. Teachers ought to be willing to allow well-conducted independent study to substitute for what would otherwise be some “normal” work. Otherwise, independent study becomes a burden for many students.
Planning for Students to Study Independently
The teacher planning required for using independent study will be different from the planning needed when using other teaching techniques. As students indicate a desire to do independent study, teachers will need to draw on their personal knowledge of available resources to help each student decide where to look for information related to the independent study. Teachers also need to help develop questions to guide the study. The least teachers should do is to check the list of study questions to be sure the student is following the proper course of action and is being thorough in the study.
Teachers of agriculture should have a place where students can study independently. Such a place can also be used for students to study for career development events during study halls or other free time. A very satisfactory arrangement is to have a study carrel at the back of the room. It should be equipped with an electrical outlet and be capable of housing a slide projector, an audio tape recorder, a CD player with headphones, and possibly a computer.
During the course of the independent study there needs to be interaction between the student and the teacher. Questions need to be aired, opinions offered, and progress checked. Once the student completes the study, the teacher needs to take time to thoroughly evaluate the student’s efforts and offer specific comments that indicate what the student did well, as well as areas for future growth.
Making Use of What Students Learn from Independent Study
Independent studies need to involve more than students studying on their own and writing reports. As with all career and technology instruction, it is important that the learning be applied. The teacher should help the student find opportunities in which to use the key points from the independent study. For example, if a student uses independent study to learn how to build a brooder for quail or pheasant chicks, the teacher could have the student follow up this study by constructing a brooder in lab and then raising a batch of chicks to be released as a supervised agricultural experience.
There will also be times when the class will want to hear about the specifics of a student’s study. When this is the case, the teacher should provide an opportunity for the student to report to the class. The teacher also needs to advise and coach the student on how to deliver the report effectively.
THE USE OF STUDENT NOTEBOOKS
An essential aid to learning is for students to have high-quality student notebooks. Getting students to have high-quality notebooks requires a high degree of commitment on the part of the teacher. It also requires that the teacher use student notebooks in such ways that students see the value of keeping good notes. When this happens, teachers of agriculture have developed another important teaching technique they can use.
Why Notebooks?
Student notebooks provide a way for students to organize and accumulate their learning. Through the very process of organizing learning, students are able to begin to see how the questions to be answered in each unit of instruction, and how each unit of instruction in the course, fit together to make the whole. As the notes in the course begin to accumulate, students begin to realize how much they have learned. This helps them recognize that the agriculture course is a place where serious learning occurs.
Taking and keeping good notes promotes learning. Consider the educational implications of the following chain of events. At the beginning of the class the teacher focuses everyone’s attention on the problem being studied. Students have to locate the logical place in their notebook for today’s notes. They see that what is ,being studied today is connected with what they learned yesterday. Then as the day’s lesson proceeds, students hear important ideas; they see key points on the writing surface, overhead projector, computer projection, or other media; and they write these important key points in their notebooks. As they write their notes, they probably repeat them silently and certainly see the key points again as the notes are recorded on paper. This repetition and use of multiple senses increases the amount that is learned and retained.
A final justification for student notebooks is that they become an excellent reference for future use. As students encounter difficulties in lab, in supervised study, conducting experiments, or engaging in independent studies, they are able to refer to their notes for help. This should also be true when they are placed on a job or completing a project. Likewise, notebooks are an essential reference whenever students are studying for quizzes, tests, or examinations.
Suggestions to Follow in Getting Students to Keep Quality Notebooks
The first requisite for quality student notebooks involves teaching students how to set up their notebooks for their studies. The teacher can suggest a common system of organizing the notebooks. It is a good idea if all students have the same type of notebook. In fact, teachers will experience much more success with notebooks if every student has the same type notebook. Suitable three-ring binders can be bought in bulk for the class, and the cost of these can be included in the fees for the course. The teacher also needs to look at the course of study and decide how the students’ notebooks should be organized. Tab dividers can be used for the major divisions of the course.
In addition to being sure all students have notebooks with the same subdivisions, the teacher needs to teach the students a format for their notes. Many teachers insist that notes be kept in ink. Such decisions reflect the preference of the teacher. Each day’s entry should be dated. The title of the problem area should appear at the head of each new section of notes. Each problem needs to be labeled. Then, under each problem, students should record factual information, and, before moving to a new problem, the conclusion or a decision needs to be labeled and recorded. In order to be sure students use the format desired, the teacher should distribute an outline of the format at the beginning of the year. Teachers also need to distribute sample sets of notes as models of how they want notes to be kept.
Teachers need to devote some time to explaining to students why they want good notebooks. Former students can come to class to attest to the usefulness of a good notebook. Teachers should include notebook grades in determining grades for each marking period. With this kind of importance attached to notebooks, students are apt to be willing to do a good job of keeping an agricultural education notebook.
It is also important for teachers to help students learn to take good notes. This is best accomplished by teaching so as to facilitate good note taking. In essence, anything that needs to appear in the students’ notebooks needs to be visually displayed before the class. This could be written on the writing surface, projected onto a screen using various media, displayed on a flip chart, or hung on the wall or bulletin board. The information should be organized on the writing surface precisely the way the teacher wants it to appear in the students’ notes because invariably the notes of students reflect that from which they have recorded. If the teacher underscores captions, so do the students. If the teacher uses poor grammar or misspells, so do the students. If the teacher uses a header to organize sections of notes, so will the students. Thus, teachers need to provide the model from which their students’ notes will be derived.
Suggestions to Follow in Making Effective Use of Student Notebooks
Students will not have good notebooks unless they are taught to record and use the notes in meaningful ways. It is crucial that teachers refer students to their notes whenever they raise questions that have been answered in their previous studies. This is true whether the question is raised during class or lab. Get students into the habit of referring to their notes as a source of useful information.
Another good way for students to use their notes meaningfully is to allow them to be used as a reference for solving problems and answering questions on quizzes and tests. When notes are used, they are more likely to be well kept. Nevertheless, unless the teacher takes time to do a good job of periodically evaluating students’ notes, they will probably do a less than superior job of note taking and note keeping.
Evaluating Student Notebooks
Student notebooks should be graded at least once each marking period, but doing so more often will bring positive results. Rather than wait until the last minute, teachers should systematically grade a few notebooks each day over a period of several days. This way the teacher does a much more thorough job, and students can receive more detailed feedback than when grading is done in a crash effort.
Teachers should decide how much of the grade for the marking period will go toward notebooks. The percentage must be high enough to make a difference in the grade but should not be ridiculously high such that the student can earn a respectable grade from his or her notebook alone. Somewhere between 15 percent and 25 percent of the course grade is suggested. Students should know this at the outset of the course.
Furthermore, a score sheet should be developed and made available to the students and followed by the teacher as notebooks are graded. Scoresheets allow teachers to bring objectivity to the grading process and to provide specific feedback to students as to their strengths and weaknesses. Case 7-9 shows an example of the kind of score sheet a teacher could use.
Case 7-9: Score sheet for grading agricultural notebooks
| Categories | Possible points | Points received |
|---|---|---|
| Neatness | 10 | |
| Completeness of notes (all days) | 20 | |
| Thoroughness (pages dated, problems listed, key points recorded, conclusions included, handouts included) |
30 | |
| Accuracy of information | 30 | |
| Plans of practice recorded | 10 | |
| Total | 100 |
During the first few weeks of school the teacher needs to intermittently check each student’s notes to be sure the student is developing appropriate note taking habits and skills. Otherwise, students may be penalized for errors they did not realize they were making. In addition by waiting until the end of a grading period, students will have had time to form bad habits that are difficult to change.
USING INFORMATION SHEETS, ASSIGNMENT SHEETS, AND SKILL SHEETS
Another way of individualizing learning is to have students use specific study sheets that are designed to guide each student’s learning experience. These types of sheets are most often used with laboratory learning. Three different types of these sheets are suggested: information sheets, assignment sheets, and skill sheets.
Information Sheets
Information sheets are short handouts that provide basic information (the what, why, and how) a learner needs in order to perform at a particular skill level or to complete a given job. Such sheets could introduce the learner to information for the first time, or more likely they could be used as a synopsis or summary of previous classroom study. Figure 7-1 shows an example of an information sheet.
STARTING MOTORS AND SWITCHES
The starting motor is designed to turn the engine crankshaft with enough speed to get the engine started. To get this job done, a large amount of current is needed for a short period of time. The wires, switches, and starting motor must be heavy duty in order to handle this large amount of current. The lightweight switches and wires used in the rest of the electrical system would be destroyed immediately if they were used to carry the large amount of current used by the starter.
Switches used in the starter circuit are always low-resistance, high-capacity units but they may be either manually or electrically operated. Through the use of a heavy-duty switch mounted on or near the starter, extra lengths of heavy-duty wire from the battery to the control panel and back to the starter can be eliminated. The heavy-duty wire can then go directly from the battery to the starting motor switch and the starter. The switch may then be controlled by a mechanical control or by current carried by lightweight ignition wire and a remote switch.
The electrically operated switches use the principles of the electromagnet for their operation. They are designed like an electromagnet except that the core is movable. When the current is not flowing through the coil, the core is held part way out of the coil by a spring. As current flows through the coil, the core is drawn into the center of the coil. When the current is turned “off,” the spring forces the core back out of the coil. This electromagnet with a movable core is called a solenoid. The movable core of the solenoid is then connected to the movable part of the heavy-duty starter switch. In this way, the heavy-duty starter switch can be controlled from almost any location merely by using lightweight ignition wire.
Basically, the starting motor, or starter, is a direct current motor designed to provide high power for a short amount of time. It is designed to use a low-voltage source of electrical power, such as a storage battery. Because the voltage of the electrical energy used is low, the amount of current (amperes) used must be very high to produce the amount of power that is needed.
Although the starter is highly complex in design, it works on the same basic principles as the electric motors discussed Unit IV, “How Magnetic Forces Make an Electric Motor Work.” The same electrical forces that made the motor you built run make the starting motor do its job. Naturally, the starter is much more complicated but it also produces much more power. If the starting motor is properly maintained, it is almost trouble free in operation.
The various components of a starter are identified in Illustration XI-A.
Annually or after every 500 hours of operation some maintenance work should be performed on the starter. The following operations should be carried out.
- Remove and check the brushes. If they are worn to less than half of their original length, they should be replaced.
- Remove glaze from the commutator. This can be done easily by using a strip of fine sandpaper held against the commutator while the armature is turned by hand.
- Check for signs of overheating. If such signs exist, for example, solder thrown out of the commutator or charred insulation on the winding wire, take the starter to a service shop for expert repair.
- Ensure that all connections on the heavy-duty wire from the battery to the starter are clean and securely connected. If the insulation on the heavy-duty wire is cracked or shows signs of deterioration, the wire should be replaced.
Starting motors and switches are designed to do very difficult jobs, especially in cold weather. They should be kept in top condition if they are to work properly. When they are used, they must carry a large amount of current. Dirt and worn parts will reduce the performance of the starter and increase the drain they place on the battery.
Cutaways of two starters are shown in Illustration XI-A.
Figure 7-1: Information sheet
Source: Ohio Agricultural Education Curriculum Materials Service (1970). Individual Study Guide on Electrical Systems for Spark-Ignition Engines. Used with permission of The Ohio State University and released under CC BY NC SA 4.0.
Assignment Sheets
An assignment sheet is used to tell the learners the assignment(s) they are to complete. This sheet also includes information about how to complete the assignment and how to check one’s work on completion of the assignment to ensure nothing was overlooked. Figure 7-2 illustrates an assignment sheet.
1. Assume that you are working in the floral shop at your school. Given a list of delivery and pick-up addresses, several special deliveries, and a map of your hometown, plan a delivery route.
Resources
- Map
- Telephone directory
- List of delivery addresses
- Several special deliveries (specific times)
- List of pick-up addresses
- Pen, pencil, paper
Procedure
- Locate general delivery area
- Locate and mark each delivery address
- Locate and mark each pick-up address
- Plot the most efficient delivery and pick-up route and trace the order of delivery
Performance checklist
- You are using a detailed, up-to-date city map.
- Delivery addresses and pick-up addresses are distinguished by different symbols and colors.
- No routing is made on opposite directions on a one-way street.
- Most pick-up addresses are planned for the return trip to the shop.
- No backtracking is planned.
- Special deliveries are given top priority in the delivery schedule.
- You have planned the most efficient use of delivery time with the least amount of mileage.
2. Plot several delivery or pick-up locations around your school grounds (building). Practice loading the delivery vehicle with floral designs and unloading these designs at the assigned locations. (Plan the most efficient and time-saving route.)
Resources
- List of destinations
- Clip board
- Floral design (tagged)
- Holding devices
- Delivery vehicle
- Floral kit
Procedure
- Load floral products and secure with holding devices
- Double check loaded products with list of “addresses”
- Unload floral products
- Pick up used products
- Unload used products (at shop)
Performance checklist
- All floral products are secured by holding devices of some kind.
- Floral products are arranged in order of delivery (first to be delivered in front; last to be delivered in back).
- All the delivery bags face the front of the truck.
- Floral products are carried upright to and from the truck.
- Pick-ups are loaded last.
- Seat belt is fastened whenever delivery vehicle is running.
Glossary
C.0.D.—Cash on delivery; the customer will pay for the product when it is delivered.
Holding devices—Racks, braces, sandbags, etc., used to hold or support floral products upright during deliveries.
Order routing—The process of mapping out a path of travel for delivery according to destination, delivery date, and delivery time.
Supporting references
Pfahl, Peter B., and P. Blair Pfahl, Jr. The Retail Florist Business, Fourth Edition, Danville, Ill.: The Interstate Printers & Publishers, Inc.
State Highway Department
Mapquest.com
Figure 7-2: Practical application of assignment sheet
Source: Stratman, T.S. (1976) Retail Floriculture. The Ohio Agricultural Education Curriculum Materials Service. Used with permission of The Ohio State University and released under CC BY NC SA 4.0.
Skill Sheets
Skill sheets are much like assignment sheets, except they are more limited in scope. Skill sheets focus on a specific skill and provide guidance to the learner in developing and mastering the skill. In addition to skill sheets, teachers use pictorial guides, illustrations from textbooks, Internet sites, and CD-ROMs to accomplish the guided step-by-step process for which skill sheets are used. Figure 7-3 shows a sample skill sheet.
HORTICULTURE LEARNING CENTER
Instructional Program Area—Floriculture Production
Duty Area—D—Managing Greenhouse Crops, Poinsettia Production
POTTING POINSETTIAS
Task 03
PURPOSE:
The roots of poinsettias are exceptionally brittle, therefore care must be used when handling while potting. Carelessness and rough handling will result in a large number of dead plants. Therefore by using as much care as possible, you should be able to successfully pot as many poinsettias with a 100% live factor as specified by the instructor.
REFERENCES:
- Commercial Flower Forcing, Laurie, Kiplinger, and Nelson, (5)
- The Greenhouse Worker, Wotowiec, (1)
- Producing Poinsettias Commercially, (3)
MATERIALS:
- rooted poinsettia cutting or poinsettia cutting in 2 1/4″ pots
- watering devices
- sterilized potting soil
- pots
- empty flats
- waterproof markers
- plastic labels
PROCEDURE:
Your instructor will tell you how many pots you are expected to do. They will also specify the pot size and the number of plants per pot.
- Begin by locating the assigned area in which you are to work.
- Move sufficient quantities of pots, labels, and flats to the potting area. Be sure there is a sufficient supply of sterilized potting soil available to complete the job.
- Determine the cultivar name and the color of the poinsettias you will be potting.
- Gently remove the rooted cutting from the propagation flat or the shipping carton. If you are transferring from 2 1/4″ pots, tap the cutting from the pot. Do not remove more cuttings than you can grade and pot in 15 minutes. If root systems dry out the plants are dead.
- Before potting, it is essential that you grade the poinsettias for uniformity in height and development. If one of the 3 poinsettias placed in the pot is 2″ shorter than the other, the finished product will be the same. Good growing starts at the potting table!
- Using an empty flat, transfer your graded cuttings to the potting table. Place the flat of rooted cuttings to the right of the soil pile. The pots should be arranged on top of the soil pile with several empty flats to your left.
- Pick up a container with your left hand and scoop in soil to fill the container approximately 2/3 full.
- Pick up a cutting In your right hand and insert it into the pot. With your left hand, place enough soil around the base of the cutting to hold it in place. Do not fill the pot completely full with soil. Caution! Poinsettia roots are very brittle—handle gently.
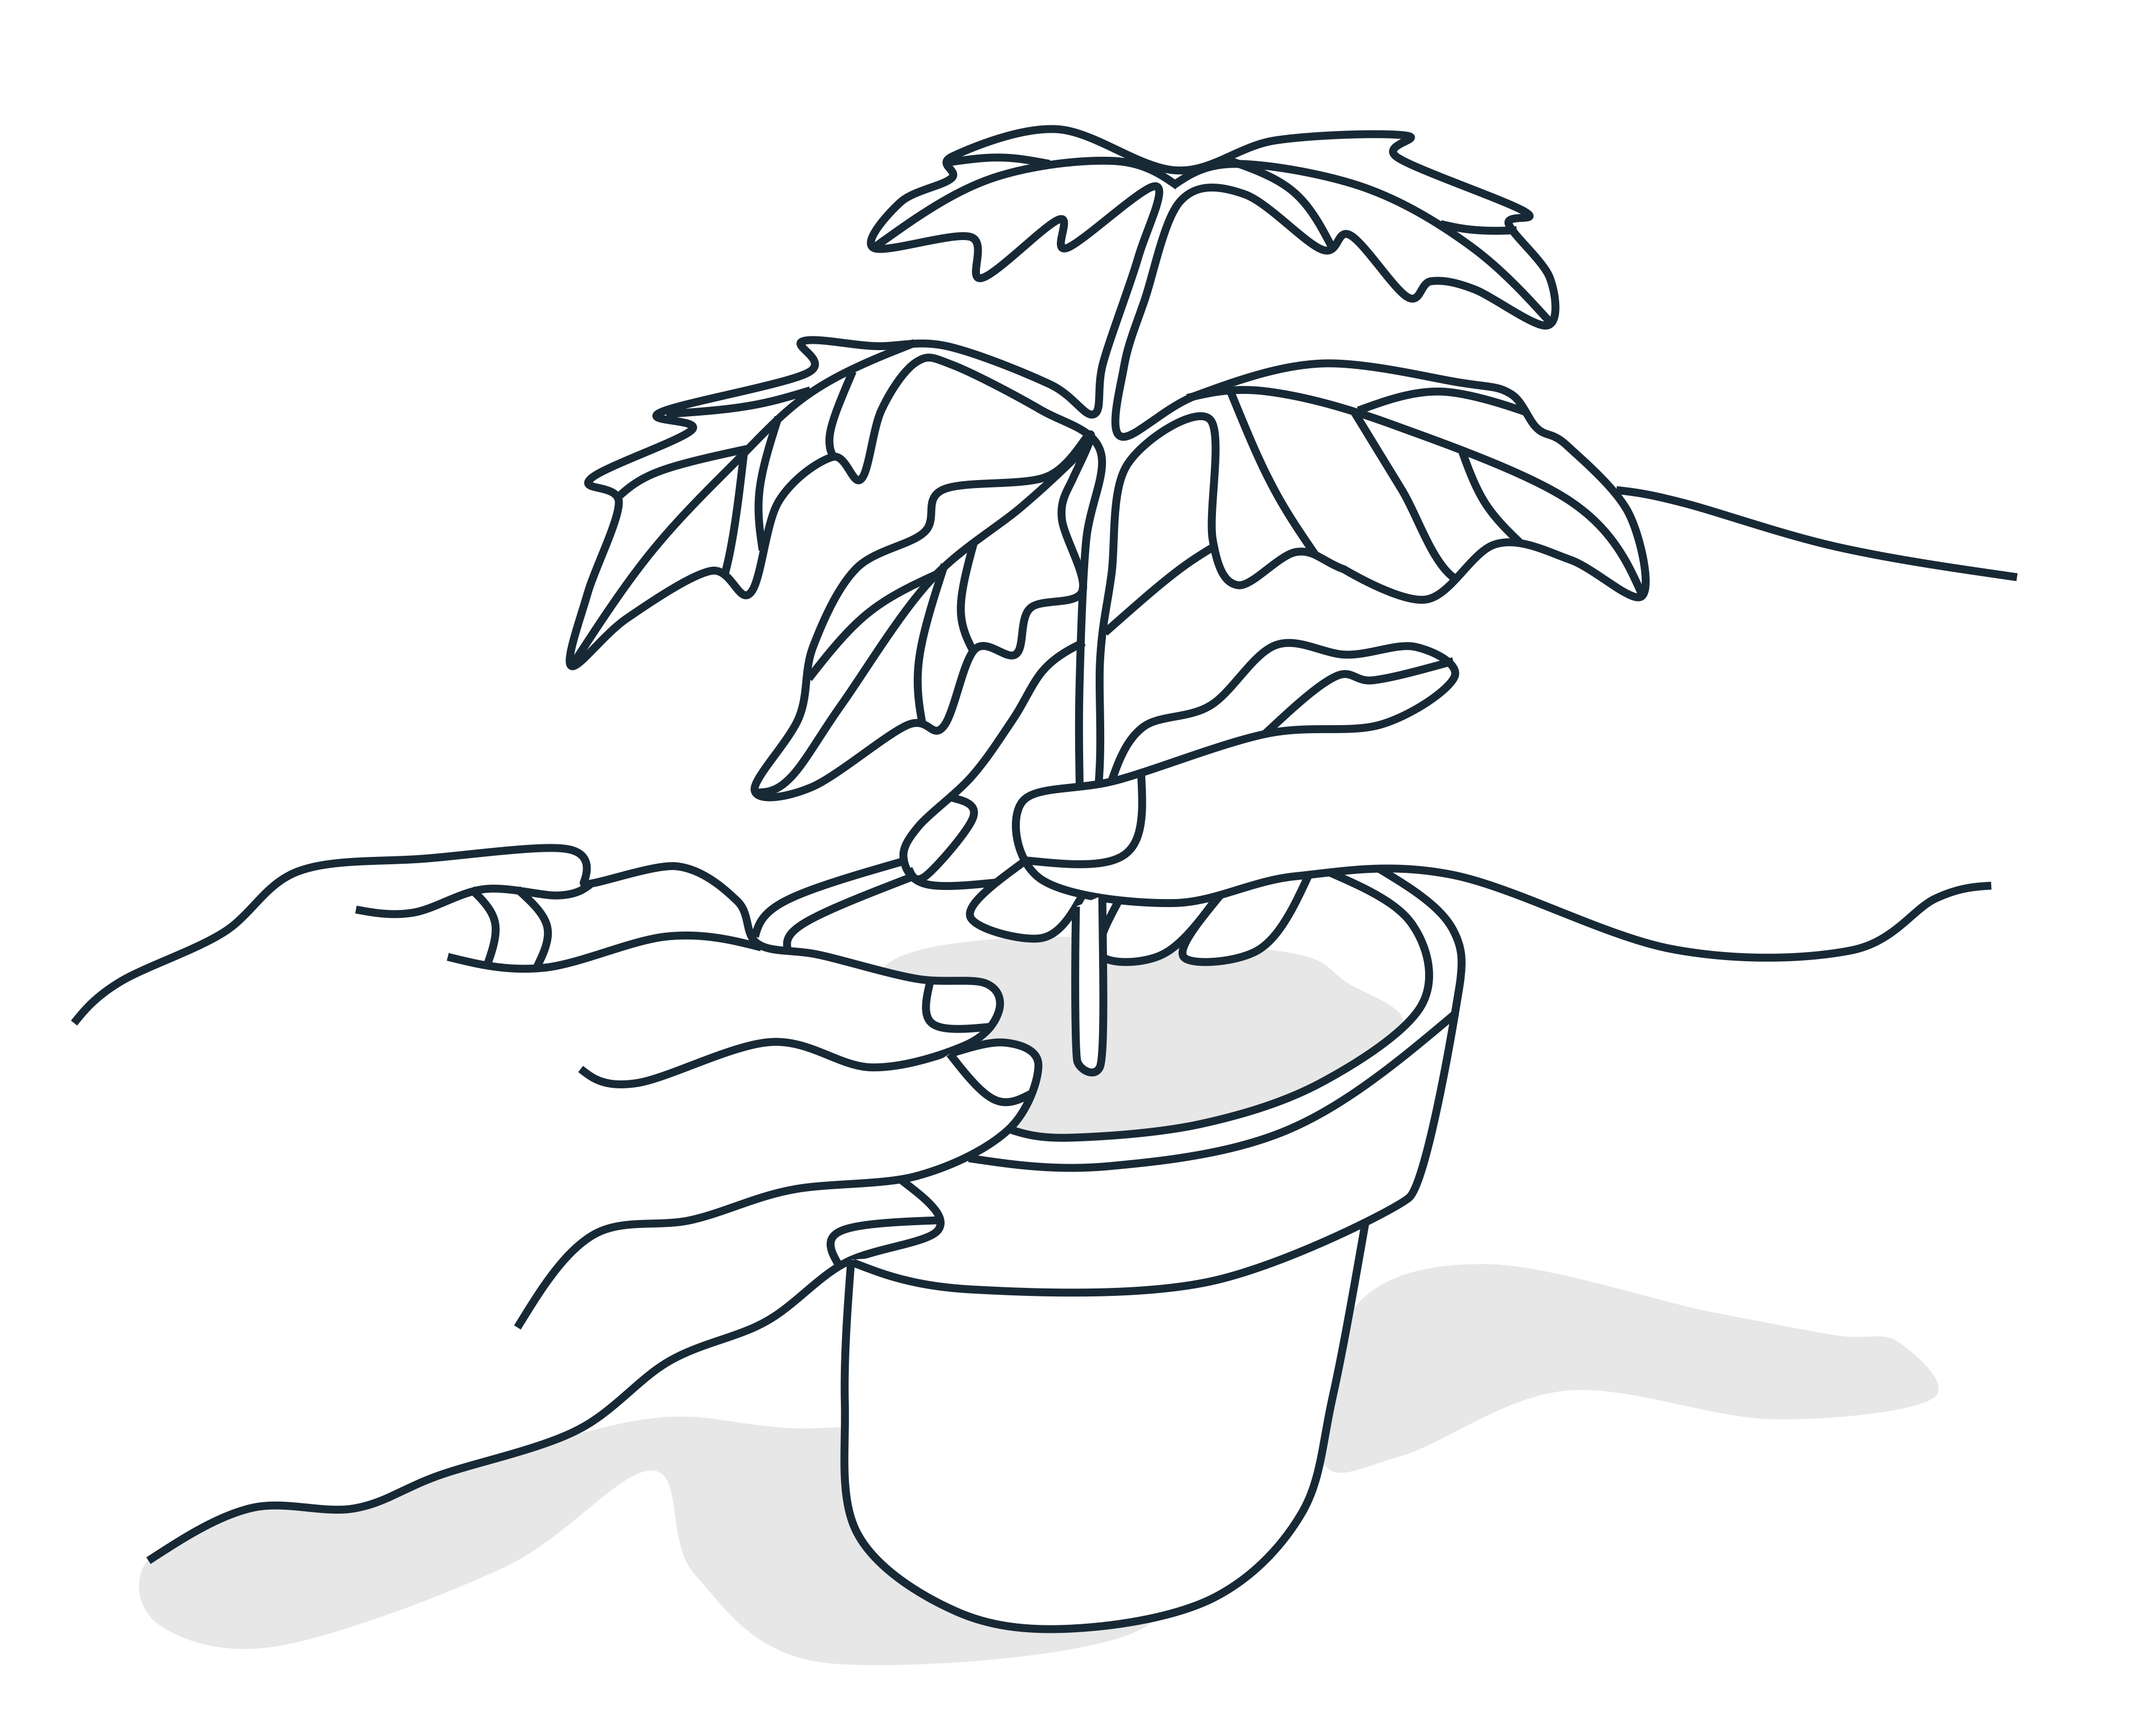
Fig 7-3A: Potting poinsettias - Insert 2 more cuttings into the pot, using the same procedure described above.
- Your 3 cuttings should be evenly spaced in the pot, leaning very slightly towards the outside of the pot, and at least 1″ from the rim of the pot.
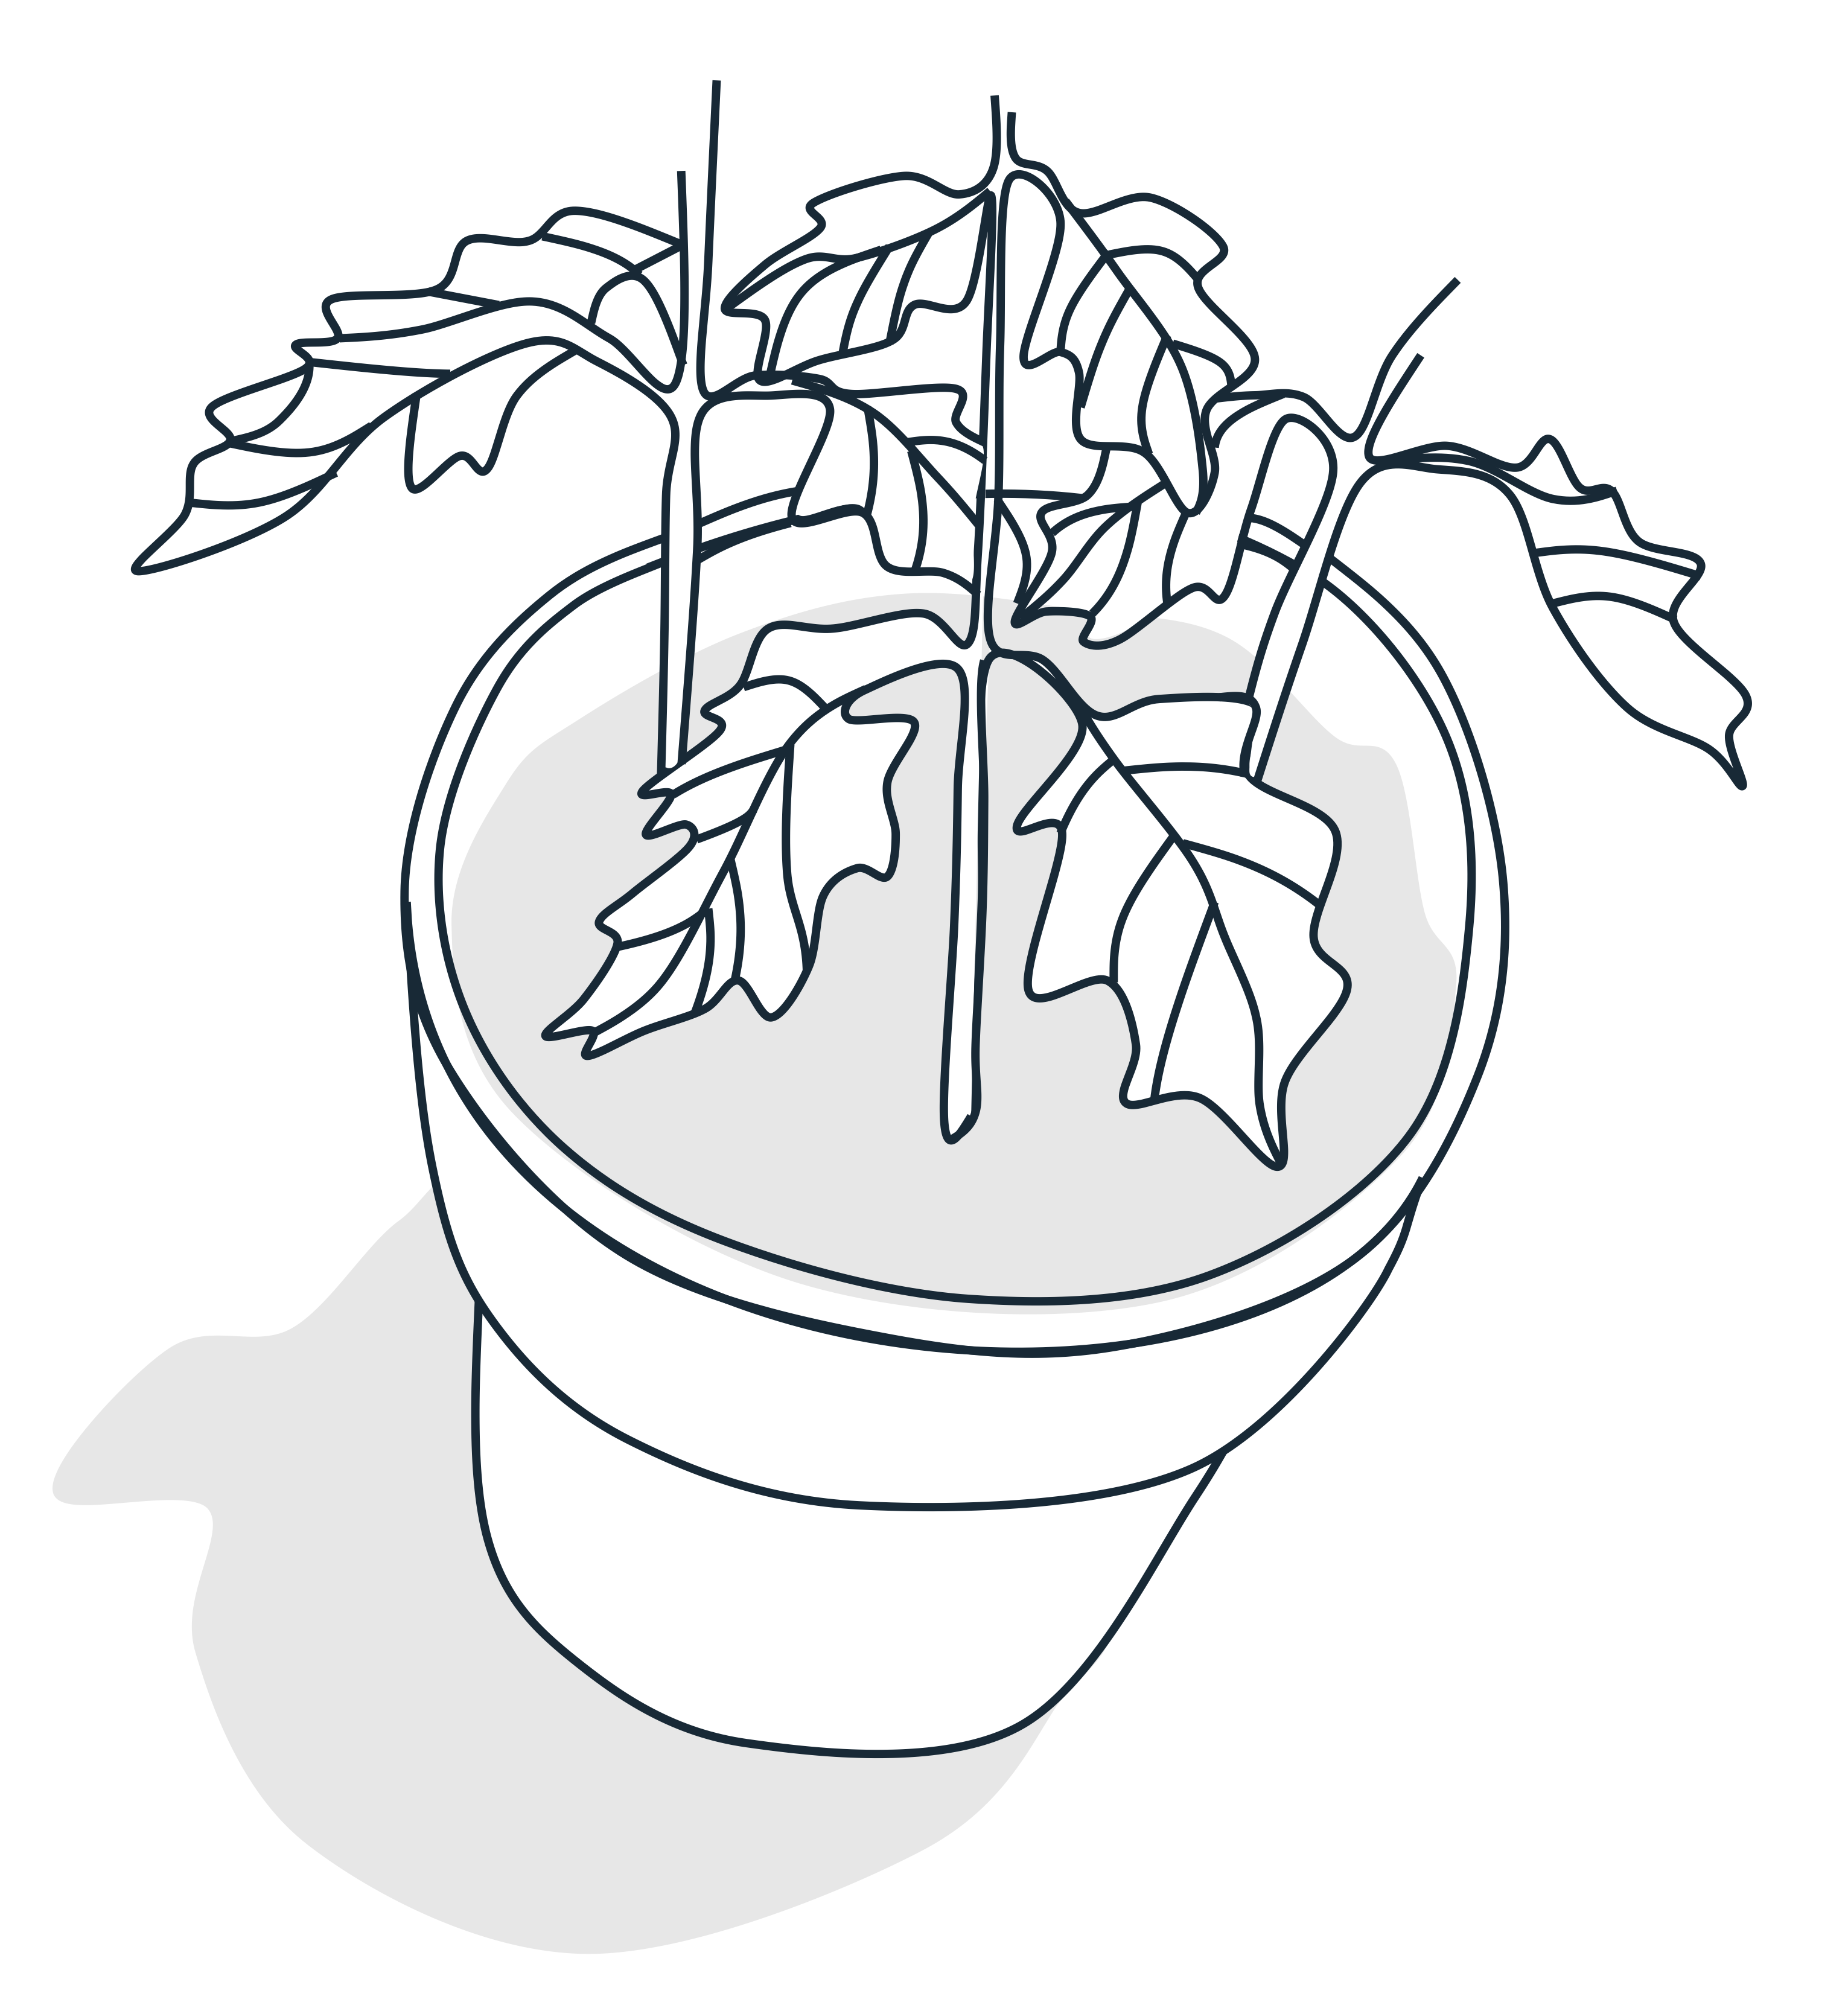
Fig 7-3B: Potting poinsettias - When all 3 cuttings have been placed, use the thumb and forefinger of both hands and firm the soil in the container around the base of each cutting.
Fig 7-3C: Potting poinsettias - Using a waterproof marker and plastic pot labels, label each pot with the following information: cultivar name, color, and potting date.
- Transfer the potted cutting to the empty flat at your left. When the flat is full transfer it to the greenhouse and water immediately.
- Your instructor will indicate your final bench placement for these plants.
| Evaluative criteria | Student | Teacher |
|---|---|---|
| The cuttings were handled with sufficient care. | ||
| Correctly traded the poinsettias for uniformity of height and development. | ||
| Cuttings were evenly spaced, correctly sloped, and not too close to the rim of the pot. | ||
| All cuttings were tight in the pot. | ||
| Correctly labeled all pots. | ||
| All pots were watered and placed at correct bench location. | ||
| Completed the assigned number of pots. | ||
| Final grade |
Figure 7-3: Skill sheet
Source: Poinsettia Production (1978). Ohio Agricultural Education Curriculum Materials Service. Used with permission of The Ohio State University and released under CC BY NC SA 4.0.
The Values of These Resources
The primary value of using these resources is that they allow students to learn at their own rate and to progress from one assignment or skill to another when they are ready to progress. These aids are narrow in scope and written at a reading level suitable for the majority of students, and they allow the students to be very actively involved in their learning.
Another benefit offered by these aids is that they provide structure for learning. The learning task is clearly stated. The outcomes to be accomplished by completing the sheet are clear. The materials that are needed to complete the sheet are spelled out. The steps to follow are logically sequenced, and often they are accompanied by illustrations designed to improve the clarity of instruction. Finally, these aids often provide the students with a self-rating form. Each of these features contributes to bringing structure to the learning activity.
Use for These Resources
One of the best uses of these resources is to teach specific skills. Once students have had specific instruction for a skill and have been shown the basic demonstrations, appropriate sheets (information, assignment, or skill sheets) can be used as they practice the skill. These aids provide repetition of previous instruction and guidance to help the students pace themselves through the activity.
The guidance provided by these sheets is very important in laboratory learning because the teacher can seldom be with each student for as much time as one would prefer. Thus, students use the given sheet for supplemental instruction and are able to progress at their own rates until specific help from the teacher is absolutely essential.
FACTORS TO CONSIDER IN SELECTING INDIVIDUALIZED TEACHING TECHNIQUES
Certainly, the factors considered in Chapter 6 for use in selecting group teaching techniques also apply to individual teaching techniques. The same notions about the nature of the subject matter, objectives to be achieved, characteristics of the learner, resource materials available, time available, and teacher preference also apply to selecting individual teaching techniques.
However, there are some additional factors one needs to reflect on when deciding whether to use an individual-centered teaching technique, as well as when determining which particular individual-centered technique is most appropriate.
One important factor is the student’s readiness (See Chapter 2) for using an individualized technique. In order for a student to pursue independent study, for example, he or she must be able to organize thoughts, read, manage personal behavior, and synthesize information. For some students these conditions will never be met, whereas others may be able to function well under such conditions early in the first year of the agricultural instruction program. The background of the student also influences readiness to use individualized teaching techniques. For example, a student with considerable background and skill can probably learn by using a skill sheet, whereas someone with no prerequisite skills could not. Students who are unable to read efficiently would be less able to productively use much supervised study where textual material was the source of learning than would more efficient readers.
Another factor to consider when deciding whether to use individualized teaching is the spread of interest in a class. When there are homogeneous interests and abilities, there is less pressure for individual-centered techniques than when there is a wide variety of interests and abilities represented in the class. For example, in production agriculture, if the class consists of 95 percent farm students who have beef cattle projects, there will be less need for individual study on beef cattle than in a class of 50 percent suburban-, 25 percent farm-, and 25 percent city-dwelling students. The same is true for a class in which 35 percent own beef cattle, 10 percent have pocket pets projects, 35 percent are experiencing agribusiness placement, 5 percent are engaged in bedding plant production, and 15 percent own horses.
Teachers who have learning packets, skill sheets, and other resources for supervised study and independent study will use techniques predicated on the availability of such resources more so than teachers without them. It may take teachers a number of years to develop a sufficient variety of study guides, lab sheets, and experiments such that they are able to truly infuse individualized techniques into their teaching.
Finally, teachers must consider the need that both they and their students have for a variety of ways of learning. Group techniques alone are not enough. Students want to function as individuals, and they also enjoy the rewards of being able to pursue their study of agricultural education in a variety of ways.
SUMMARY
Agriculture teachers should use supervised study; experiments; independent study; student notebooks; and information sheets, assignment sheets, and skill sheets. By using these teaching techniques, you will be able to individualize learning, help students learn to inquire into subject matter (See Chapter 2), promote student independence, and help students in general learn how to learn in a discriminating way.
There are no shortcuts to success if teachers want to masterfully use individualized techniques of teaching. You must do a thorough job of planning, conducting, and terminating the particular type of study being used. You must also lead students to develop clear conclusions to the problems being studied.
FOR FURTHER STUDY
- List the basic educational goals furthered by the use of individualized teaching techniques.
- You are to teach a unit on fish diseases. What individualized teaching techniques would you use, and why?
- Outline the procedure you would follow in planning and conducting a period of supervised study.
- Explain under what circumstances you would use individualized teaching techniques as opposed to group teaching techniques.
- Visit agriculture teachers and observe their use of individualized teaching techniques. Peruse the teaching resources they are drawing on for the use of individualized teaching techniques.
