Getting to Know GeoCaching.com
In 4-H, there are many project-based learning opportunities designed to introduce students to STEM concepts. The geocoin Adventure provides experience with Global Navigation Satellite System (aka GNSS, GPS) technology to map and document the path of a Virginia geocoin across the country (and the world) while learning about the region, land use, and culture of the community where the coin is cached.
You will need to ensure that your geocoin is properly placed into a geocache and “placed into circulation.” You will then have the opportunity to watch the coin’s movements (using Google Earth Pro for desktop) as it moves from cache to cache. We have developed intensive instructions to provide you with everything that you need to know about geocaching and trackable geocoins to track and document successfully. Enjoy your travels!
So, you want to get started? Just follow these steps:
- Be sure to copy the serial number (usually 6 characters) that is stamped on your geocoin for future reference.
- Create a Geocaching account at www.geocaching.com if you do not have an account already. Please note that you will need to provide your email address and verify your account before it is activated. When you find or receive a trackable, you will need to grab it from the previous geocacher before it is officially yours.
How to Grab a Trackable:
- Navigate to the “Search By:” page and tap the Trackable square (Figure 1.10).
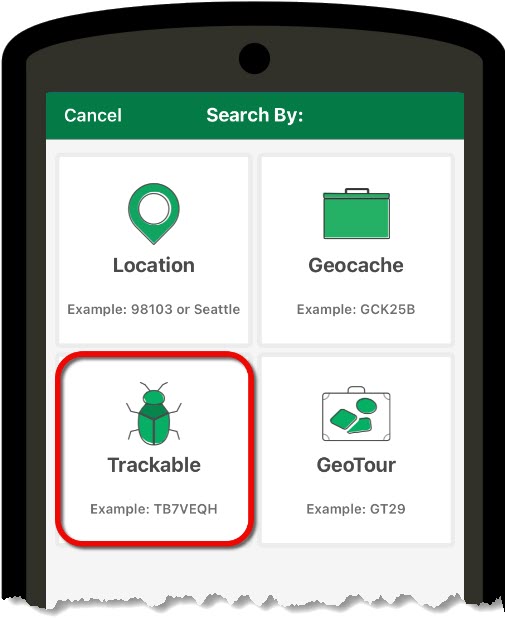
Figure 1.10: Trackable square on “Search By:” page. - Enter the Tracking Code. The Tracking Code is a super-secret six-digit code found on the trackable (see Figure 1.11). Each trackable has its own unique Tracking Code. Do not share this code with anyone else (on the web, via email, etc.) or else they can virtually take control of your coin. They need to physically find the coin to learn the Tracking Code.
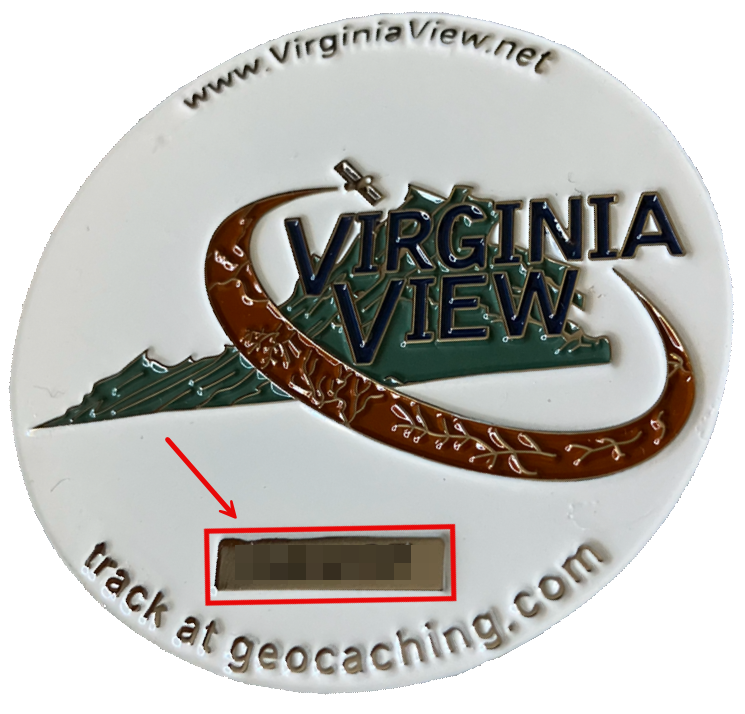
Figure 1.11: Enlarged Geocoin displaying the secret Trackable Code. - On the Trackable Details page, you will see the trackable’s (a) publicly viewable username and its (b) corresponding secret Tracking Code. Tap “Log Trackable” at the bottom of the page (Figure 1.12).
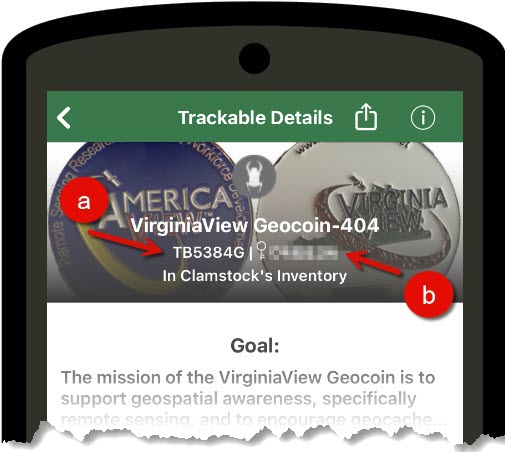
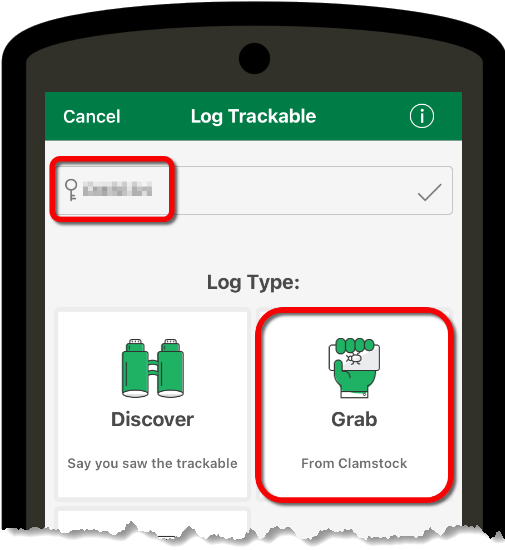
Figure 1.12: Log Trackable on Trackable Details page. - From the Log Trackable page, tap the “Grab” square (Figure 1.13). Notice the Trackable Code has been blurred out as a reminder to not share this number with anyone.
The trackable is now yours and can be viewed in your Trackables Folder from your Profile page!
To Drop a Trackable
- To allow others to find and grab your trackable, you must first be located at an existing geocache site that you have discovered.
- Return to the Log Trackable page using the same Tracking Code that you used to grab the geocoin.
- You will now see the “Drop” square option. Press the “Drop” button (Figure 1.14).
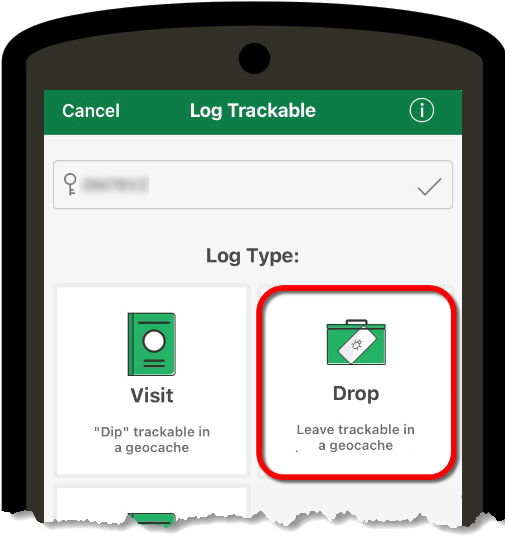
Figure 1.14: Drop square on Log Trackable page. - Tap on the geocache site where you will drop the geocoin and press “Drop” (Figure 1.15).
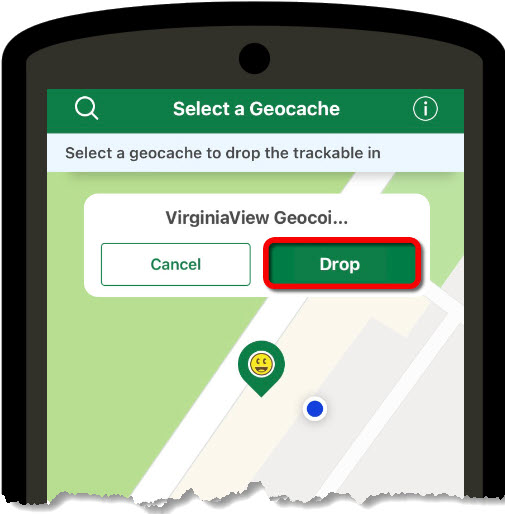
Figure 1.15: Drop rectangle on Select a geocache page.
Once you have dropped the trackable, it will be available for other geocachers to uncover!
Geocaching with a GNSS (GPS) Receiver
For those of you who want to use an old-fashioned GNSS (aka GPS) receiver, you can also discover geocaches!
- Navigate on your computer to a geocache as instructed in the Getting Started section and click on the geocache of interest. In this example, “International Roots” will be the geocache of interest.
- Click “Send to Garmin” (Figure 1.16) and allow Garmin Express to open.
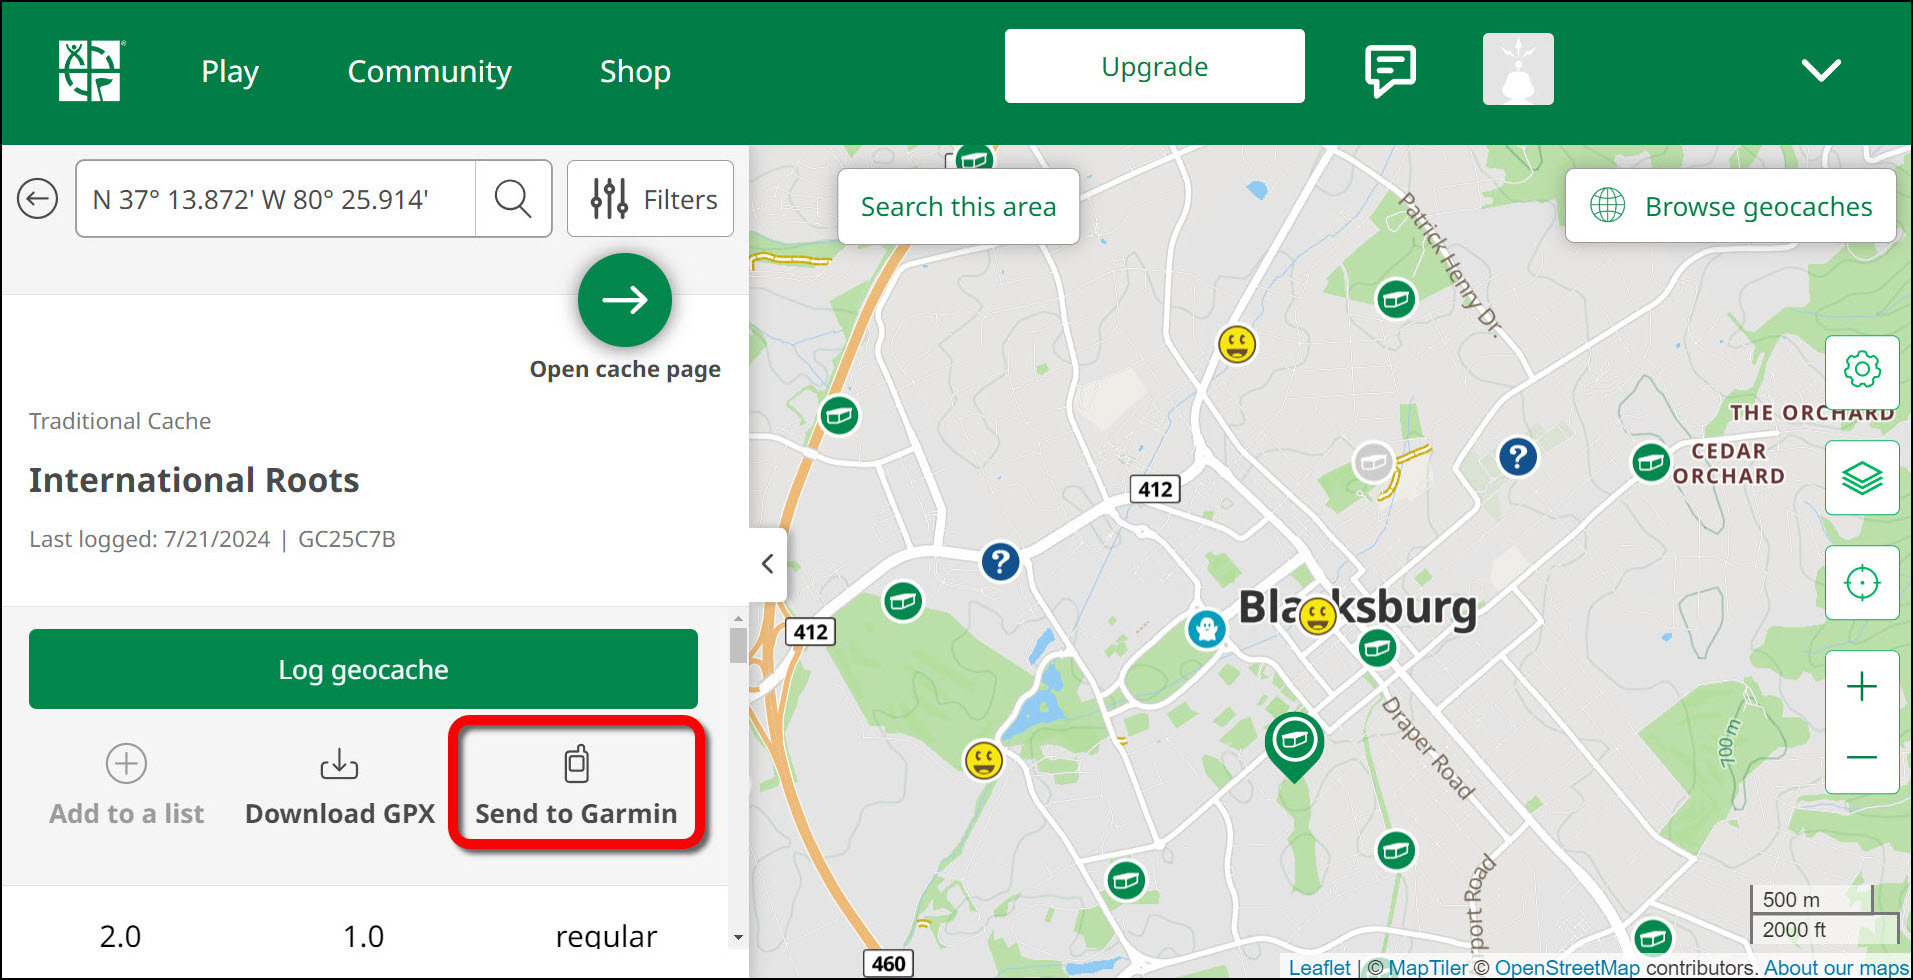
Figure 1.16: “Send to Garmin” button highlighted on Geocaching website. - When Garmin Express opens, click the blue “Download” button to send the GPS coordinates to your device (Figure 1.17).
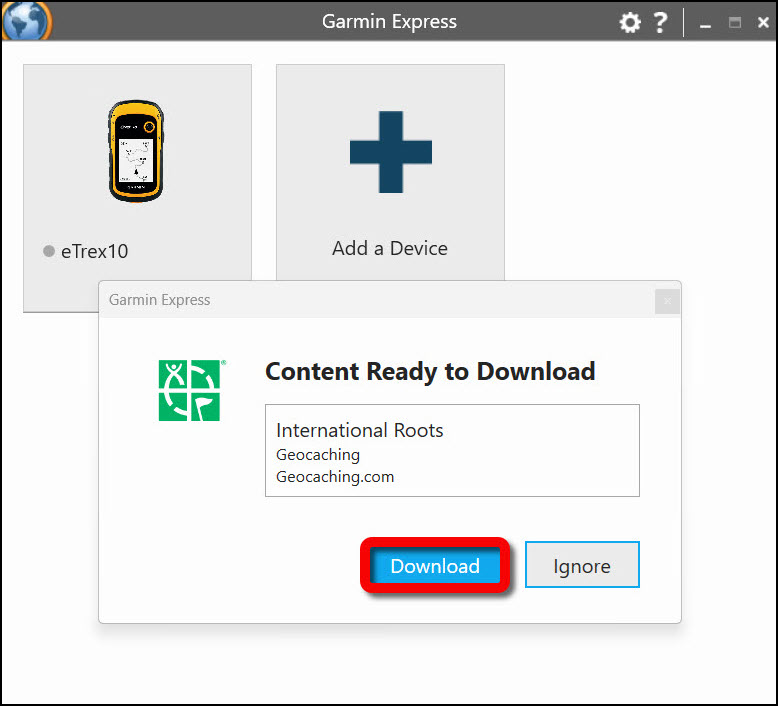
Figure 1.17: Download content page in Garmin Express application. - You will then need to plug your device into the USB port to your computer. It will take a few moments for the coordinates to transfer to your device (Figure 1.18).
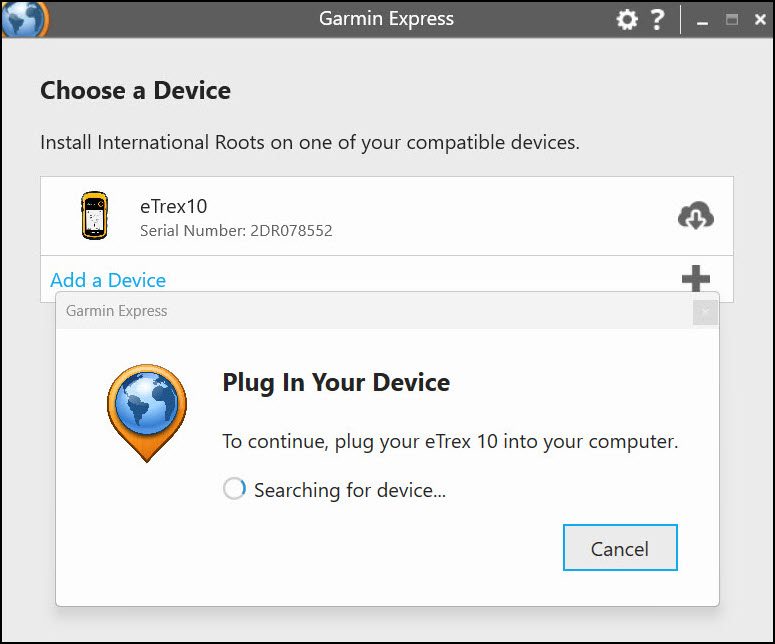
Figure 1.18: “Plug In Your Device” prompt page in Garmin Express application. - When the coordinates successfully download, unplug your device from the computer.
- From your device, navigate to the “geocaches” page. Here you will find the name of the geocache you downloaded.
- Click on the geocache and press “Go.”
- Once you have found the geocache, log it on to your GPS device and do a happy dance!
- We are almost done! Log the discovered geocache on www.geocaching/play.com too so your find can be added to your profile (Figure 1.19). Hint: On the “Log this geocache” page, scroll down to see the “Post” button to successfully log your find.
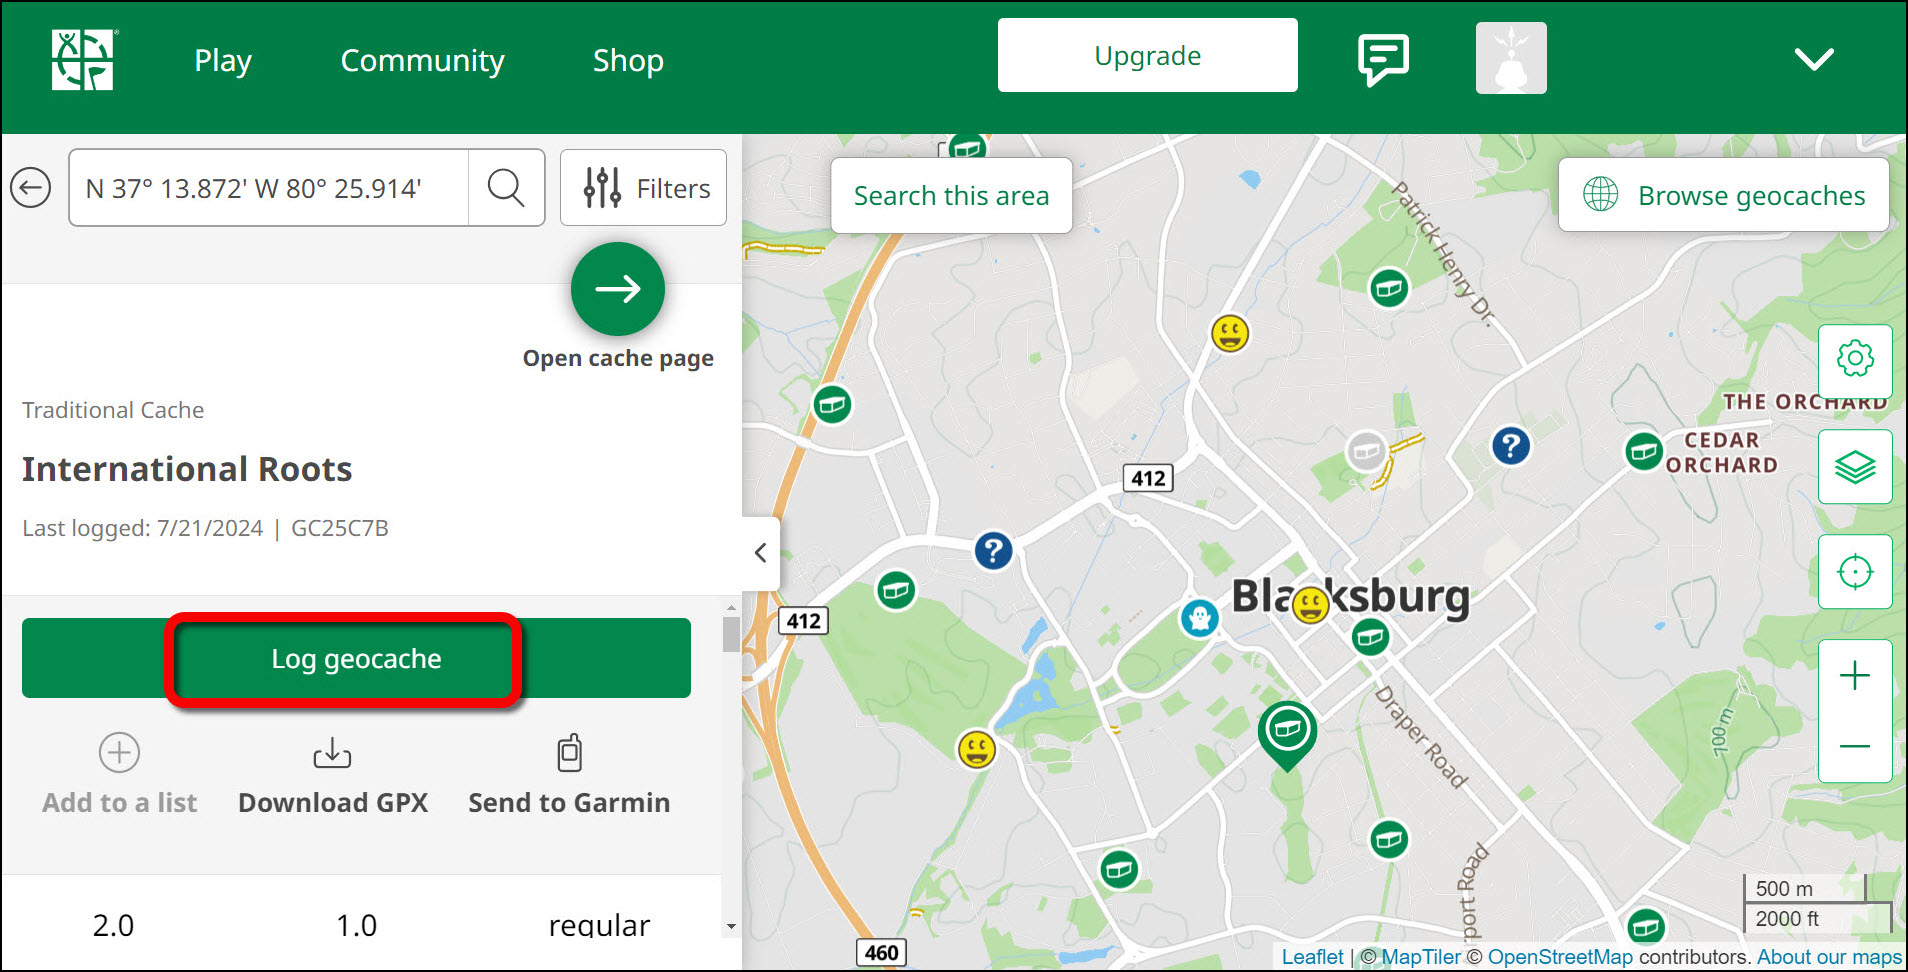
Figure 1.19: “Log GeoCache” button highlighted on Geocaching website.
The discovered geocache will now show as a smiley face icon, congratulations!